Calibration Frames in Practice: Getting Lights, Darks, Flats, and Bias Right
Preprocessing is a hugely important part of the workflow, and I usually spend a lot of time here. Apart from the calibration routine itself, I handle most steps manually to make sure every link in the chain is correct—that way, when something goes wrong, I can track down the cause quickly. And calibration frames are the very foundation of preprocessing. This article gathers the pitfalls I’ve stumbled into over the years and the practical understanding of calibration frames I’ve built up.
Lights, Darks, Flats, Bias, and Flat Darks: Sort Them Out First
The four fundamental frame types in astrophotography are the light, dark, flat, and bias frames, plus the flat dark (the dark for your flats). This is the most basic concept, yet the number of people who can actually give a clear answer to “briefly describe the difference between light, dark, flat, bias, and flat dark frames” is smaller than you’d think—many people just memorize the names, and that is not the same as understanding what each of them actually does.
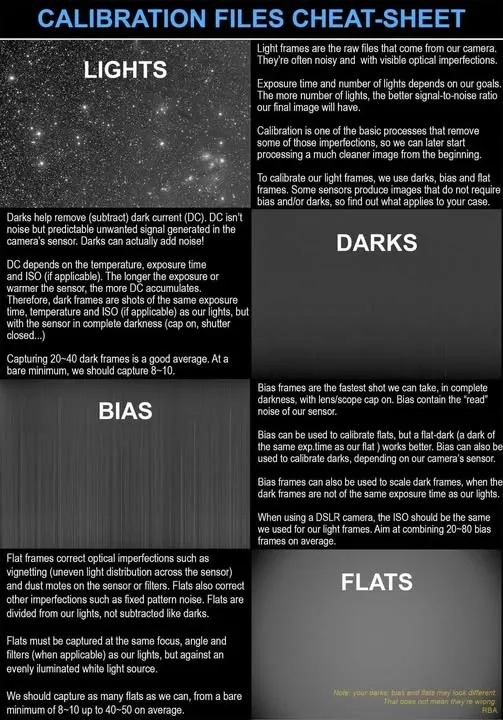
The image above is an explanation I’m quoting from RBA, covering light, dark, bias, and flat frames, along with what these calibration frames typically look like under normal conditions. The flat dark, as mentioned, is simply the dark for your flats—just apply the same reasoning as for darks. What you really need to remember is which class of defect each one is responsible for removing: darks tackle thermal noise and dark current, flats tackle vignetting and dust shadows, and bias frames tackle the readout offset.
Flats: The Frame With the Most to Learn
Of the four calibration frames, the flat is probably the one most prone to trouble—and the one with the most to learn.
Donuts and Obstructions in Your Flats
If you use the ScreenTransferFunction (STF) in PixInsight to screen-stretch and inspect a flat, you’ll find it’s always full of ring-shaped “donuts”—those are basically dust in the light path—and you’ll also see vignetting; if you use an OAG, you’ll see the shadow of the OAG’s obstruction as well.
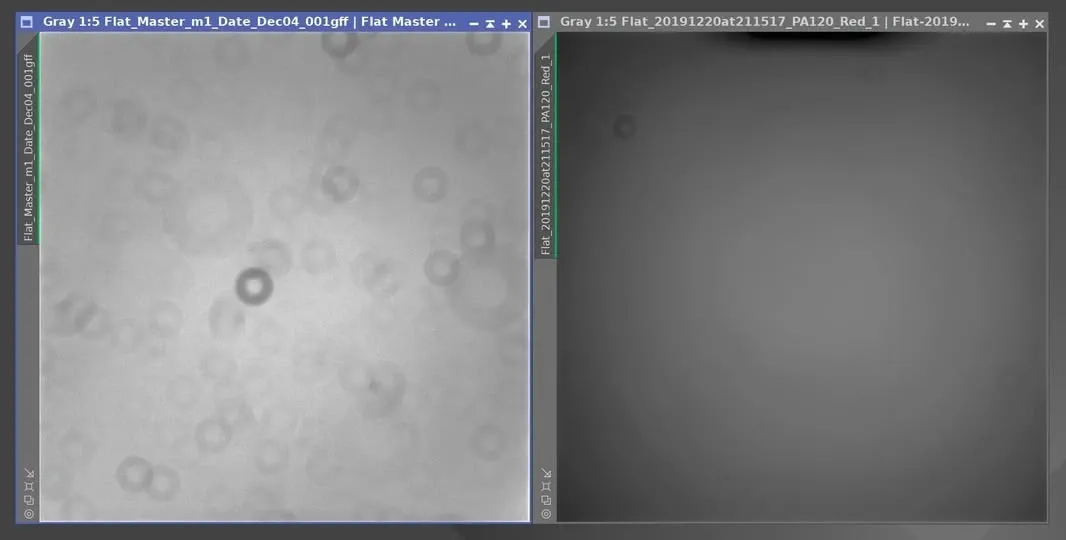
For this very reason, any change to the optical system—disassembly and reassembly, adjusting the framing, even adjusting the lens mask—means you must reshoot your flats. Otherwise the positions of the donuts or obstruction shadows won’t line up with where things are obstructed on the light frames, calibration naturally can’t succeed, and instead it produces all sorts of bizarre post-calibration artifacts.
Choosing the Exposure Time: A Hands-On Test
How long should a flat be exposed? I ran a hands-on test. The gear was an 8-inch Newtonian (modified) with an ASI 2600MC. At the same temperature I shot flats and their matching flat darks at 10ms, 1s, 5s, and 10s, then inspected the calibrated results by eye. I found the 5s set was the best; both 10ms and 10s showed brightening around the edges. Next I divided the 5s flat by the flats of other durations to compare: the 1s set must have been a bad shot—dividing it came out entirely too dark; the 10ms showed a difference running from upper-left to lower-right; the 10s difference was very small. The calibrated flats at every duration all sat at roughly the same histogram position, slightly left of center, with no information clipped, which shows the capture settings were correct.
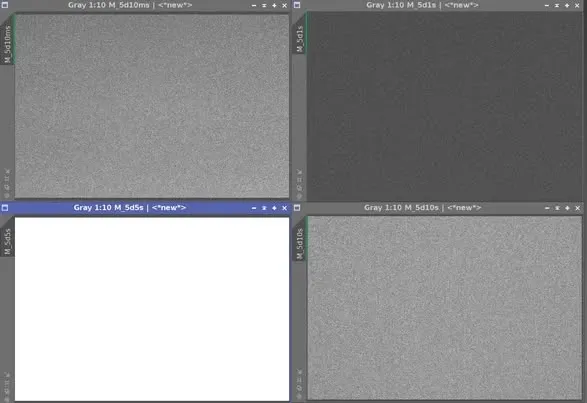
The conclusion: setting other variables aside, this system does best with 5s flats, and 10s is also good, just more time-consuming. A word of caution—this “optimal duration” is the result for one specific system; switch to a different setup and you’ll have to test all over again.
Light Panel or Sky Flats?
Only when a telescope’s aperture is too large would I even consider sky flats. Sky flats have plenty of problems: controllability is poorer both for stars (sky flats often show up bright stars) and for brightness (every frame comes out at a different brightness). In today’s world, where adjustable LEDs are so common, a light panel is the simplest way to shoot flats for telescopes under 25 cm—you can shoot anywhere, and reshoot immediately if a frame comes out bad, so there’s really no excuse not to take flats. If you truly must use the sky, I’d use a milky-white plastic panel rather than a white T-shirt. As for the number of flats, 5 to 10 is about enough; the point isn’t quantity, it’s shooting them correctly.
As for how to dim the panel, I’ve tested that too: I compared 1s flats shot with PWM dimming (which flickers) against 4s flats shot with a neutral-density panel added. Although the PWM banding was clearly visible in the 1s frame, the banding vanished after integration, and dividing against the 4s master flat came out white, meaning there was almost no difference. So PWM dimming is workable (voltage dimming, which doesn’t flicker, is of course ideal); to save time, shooting only 1s flats—and 1s flat darks too—seems to be enough.
Cooled CMOS: Please Calibrate Flats With Flat Darks
This point deserves special emphasis: if you’re using a cooled CMOS camera, please calibrate your flats with the flat dark current (the dark for your flats), not with bias frames. Bias usually can’t calibrate flats correctly, and if the flats aren’t calibrated correctly, calibrating the lights at the end will fail. The most common result of poorly calibrated flats is over-correction when you go to calibrate the lights, with all four corners turning bright.
The DSLR Flat Display Trap
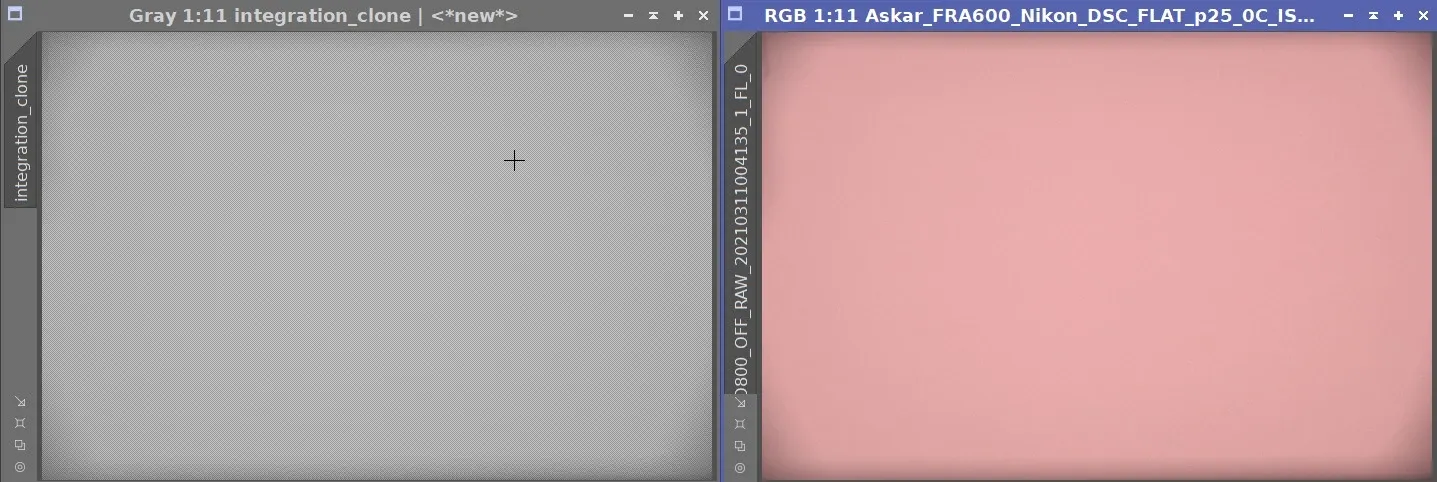
If you shoot flats with a DSLR (especially a Nikon), you may get a shock: even though they look bright on the camera or in Photoshop, in PixInsight they’re pitch black.
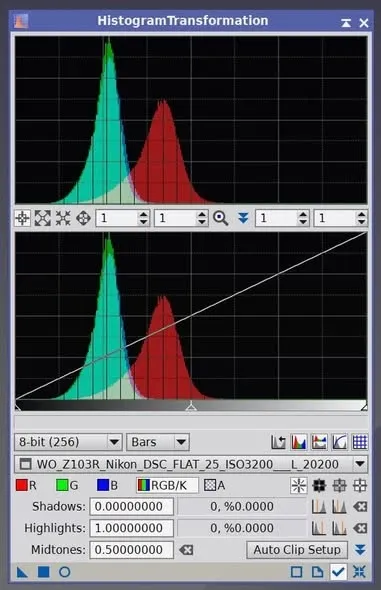
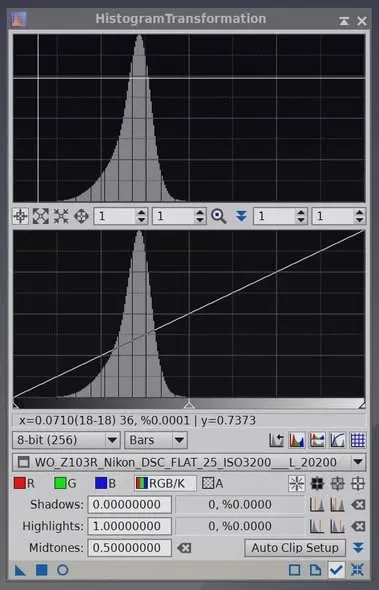
The reason is that 14-bit data is stored in a 16-bit file container, so to display it correctly the first step is to use the Histogram tool to set the white point to 0.25. This is purely a display issue and doesn’t affect the data itself. (I recorded a video using a Nikon D810 Astro mod as the example, demonstrating the full procedure.)
Darks: They Expire—Remember to Refresh Them
Darks aren’t something you shoot once and use forever. A fellow imager once calibrated with the same old darks and got poor results; when I asked, it turned out the darks had been shot at the start of the year—which confirms once again that darks need to be refreshed periodically; a given batch should be reshot after about three months. If you get slight problems every time you calibrate, you can check whether the pixel brightness values of the old and new darks are about the same, and use that to judge whether the darks have aged.
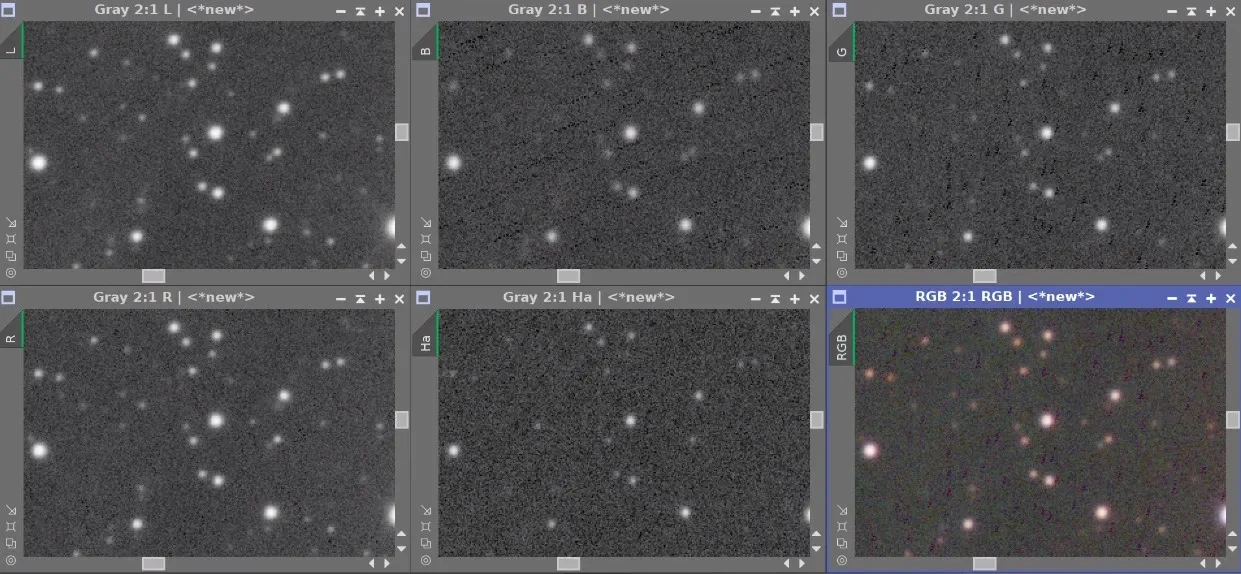
Darks at different exposure durations are also worth getting to know. I’ve looked at a set of QHY 268C (Sony IMX 571) master darks running from 0 to 600 seconds, and the background value barely changed regardless of duration (all around 0.0075); the visible difference was that hot-pixel brightness increased with duration. This leads to a practical conclusion: if you handle hot pixels separately (for example with Cosmetic Correction), then even if you find yourself with darks whose exposure time doesn’t match your lights, you can still use them for calibration.
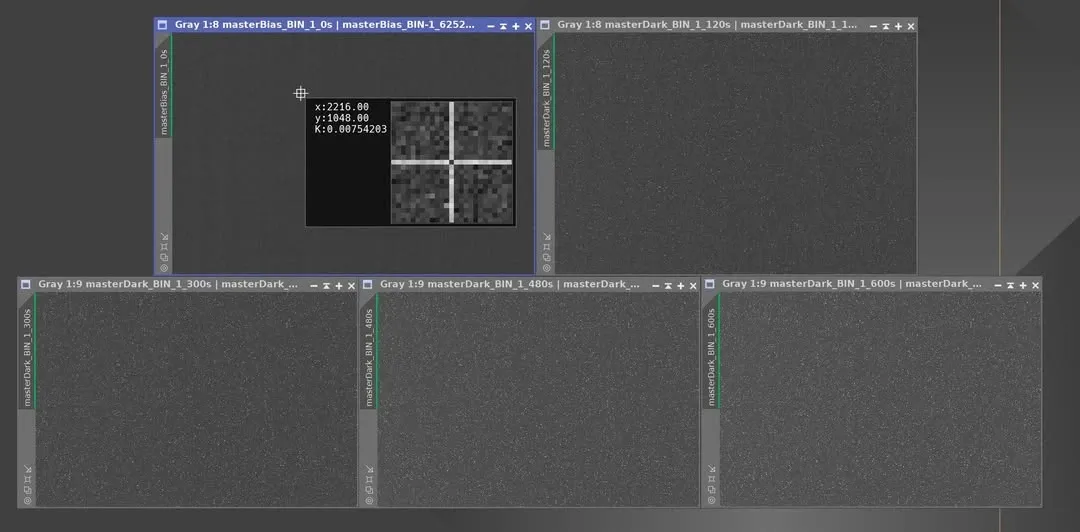
Incidentally, back when I was studying calibration frames in my early years, I got burned by a dark-frame problem: after calibration, registration, and integration I found signs of flat over- or under-correction, redid the entire master flat from scratch, and only at the very end discovered the problem was actually in the darks.
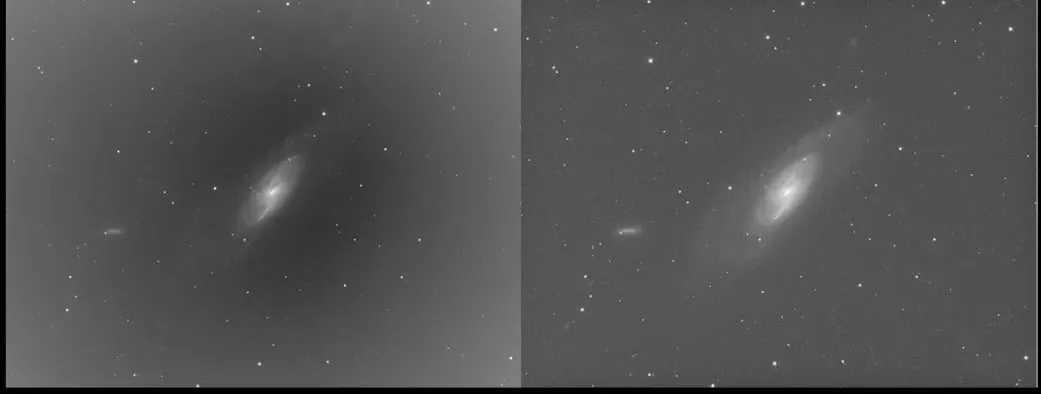
A Classic Lesson: A Bad Bias Frame Wrecks the Whole Integration
Finally, a case that left a deep impression. One dataset’s integration simply failed (in PixInsight) or came out incorrect (in Astro Pixel Processor), and tracing it back, the culprit was a badly shot bias frame.
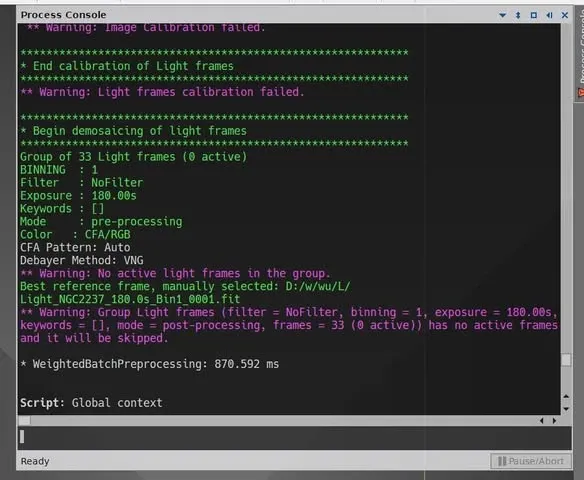
This was also the first time I’d encountered a bad bias bringing down an entire integration. So let me say it one more time: for cooled CMOS, calibrate your flats with flat darks, not bias. And an uncalibrated flat is basically a wasted shot—it only creates more problems in the calibrated image. Get your calibration frames right first; only then is there anything else worth discussing.