PixInsight GPU Acceleration: CUDA Setup and Performance Benchmarks
This article is compiled from notes taken between 2021 and 2024. Some tools, CUDA versions, and setup procedures have since been updated (in particular, PixInsight now supports one-click configuration in its later versions), so please keep the time frame in mind while reading.
Ever since neural-network processes like star removal, AI denoising, and AI sharpening started making their way into the PixInsight workflow, “should I add a graphics card to my processing computer?” has become a very practical question. This article pulls together my benchmarking and setup experience with GPU acceleration over the past few years, including why you’d want a GPU, how to enable it, how much time it saves, and how the various platforms differ.
Why You Need GPU Acceleration
The processes in PixInsight that currently support GPU acceleration are mainly the ones that lean on neural-network computation: StarNet++, StarNet 2, StarXTerminator (SXT), NoiseXTerminator (NXT), and BlurXTerminator (BXT). If you run these on CPU alone, the wait times get very substantial, especially as image size grows.
One example that really drives it home is batch star removal: when processing comets with the newer method, you need to remove stars from each un-integrated comet frame individually, in the linear state. For instance, with 200-plus 9-megapixel frames, using an RTX 3060 Laptop version for acceleration, each one takes only about 20 seconds; if you rely on the CPU alone, the total time will make you question your life choices.
Once you’ve used GPU acceleration, there’s basically no going back.
The First Time I Successfully Enabled CUDA
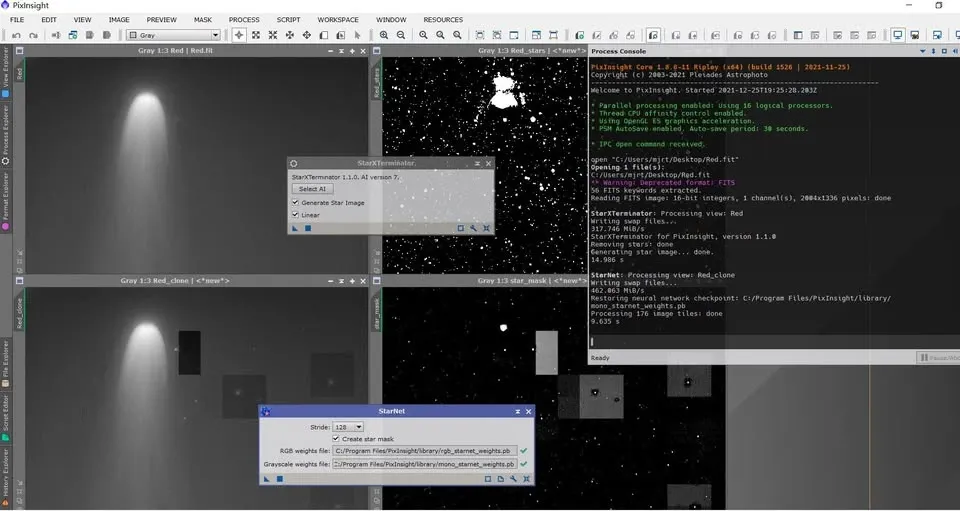
At the end of 2021, after spending hours testing different versions of NVIDIA CUDA, cuDNN, and TensorFlow, I finally managed to use the GPU (NVIDIA RTX 3060) to assist with star removal:
- StarXTerminator took only about 15 seconds;
- StarNet++ under 10 seconds;
to finish removing stars from a single frame. Compared to CPU alone, the difference was dramatic.
How to Enable It: From Manual Setup to One-Click Install
The Old Way: Placing Files Manually
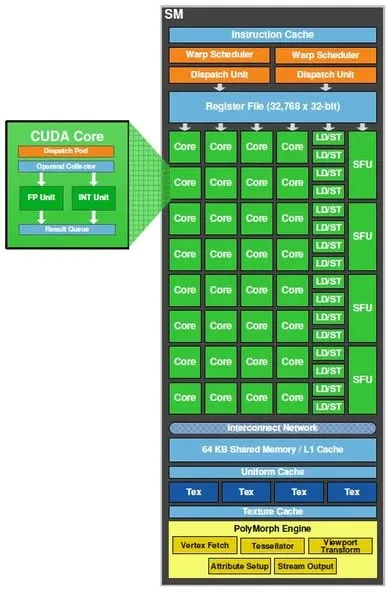
In the early days, enabling GPU acceleration meant downloading the matching versions of CUDA, cuDNN, TensorFlow, and so on yourself, and dropping them in the right locations. The barrier to entry was not low, and it only applied to users on Windows who had PixInsight installed and an NVIDIA graphics card with CUDA cores. AMD graphics card users (including integrated graphics) should skip this outright, and Linux users have to cross-reference the equivalents themselves. Once configured, it dramatically sped up StarNet, StarNet++, SXT, NXT, and BXT.
The annoying part was that every time you updated PixInsight, you’d often have to re-place these files, which was easy to forget.
The Current Way: PI’s Built-In One-Click Setup
By early 2024, the situation had improved dramatically. Now you just add an update repository in PixInsight, and you can use GPU acceleration directly, without any extra installation or configuration. This is the method provided on the PixInsight forum by RC (Russell Croman, author of the XTerminator tools). At the time this feature only worked on Windows, with the Linux version still in development; as for macOS, it never needed this kind of setup in the first place.
How to Confirm the GPU Is Actually Doing the Work
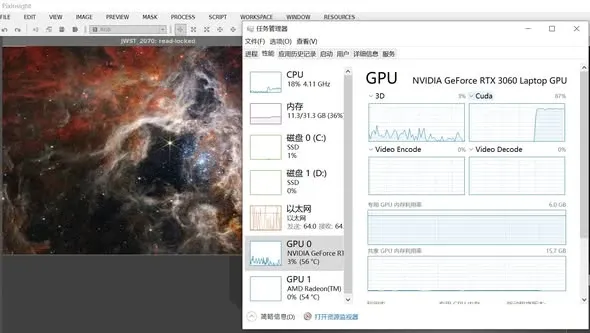
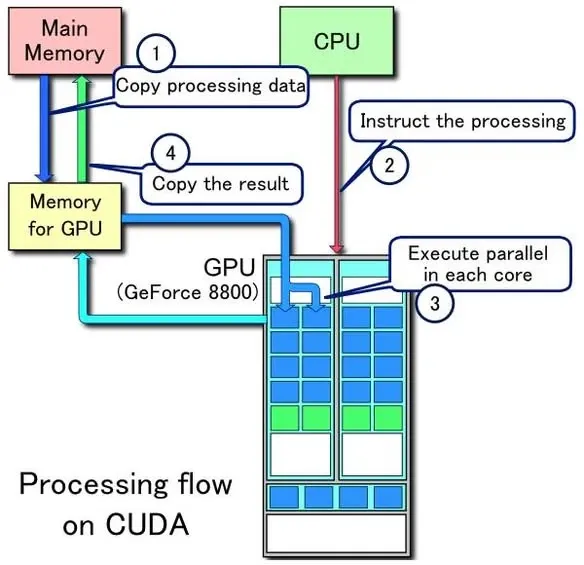
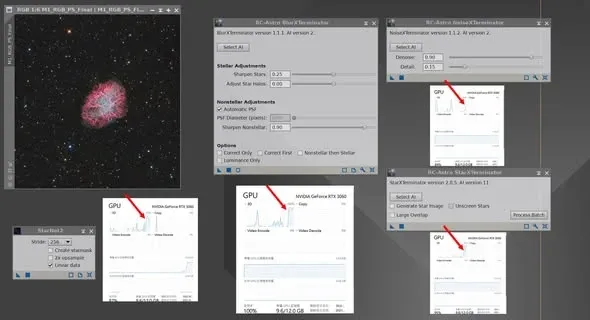
To check whether the GPU is pulling its weight during star removal or denoising, on Windows 10/11: open Task Manager, switch to the “GPU” tab, and select the “CUDA” sub-view. If you see the CUDA cores show utilization, the GPU is being used (for example, while running SXT you can see the CUDA cores spike to 87% utilization); if the CUDA cores show no activity at all, then the GPU isn’t being tapped.
Performance Benchmarks
High-End CPU vs. Mid-to-Low-End GPU
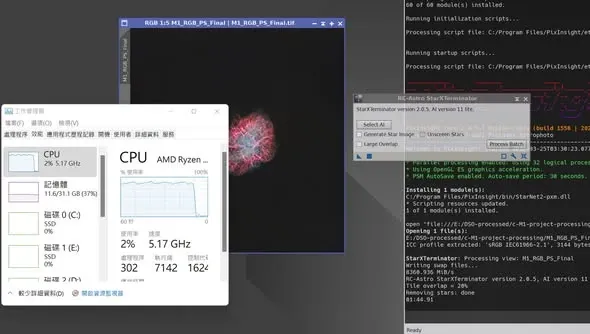
A lot of people ask: if the CPU is powerful enough, do you even need a graphics card? I pitted a consumer high-end CPU (AMD R9-7950X) against a consumer mid-to-low-end graphics card (RTX 3060 12G), running PI 1.8.9-1 and SXT 2.05 AI 11 lite:
- First image, M1 (14.75MP): CPU star removal 1 min 45 sec; GPU star removal 10.2 sec.
- Second image, Webb NGC 3372 (123MP): CPU star removal 12 min 31 sec; GPU star removal 1 min 05 sec.
Two patterns emerge: the larger the image, the more pronounced the benefit of GPU acceleration; and even pitting a high-end CPU against a mid-to-low-end GPU, the CPU takes at least ten times as long as the GPU to complete the same job. If your CPU isn’t a high-end model, the gap only widens. So, as long as your workflow requires repeatedly using AI processes, I strongly recommend getting at least a mid-to-low-end RTX 30 series card.
Just Updating the CUDA Software Can Nearly Double the Speed
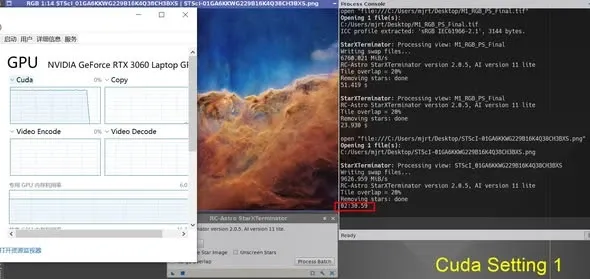
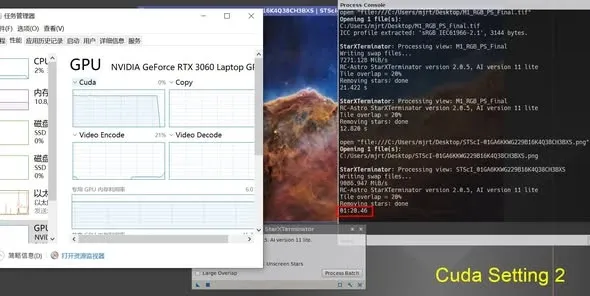
Here’s another astonishing discovery. A little over a year ago I first enabled CUDA acceleration on my RTX 3060 Laptop notebook, and just over a year later, without swapping out any compute hardware at all (the laptop can’t be upgraded anyway), I re-tested with the same image after simply updating the relevant software, and the speed had nearly doubled.
Take removing stars from a 120-megapixel image as an example (PI 1.8.9-1, SXT 2.05 AI 11 lite, RTX 3060 Laptop 6GB):
- CUDA setup one (CUDA 11.2.2, TensorFlow 2.6, cuDNN 8.2.1): about 2.5 minutes.
- CUDA setup two (CUDA 11.8, TensorFlow 2.9, cuDNN 8.7, ZLib DLL x64 1.2.3): just 1 min 20 sec.
So, if you installed CUDA early on and never updated it since, remember to update your CUDA software. You can refer to “setup two” above, which is like picking up a solid chunk of extra performance for free.
Desktop vs. Laptop Graphics Cards
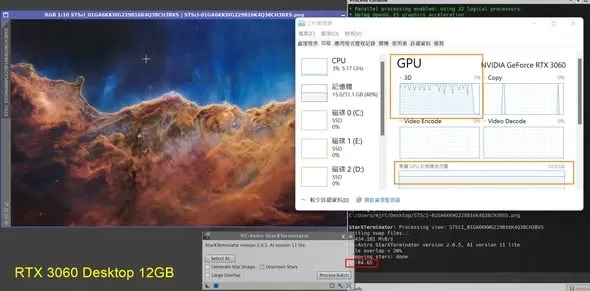
I happened to have both an RTX 3060 12G and an RTX 3060 Laptop 6G on hand. Star-removal times under the same software version:
- RTX 3060 12G: 1 min 4 sec;
- RTX 3060 Laptop 6G: 1 min 20 sec.
The two use the same chip; the only differences are memory capacity and the power design of the desktop vs. laptop versions, so the star-removal times are close. In terms of bang for the buck, a gaming laptop equipped with an NVIDIA card (priced around NT$30,000 at the time) is a pretty worthwhile choice.
Even an Old Mining Card Makes a Difference
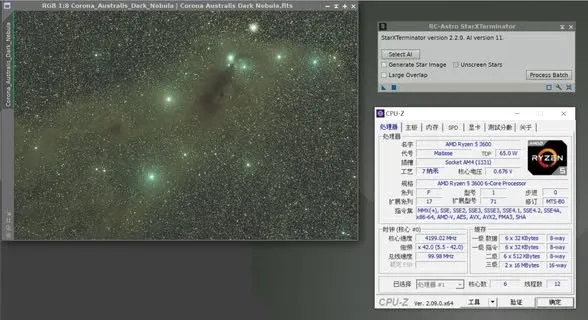
I have an old computer at home, built about four years ago (AMD R5-3600), whose original graphics card (R9-270) was nearing the end of its life. I picked up a mining card online for under NT$3,000, an NVIDIA GTX 1660s, and tested star removal on a full-frame image (about 60 megapixels):
- CPU only: 5 min 40 sec;
- GPU: 51 sec;
a difference of about 6.6x. Even though the 1660s has only a little over 1,400 CUDA cores, the time saved is still significant. As long as you repeatedly run operations like star removal, AI denoising, and AI sharpening, GPU acceleration is a worthwhile investment.
How the Platforms Differ
Support for whether AI processes can use GPU acceleration isn’t consistent across operating systems and hardware. I’ve compiled the situation for the three platforms of Windows, Mac, and Linux (some Mac test results were provided by a fellow enthusiast):
- Windows + NVIDIA: once configured, you can call on CUDA to GPU-accelerate SXT, BXT, NXT, and StarNet in full.
- Apple Silicon Macs (such as M1 / M1 Ultra): BXT and NXT automatically call Metal for GPU acceleration without any setup; SXT uses only some CPU resources when running and doesn’t tap the GPU; as for StarNet 2, you have to switch to the experimental version on the official website (command-line CLI mode only) to successfully use GPU acceleration.
- Intel Macs: StarNet can only use the CPU; SXT, BXT, and NXT can use GPU acceleration, and this works even with an AMD GPU.
On the Apple Silicon platform, processes like SXT natively support GPU acceleration, so their performance is roughly on par with “Windows + NVIDIA CUDA acceleration.” As for Linux on a PC, it too can call on the GPU to accelerate computation.
Wrap-Up
Looking back at the changes over these past few years: GPU acceleration has gone from a hardcore setup where “you spend hours matching CUDA versions” to “PI handles it built-in with one click”; more and more processes can be accelerated, and even a dirt-cheap old mining card can deliver a several-fold speedup. If your workflow leans heavily on AI processes, a mid-to-low-end NVIDIA graphics card (or an Apple Silicon Mac) is all but essential.