Comet Image Processing: A General Guide to Alignment, Star Removal, and Compositing
The core difficulty of comet image processing can be stated in a single sentence: a comet moves relative to the background stars, so the comet and the stars cannot be processed with the same set of alignment parameters at the same time. That is why, when processing a fast-moving comet, the comet and the star background are always processed separately and composited at the end. This article gathers the comet-processing insights I have accumulated over the years, covering alignment tools, star removal, and finally color and compositing, as a general guide. For a hands-on case study, see the Tsuchinshan comet series in “Processing Comets with PixInsight”.
Why Comet Alignment: A Side-by-Side Comparison
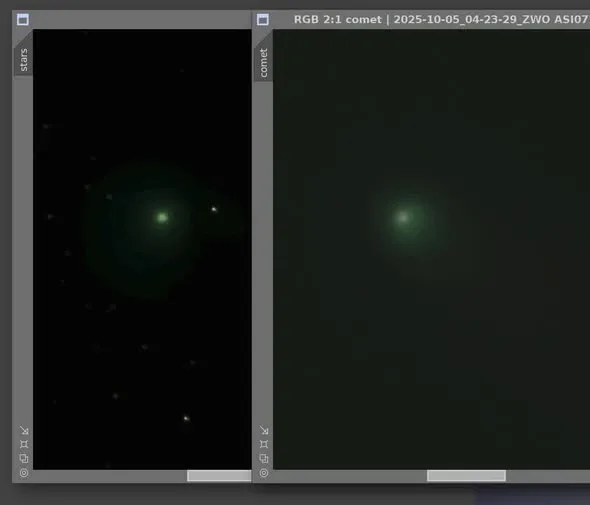
Let’s start with a comparison that shows exactly what problem comet alignment solves.
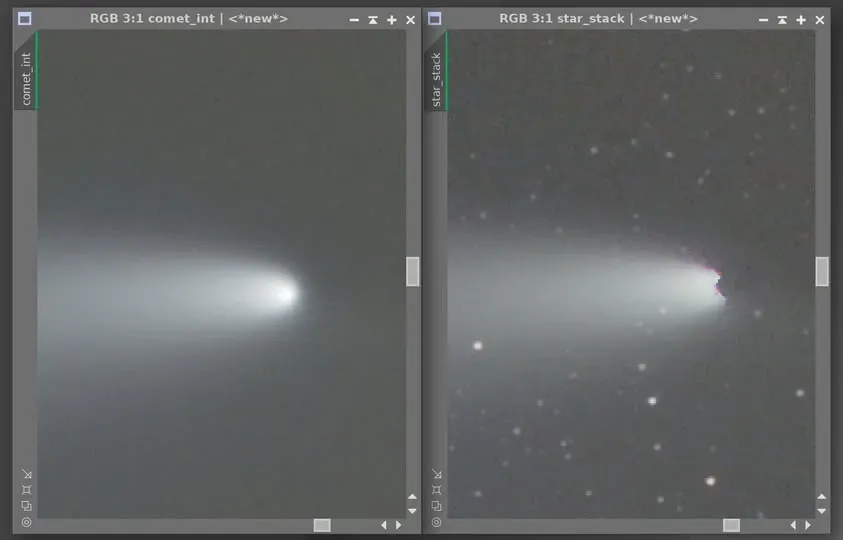
On the left is the result of integrating images that were aligned on the comet nucleus and had their stars removed; on the right is the result of integrating with star registration only, straight away. In the right-hand image, which was never aligned on the nucleus, some defects appear around the nucleus after integration—and I want to stress that those are not “details around the nucleus,” but breakage left behind after the rejection algorithm removed outliers. The nucleus image itself is also damaged by these defects. In other words, if you want to preserve the complete form of the nucleus and the tail, the comet alignment step is unavoidable.
The Comet Alignment (CA) Tool
The tool for comet alignment in PixInsight is Comet Alignment (CA). The most basic usage pairs it with Star Alignment (SA): use SA to register the stars and CA to align the comet, ultimately producing two images—one for stars and one for the comet—each processed further on its own. Inside SA, you select the comet position with a left-click of the mouse.
A Method That Once Failed and Later Succeeded
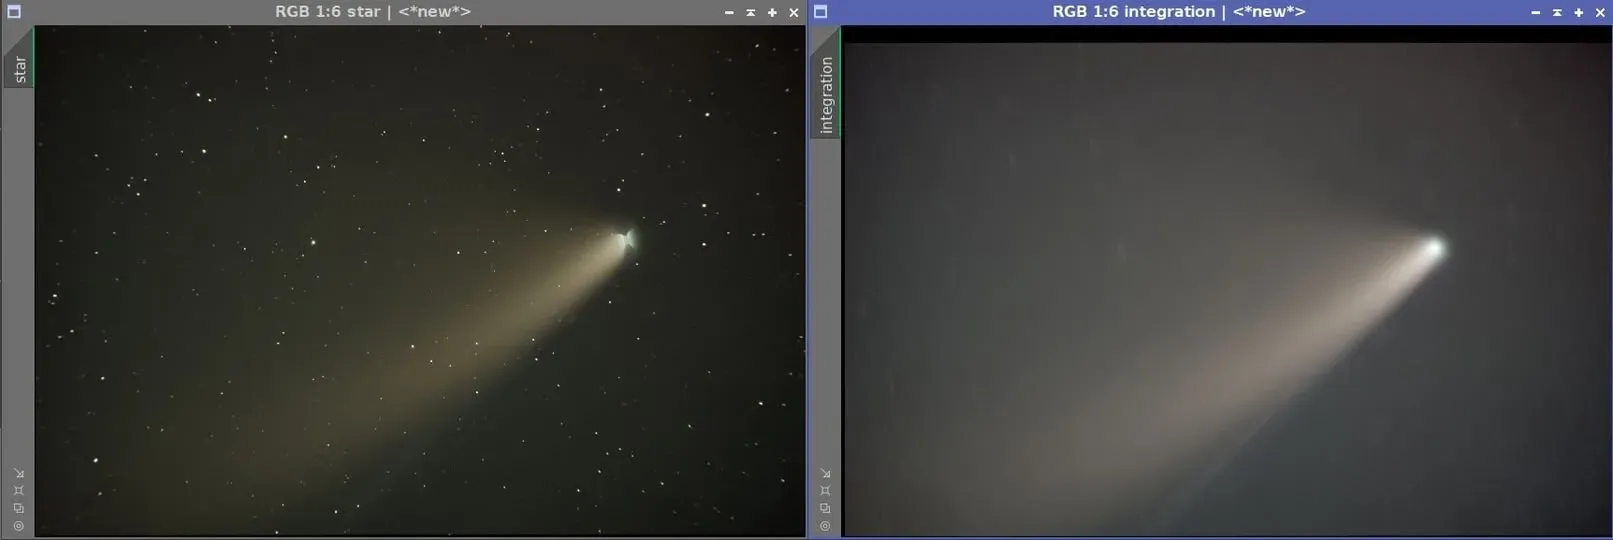
Years ago a fellow astrophotographer shared an advanced idea: use CA to align the comet, integrate a “pure comet image,” then run CA once more to subtract the comet out of the star-registered images, thereby obtaining a clean, pure star background. The detailed steps are:
- Calibrate the comet images.
- Use Star Alignment to register the stars, producing star-registered images.
- Use CA to select the comet nucleus in the star-registered images, producing nucleus-aligned images.
- Use Image Integration to integrate the comet-aligned images, producing a “pure comet image” that is almost free of stars.
- Save the pure comet image, select it as the subtract operand image in CA, and output once more, producing images that are “star-registered and comet-free.”
- Use Image Integration to integrate the star-registered, comet-free images, obtaining a “pure star image.”
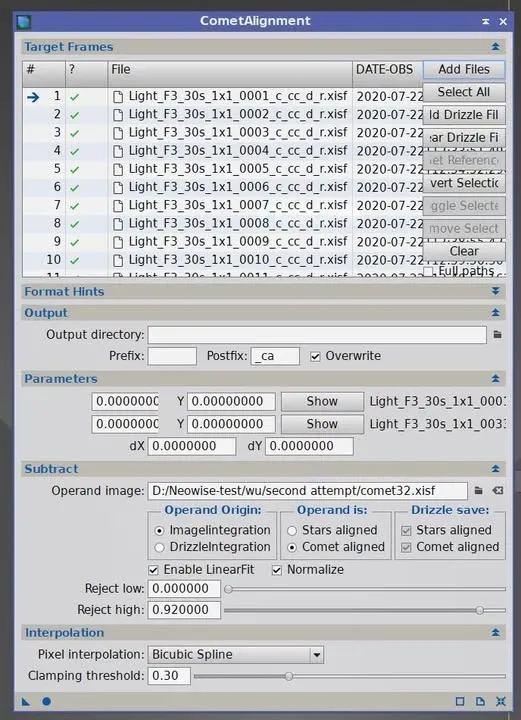
Honestly, when I first tested this method on my own data it was unsuccessful—step 5 would not produce a clean “star-registered, comet-free image.” Some of the star-registered images still had the comet remaining, or were over-subtracted so that the comet position turned completely black, and after integration the comet was still incomplete. But the person who shared the method did succeed on his own data, so at the time I still noted it down for reference. Later I refined my approach and redid it with a set of Leonard comet data that had a simple background (TOA 150 + QHY 268c, 16 frames of 90 seconds), and confirmed that this traditional comet alignment method can indeed succeed. Because the background contains no special galaxies, clusters, or nebulae, it is quite suitable for beginners to practice on.
The New CA: No Need to Register Stars First
The new Comet Alignment has one important change: you no longer have to register the stars first.
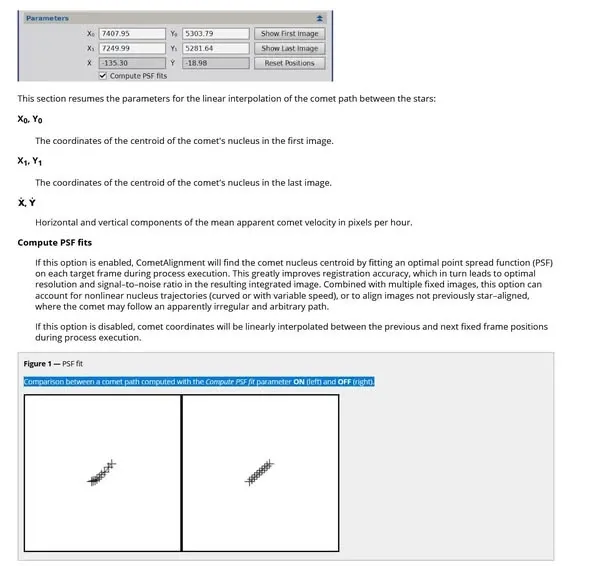
You only need to select the nucleus position “roughly” on the first and last frames, check Compute PSF fits, and the program will compute the nucleus in the remaining frames on its own and align them. So even if the comet’s path of motion is not a straight line, it can still be aligned. The obvious benefit is that you avoid two rounds of interpolation—the old approach of first registering stars and then aligning the comet amounts to interpolating twice, and each interpolation costs a little image quality. (Notice that the filename suffix of the images in the screenshot is _c_cc_ca, without _r, meaning they went through only Calibration, Cosmetic Correction, and Comet Alignment, without Registration.) This new approach also enables some further applications, such as integrating several consecutive nights of comet data, or producing a time-lapse of the comet’s continuous motion.
Star Removal: The Nucleus Is Easily Damaged
Comet processing inevitably involves star removal, but the nucleus and coma are easily mistaken for stars by star-removal tools and destroyed. Let me break this down into several cases.
The Problem of Removing Stars from a Color Image in the Linear State
If you have not bought StarXTerminator (SXT) and want to batch-remove stars with Starnet++, color images run into a snag: in the linear state, after a color image passes through Starnet++, the nucleus and coma become damaged.
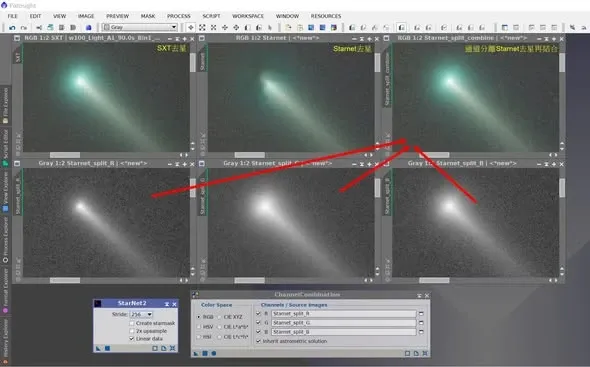
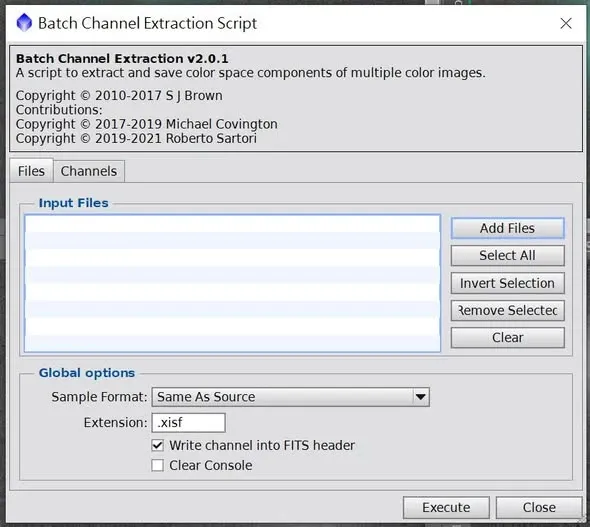
The solution is to split the three RGB channels, remove stars from each separately, then combine them back together, just as you would process the RGB channels from a monochrome camera. After doing this, the nucleus and coma look much more normal. To batch-split the channels, you can use the Batch Channel Extraction Script.
Protecting the Nucleus with a Mask
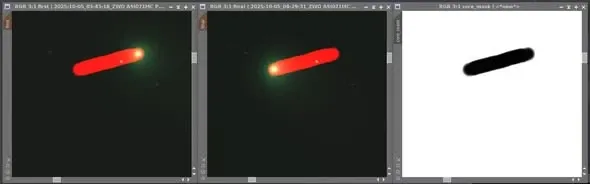
During batch star removal, SXT or Starnet sometimes removes the nucleus outright as if it were a star, or separates parts of the comet at different scales, causing the nucleus to dim. The solution is to add a mask over the nucleus:
- Use a program such as GAME to make a nucleus mask.
- In SXT’s Process Batch, choose to load the mask.
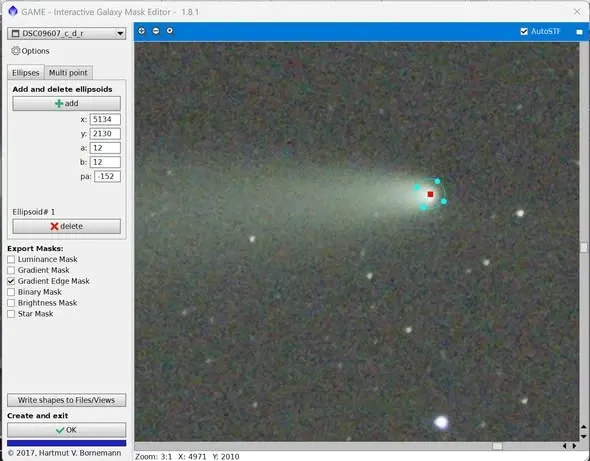
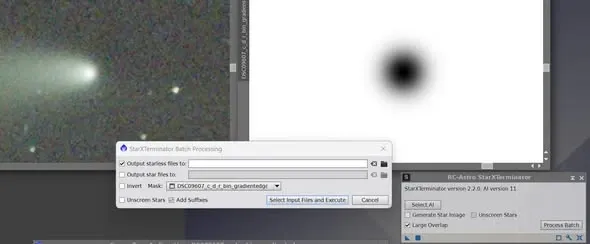
The masked region (the black part of the mask) will not have its stars removed, so the nucleus is protected. If you are using Starnet, you can also load a mask in the Process Container during batch star removal.
A practical little tip: before removing stars, remember to first confirm the nucleus position in the first and last frames, then use GAME or the Clone Stamp Tool to make a mask along the line connecting the nucleus positions of the first and last frames, and only then remove stars—that is how you effectively avoid damaging the nucleus.
Color and Background Correction
The end of a comet’s tail sometimes takes on strange colors—red, purple, green, you name it. Basically these are mostly the color of the sky background where the comet sits, brought out after the comet alone has been enhanced (for example the third, red tail that appeared on NEOWISE a few years ago). Whether to keep it or remove it is a matter of personal taste; if you want to remove it, my approach is simply to pull that color out.
In theory the sky background should be close to a blackish brown after correction, but with no stars present the comet’s color correction tends to fail or be inaccurate, especially for images shot with a color camera. In my experience, the two biggest problems in processing a comet are correcting the color and removing star residue; solve those two and you are already ninety percent of the way to success.

Wrapping Up: The Fundamentals Still Matter
Comet processing often takes several days of back-and-forth trials, and it is quite likely that one whole day will be spent stuck—sometimes the brain needs time to settle before it can come up with a solution.
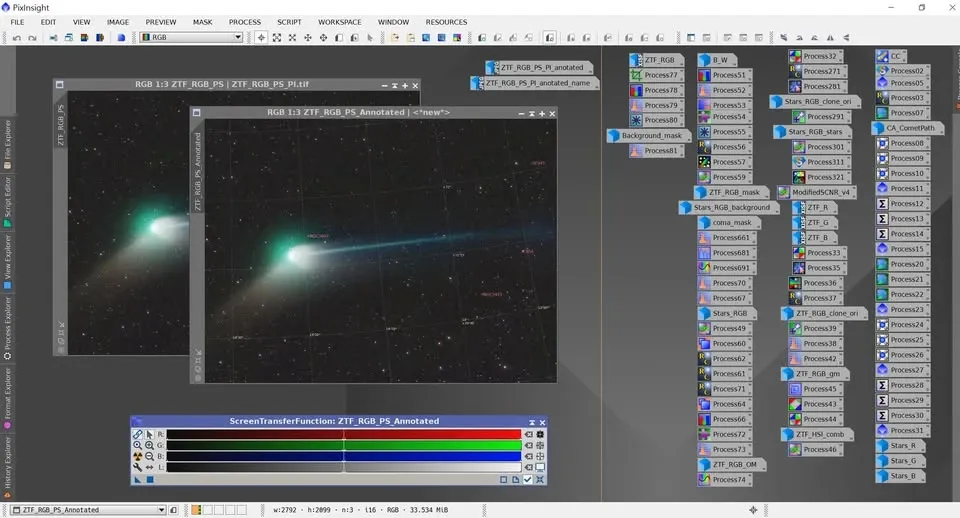
AI tools (the star-removal and noise-reduction kind) do save a lot of time, but that time is really just shifted onto the computer’s compute cost (with a slow CPU or no GPU, it takes ages). Beyond that, PixInsight’s fundamental tools are just as indispensable: besides the familiar DBE, STF, Histogram Transformation, and Curve Transformation, Wavelet, HDRMT, and the color saturation tools—used together with masks—are all key to squeezing quality out of an image. Tools will keep improving, but it is these fundamentals, practiced well, that give you the real confidence to process comets consistently well.