DBE Background Extraction: Dark Rings, Glow, Light Gradients, and Sample Points
DBE (DynamicBackgroundExtraction) is an important tool in PixInsight’s linear stage, used to estimate and remove the light and color gradients in the background. But it’s far more than just “flattening the background” — from dark rings and glow to the placement of sample points, every part takes careful skill. This article covers several ways to use DBE and its common pitfalls.
What DBE actually does
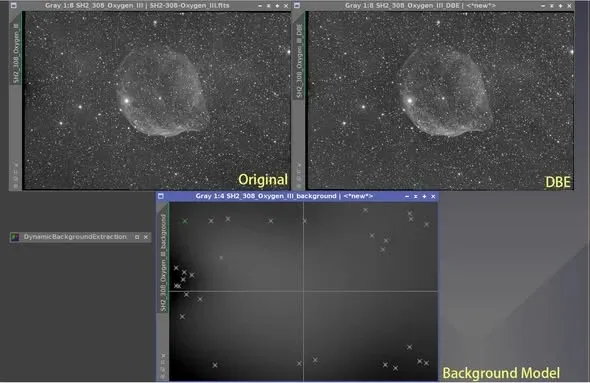
At its core, DBE builds a background model of an image with an uneven light gradient, then removes it by subtraction or division. This is an important step in the linear stage of an astronomical image.
Interestingly, this background model can also let you infer the conditions at capture time — for example, vignetting around the mirror, or dark shadows caused by over-aggressive glow removal. The shape of the background model is often almost identical to the original image, and it’s worth downloading it to compare and study.
One thing to stress: even with subtraction, it is not simply a matter of subtracting the background model from the original. This process involves at least some spatial-frequency-related algorithms, whose goal is to avoid affecting the celestial signal you want to keep as much as possible (for instance, stars changing color). When comparing before and after, remember to use the same STF settings on both images so you can judge the difference fairly.
Dark rings: a common headache when shooting galaxies
Quite a few enthusiasts have dark rings in their galaxy shots, and DBE is exactly the thing to fix them.
For galaxies I usually run DBE at least twice on the luminance channel: first to deal with the dark ring, then to deal with the uneven light gradient. For the color channels, I usually only deal with the uneven color gradient (i.e. only the second step), but the sample points may differ from those on the luminance channel.
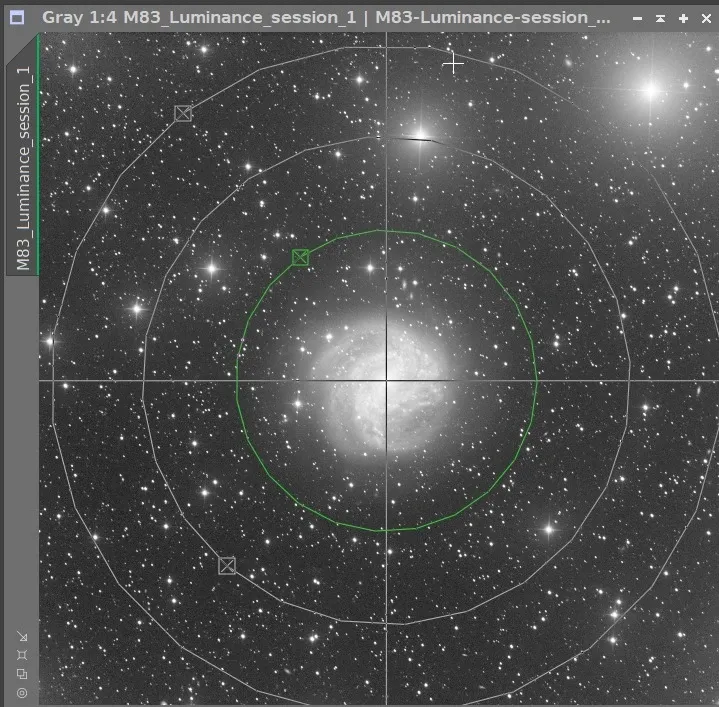
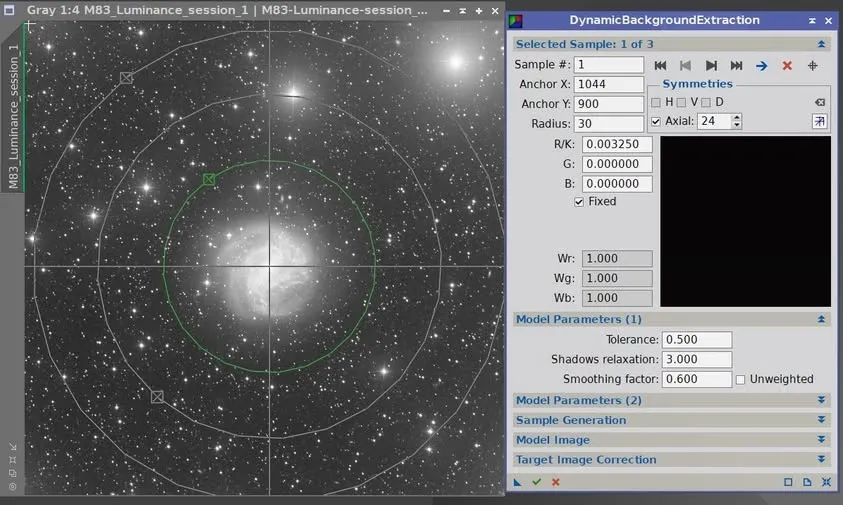
The concrete way to handle a dark ring: draw a circle or whatever shape you need, check Fixed, and manually adjust the brightness for that ring. On a monochrome image only the R/K field has any effect; usually you nudge it with a very small value, try a few times, and flatten out the dark ring or bright ring.
One prerequisite to note: the image must first be calibrated (dark subtraction, flat division, flat dark) before you do DBE. If there are severe dark or bright rings from the very start, check whether the calibration frames are the problem first — don’t make DBE do the job the calibration frames should have done.
Removing fine-scale structures and glow
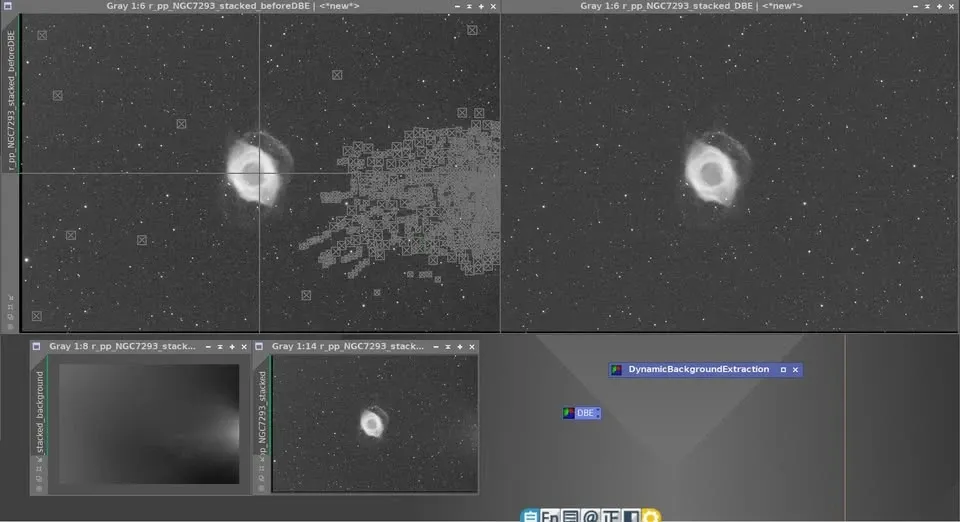
DBE can also be used to remove some small-scale structures in the frame, such as the glow that some cameras (like the QHY 183M) can’t fully calibrate out.
This is a grind — you can only slowly place a large number of sample points, and it’s very time-consuming. But the result is quite good, and the residual glow can be almost completely flattened. By comparing the background model against the original frame with its residual glow, you can clearly see what this step removed.
Sample points: the key to DBE’s success or failure
How well DBE works depends largely on whether the sample points are placed correctly.
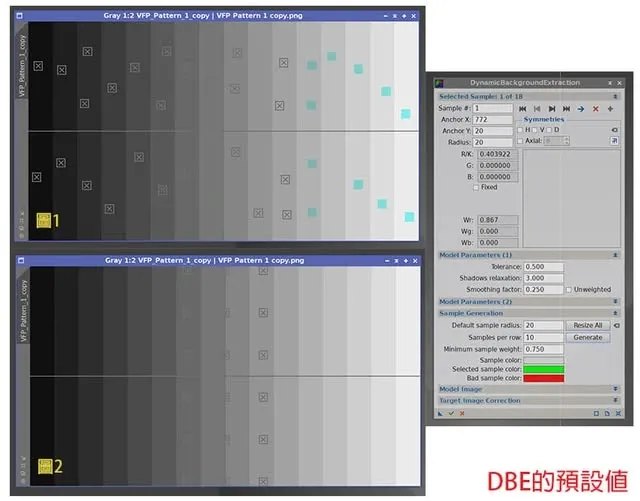
Don’t put faith in the defaults. They’re fine most of the time, but the moment you hit a high-contrast brightness gradient, the defaults blow it:
- If the points are placed manually, it can end up like some examples where the blue portions are all excluded from the calculation (essentially placed for nothing);
- If they’re placed automatically, it’s even worse — the sample points cluster almost entirely near neutral gray, making it impossible to estimate the background correctly.
In the situation above, only the sample box size was actually changed; all other parameters were left at their defaults. Which is why the saying rings true: Default is an illusion.
Is it okay to put sample points on a dark nebula? I ran a test: in one image the sky background brightness was around 0.007, the dark nebula brightness was also around 0.007, and other locations were above 0.008. In this situation, having DBE pick the dark nebula as a sample point, I’d argue, doesn’t have much impact. A thousand words are no match for the photo speaking for itself.
A real case: what to do when an image isn’t flat
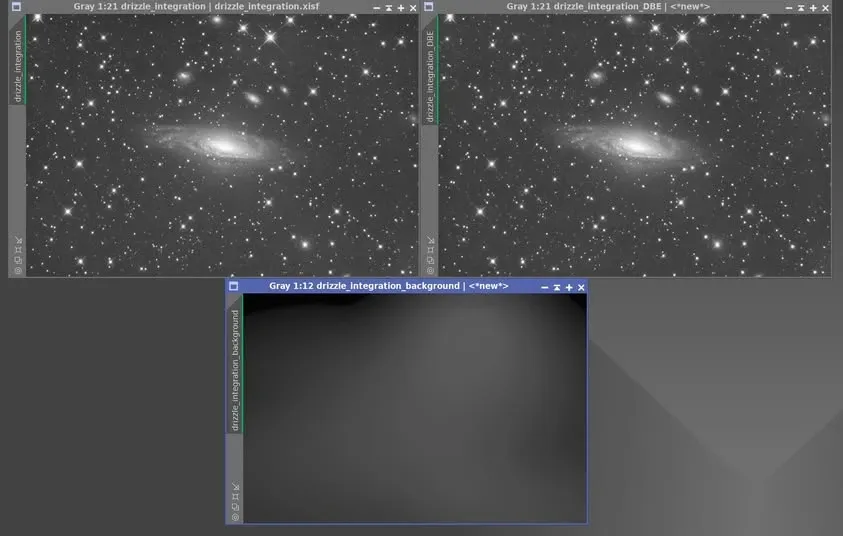
An enthusiast once wrote to ask: his image was a bit uneven, how should he fix it? The original had slight vignetting, and after DBE it became flat, with the light-gradient model showing only some vignetting in the upper corners. In fact this image was of very high quality.
This brings up a reminder: if an image becomes less flat after processing, make good use of masks and improve your processing procedure, rather than just piling on more DBE. One more note — oversampled data doesn’t need drizzle; what it needs is deconvolution.
Summary
On the surface DBE is about “removing the background,” but in practice it’s a skill of judging sample points. From galaxy dark rings and camera glow to high-contrast gradients, each situation has its own corresponding sampling strategy, and the default is almost never the best solution. Put the sample points in the right places, and only then can DBE give you back a background that’s clean and doesn’t harm the celestial signal.