Removing Light-Pollution Gradients: ABE, DBE, Gradient Correction, and GraXpert
This image was originally meant to serve as one of the gradient-removal examples in a Sony talk, but I ran out of time and never got to it. As it happened, PixInsight recently released the Gradient Correction (GC) process, so I casually ran the image through it again, and the result turned out worth noting.
This image was taken four years ago, casually snapped from a hotel balcony before the annular eclipse in Yunlin-Chiayi: no flats, and no tracking, with the bright region at the bottom of the frame being the light pollution from Chiayi City. The conditions were quite unfavorable, which makes it a perfect touchstone for various gradient-removal tools.
The Same Image, a Showdown of Multiple Tools
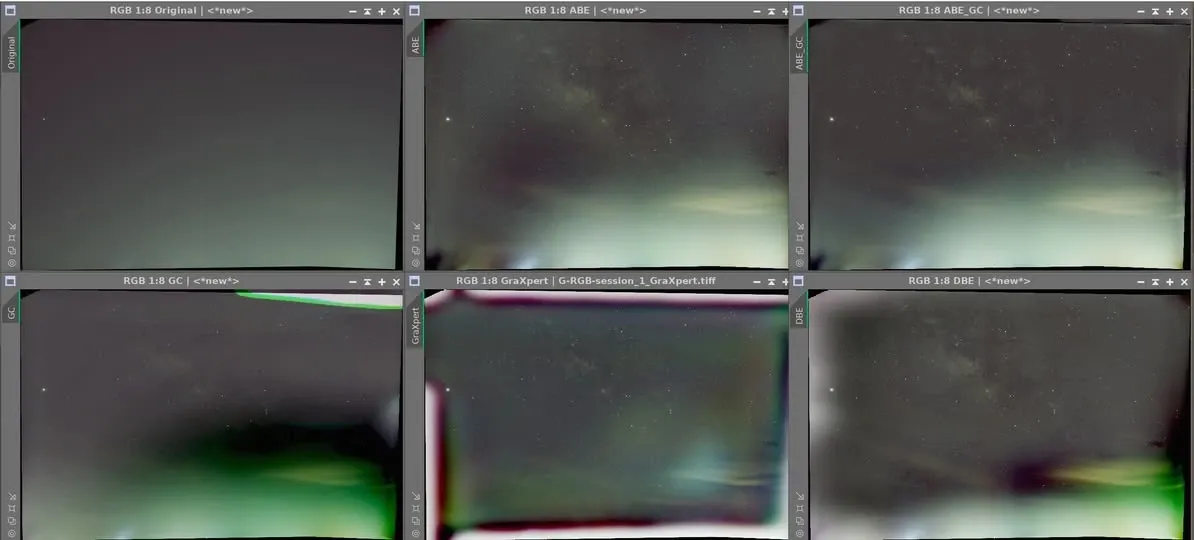
I had previously done DBE by hand several times, and the results were all rather unsatisfactory (see the bottom-right image). ABE, on the other hand, unexpectedly did quite a good job (top-middle image). And this time’s surprise was: taking the already-better ABE result and running it once more through GC (top-right image) actually produced the best outcome, the galactic center emerging from the light pollution, and even the over-correction that ABE couldn’t handle (that black shadow just left of center) was eliminated along the way in GC.
I also tested GC on its own (bottom-left image), as well as the effect of GraXpert’s other modes (bottom-middle image), and I’ve laid them all out in the comparison for reference.
A Few Observations
It’s worth adding that, in theory, DBE on this image should be able to achieve the same result as ABE; the only difference is that you have to place the sample points correctly and tune the parameters well, which takes a lot of time. The ceiling of a tool’s ability often isn’t the problem; the real cost lies in how much effort the person has to put into operating it.
On this kind of material, with severe light pollution and lacking flats and tracking, the combination of laying down a base with ABE and finishing with GC saved me a good deal of effort this time, and let the galactic center, which had almost been swallowed by light pollution, finally show itself.