BlurXTerminator 2.0 AI4: Optical Aberration Correction, Tested
After BlurXTerminator was updated to 2.0 (the AI4 model), its biggest highlight is a powerful optical-aberration correction capability. This article gathers what I learned from throwing all sorts of “problem” images at it—from corner aberrations and shooting trails to the recovery of saturated regions around bright stars.
Corner Aberrations: Small Stars Turned Round Again
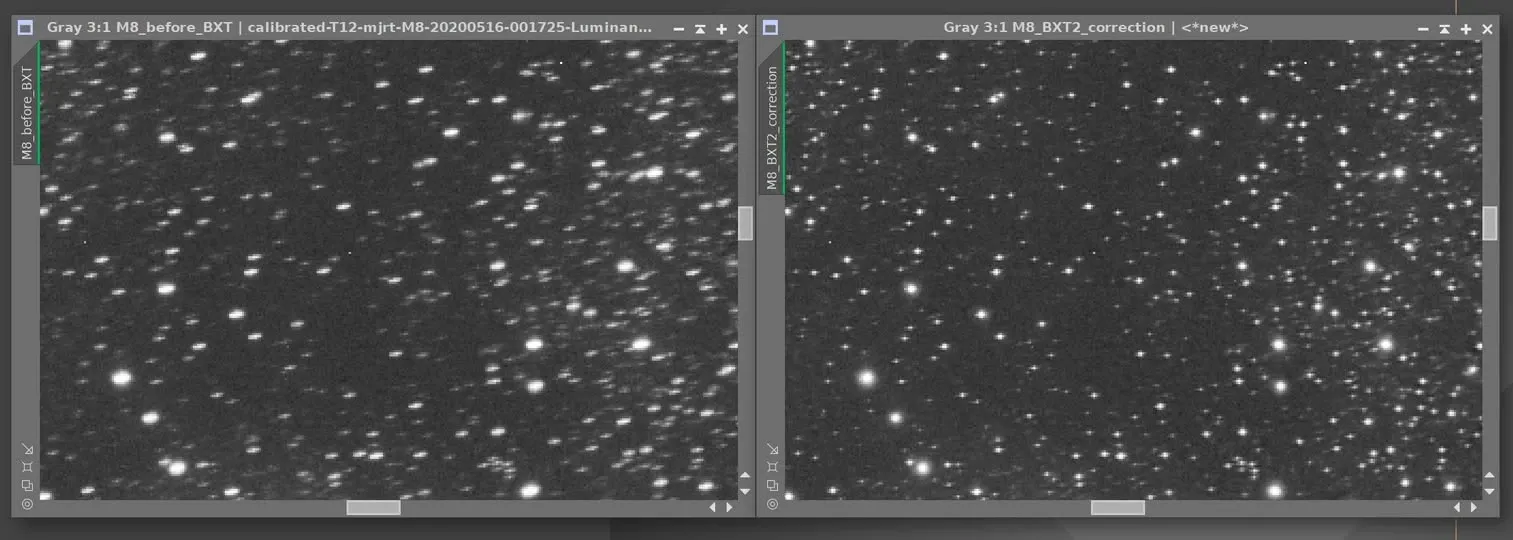
Let’s start with an image taken with a D810 and a Sigma ART 105mm f1.4 (stopped down to f2). This kind of lens inherently has noticeable aberration around the edges of the frame, with stars stretched into all sorts of shapes. After AI4 correction, a lot of the small stars around the edges actually turned round again. Honestly, seeing this effect for the first time gave me a bit of a shock, and I hurried off to update.
It Can Even Rescue Slight Shooting Trails
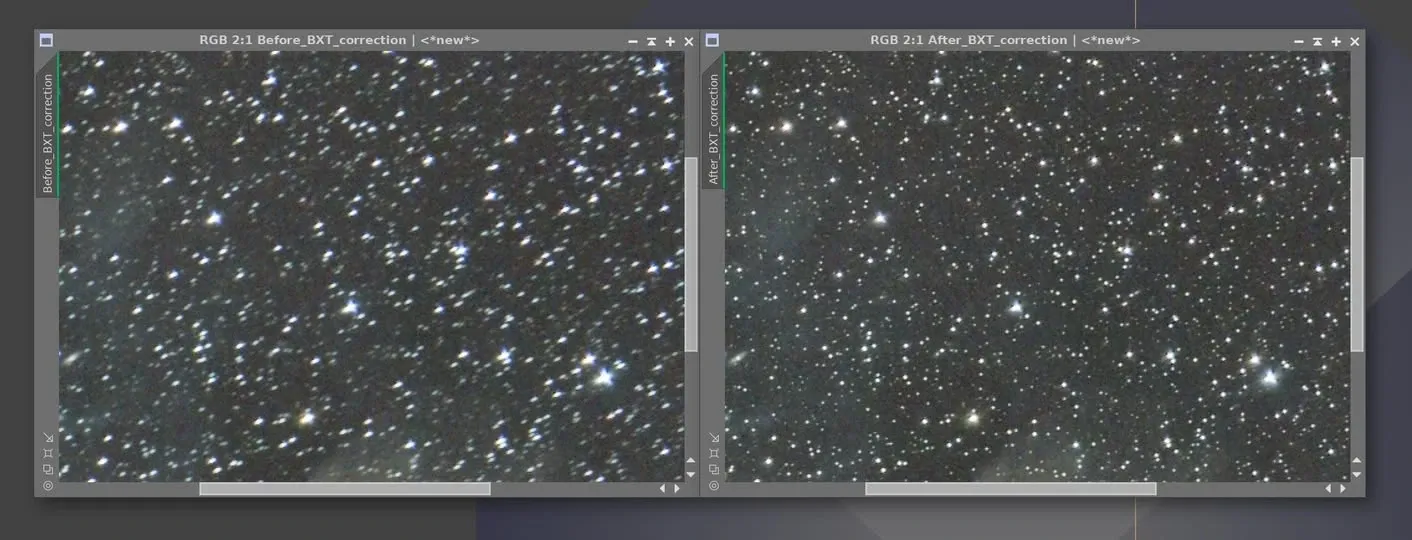
A fellow imager mentioned star trailing during capture. On a whim I dug out a scrapped trailed image (undersampled data) to run an AI4 correction test—the trailed stars all seem to have been restored. The biggest difference from the corner-aberration image is that here the bright stars didn’t take on any “dove”-like deformed shape; they too were restored to round.
Deconvolution Makes Background Galaxies Clearer
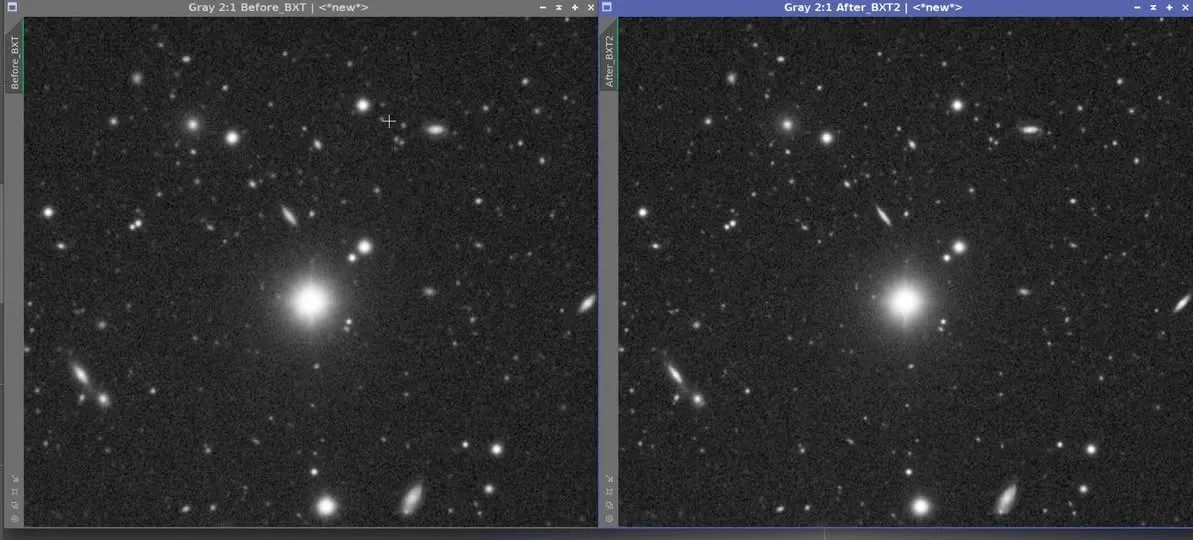
Switching to an image shot with a small refractor (jokingly called a “toothpick scope”). The background of the frame contains many different kinds of galaxies. After AI deconvolution, the galaxies became clearer and the stars shrank slightly—sometimes you even have to look twice to tell which are stars and which are distant galaxies.
AI4 Isn’t Better Than AI2 in Every Situation
Here’s a counterexample worth noting. If your telescope happens to have a “purple fringing” problem (stars tinged purple), then when correcting with BXT I’d suggest switching to AI2. That’s because correcting with AI4 instead makes an unnatural green appear around the stars—purple fringing turns into green fringing, which just swaps one problem for another. The new model isn’t always a cure-all; for certain color-fringing situations, the old model may be the better fit.
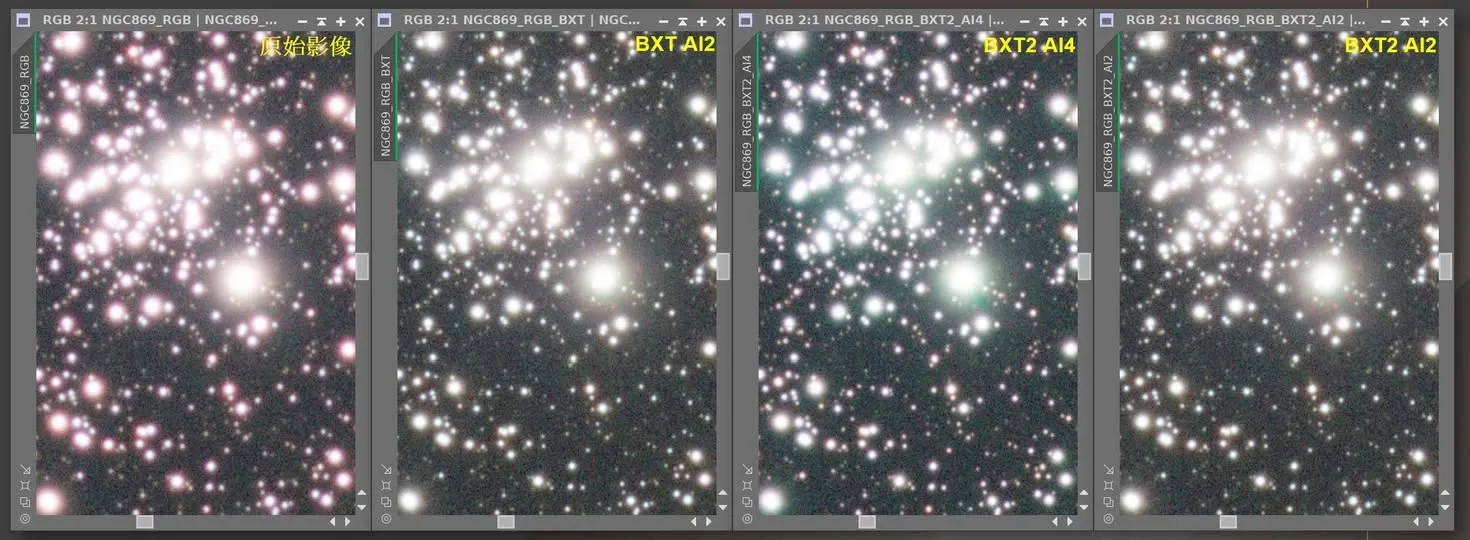
The Key Difference Between AI4 and AI2 in Saturated Regions
Here’s an example that really illustrates AI4’s progress: the reflection nebula IC 349 (Barnard’s Merope Nebula) next to the Pleiades. This reflection nebula sits beside Merope, and when processing M45 it’s usually drowned out by the star’s glare and overlooked, because you end up heavily stretching the stars and the surrounding nebulosity. To my surprise, after shooting and integrating with a 10 cm refractor, it was already observable at the linear stage; and after AI4 deconvolution, comparing it with the Hubble Space Telescope image, it really does bear some resemblance.
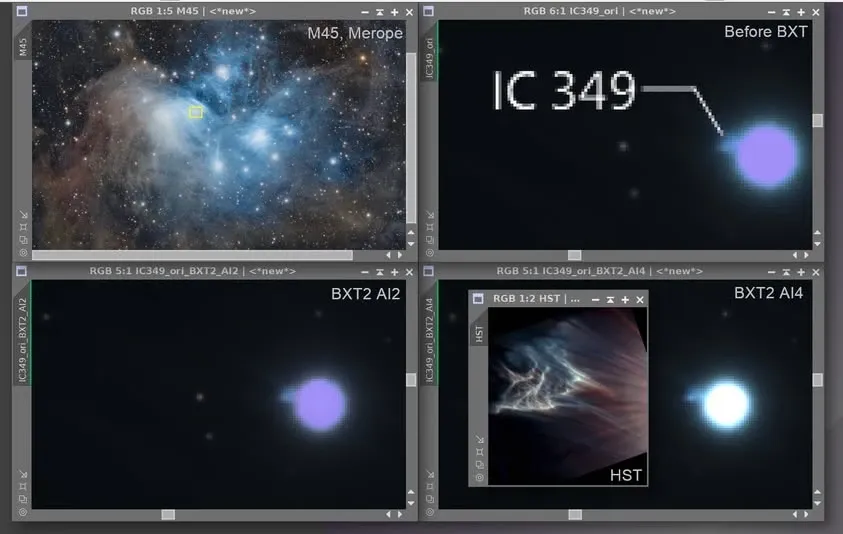
To sum up the two biggest differences of AI4 over AI2:
- It fills in the channel values missing from the PSF in the saturated regions of bright stars, so the stars go from an abnormal blue-purple to a more normal white-blue.
- For non-stellar features near saturated regions (such as IC 349), it produces a better deconvolution result.
Using Hubble Images as a Reality-Check Benchmark
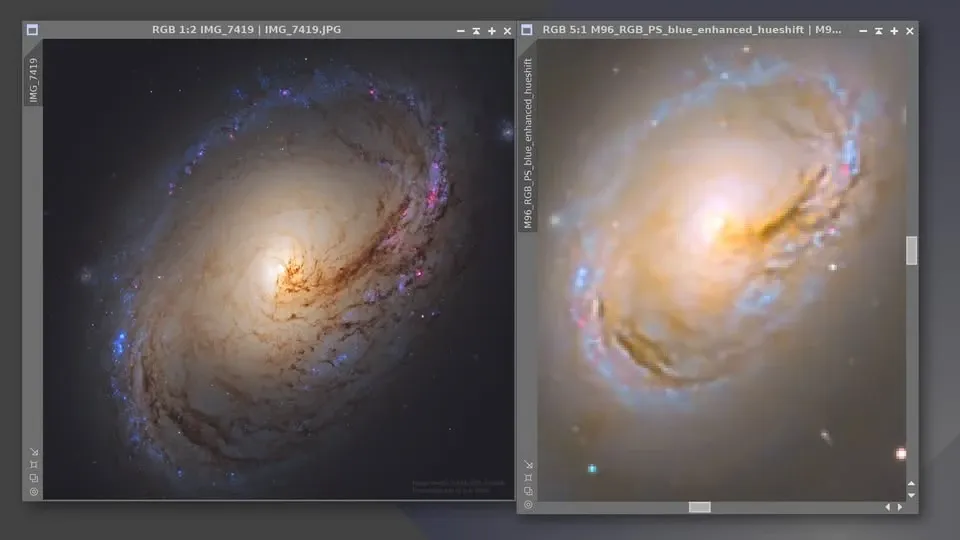
Extending this comparison habit: in the later stages of processing—galaxy images especially—I often use Hubble Space Telescope images as a reference for comparison and learning, to confirm that certain small features are genuinely there and not an artifact manufactured by processing.
Of course, even after BXT you can’t shoot anything as clear as Hubble, but at least the overall look, the positions of the HII regions, and the positions of the dust obscuration can all be matched up. Take the image below: on the left is M96 processed by an amateur imager using HST data, and on the right is M96 shot and processed with a 12 cm telescope, magnified to 500%. Being able to match them up is enough to give a little comfort for all the hard work put into the processing.