A Workflow for Stretching and Luminance Processing of Galaxy Images
When processing galaxies, I’ve gradually come to realize one thing: the step from linear to nonlinear stretch is the crux of the whole workflow. Get this step wrong and no amount of effort afterward can save it. This article gathers a few of my experiences with galaxy stretching, along with a processing route for the galaxy luminance channel.
Get the stretch wrong and everything after is wasted
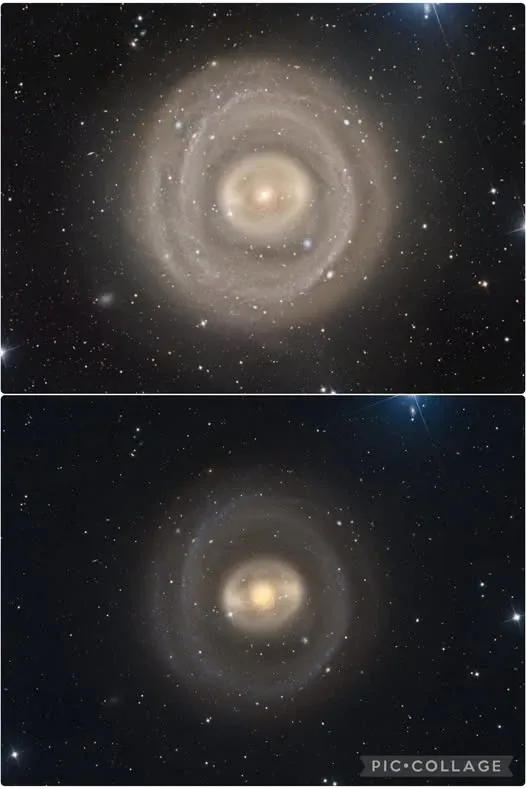
First, a lesson learned. I’d always processed relatively few transitional-type galaxies, and once when working on such a target I plowed ahead and stretched it as if it were a spiral galaxy. The spiral arms did come out, but the color was very strange, and no matter how I adjusted it I couldn’t get the look I wanted.
Later, comparing against other people’s work online, none of them looked like mine. After some investigation I discovered the problem lay in a stretch stage that was too brutal. So I tore down the workflow halfway and redid it, and only then arrived at a version I was happy with. The top and bottom versions each had parts I liked and disliked, and the final piece fused the two into one — showing the central detail while keeping the outer regions from getting too strange.
Tearing it down and redoing it is actually the fastest route
It was a similar situation processing M33, the Triangulum Galaxy. I wasn’t quite happy with my first attempt, so the next day I tore down two-thirds of it and re-stretched. I always used to underestimate this “linear-to-nonlinear stretch” step; only after several failures and teardowns did I truly understand: once this step goes wrong, no amount of effort afterward will get you the look you want.
The good news is that when this happens, tearing it straight back down to the linear stage and redoing it is usually the fastest way. PixInsight’s powerful History feature lets you easily return to any stage, without starting over from scratch.
A standard workflow for the galaxy luminance channel
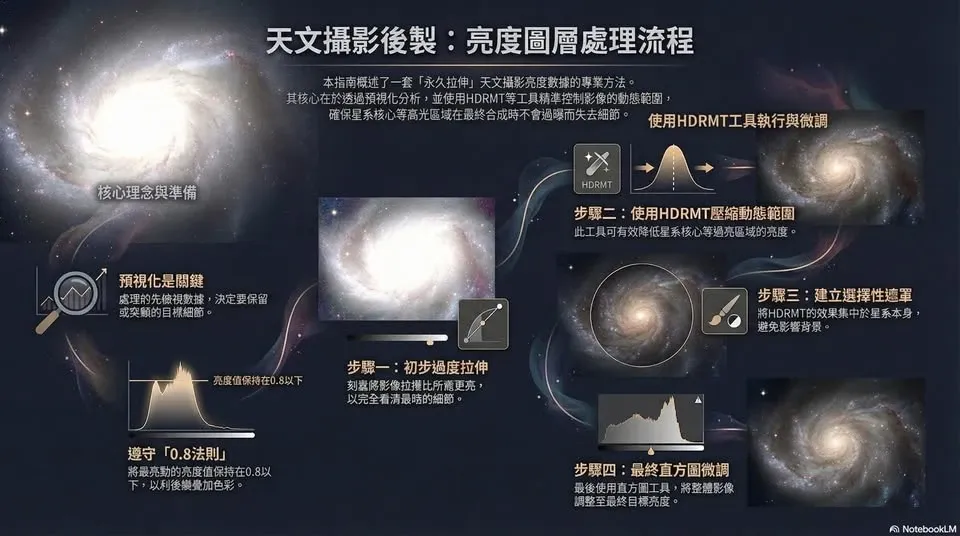
After accumulating these experiences, one can distill a standard processing route for the galaxy luminance channel. Its spirit is to “safely bring out the detail hidden in the cosmos,” rather than merely brightening the image. The whole route runs roughly as follows:
- Start with previsualization: first judge which structures in the image are worth preserving.
- Initial stretch: bring the luminance roughly into the nonlinear state.
- Compress the core with HDRMT: handle the overly bright core region and pull the core detail back.
- Build a selective mask: do localized processing on specific structures.
- Fine-tune with the histogram: finally use Histogram to fine-tune the overall brightness.
Each step trains us to “read the image, rather than merely stretch and brighten it.” A good galaxy image lets the dust lanes, the core, and the outer halo all be read at the same time, rather than sacrificing detail in exchange for brightness.
May this workflow also become a small guiding light on everyone’s learning journey.