Background Gradient Correction: ABE, DBE, GC, and GraXpert
Removing the light and color gradients from the background is a fundamental skill of the linear stage in astrophotography. From PixInsight’s built-in ABE and DBE, to the later GradientCorrection (GC) and MultiscaleGradientCorrection (MGC), and on to the free standalone software GraXpert, the available tools keep multiplying. This article sorts out where each one fits, how they differ, and what I’ve found in my own testing.
The Basic Principle of Background Gradient Correction
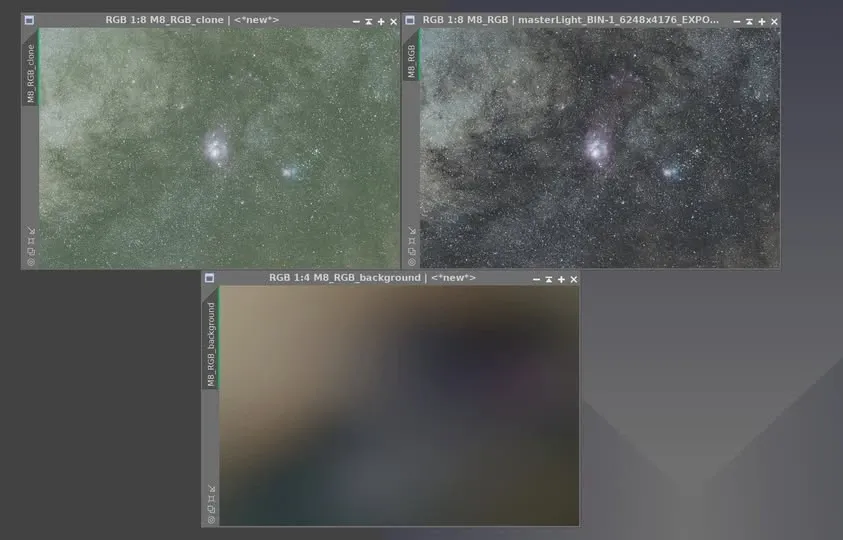
Flattening the light and color gradients in the background is done with subtraction, but the key is this: you need a tool that can correctly estimate a background model. That is exactly the role ABE and DBE play in PixInsight.
If you simply subtract a gradient without correctly estimating the background model, the result usually has problems. That’s because a real background model is often a fairly complex image, not a simple linear gradient. And even subtraction isn’t just a matter of subtracting the background model straight from the original — the process involves at least some spatial-frequency-related algorithms, in order to minimize the impact on the celestial signal (for example, star color shifts). When comparing before and after, remember to view them with the same STF settings.
ABE and DBE: A Pair of Close Relatives
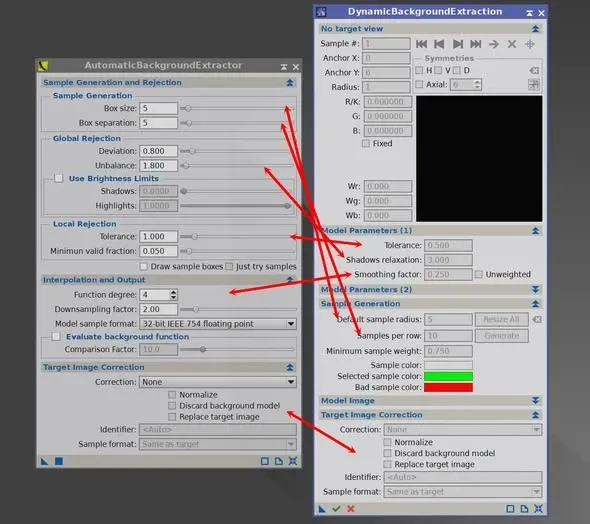
ABE (AutomaticBackgroundExtractor) and DBE (DynamicBackgroundExtraction) are two similar background-extraction processes in PixInsight. Their key parameter options are alike as well, only the names differ somewhat.
In principle, DBE contains all of ABE’s functionality, and adds real-time content preview along with the ability to place sample points manually and in polygons. So if you can use DBE, you can naturally use ABE too. In fact, if you put ABE’s sample-point placement next to DBE’s “automatic” sample-point placement, the positions turn out to be quite close. One thing to note: DBE’s automatic sampling is just one way of using it — there are other, more manual and more refined approaches.
GraXpert: A Free Standalone Option
GraXpert is a free standalone piece of software for removing the background’s light and color gradients while the image is still linear. It works quite well, offers good control, and on the whole gives better results than the light-pollution-removal features in phone apps. It can save 32-bit TIFF or XISF files and supports all three major platforms — Windows, Mac, and Linux. If you’re not using PixInsight’s DBE, this is an option worth considering.
Later, GraXpert released an AI-trained module (though don’t get your hopes too high for the AI), which lets you remove light gradients without manually clicking sample points. In the release version you don’t even have to download the AI module yourself — the software downloads it as needed.
Here’s my blunt advice: if you already have PixInsight, then the built-in DBE is definitely the better choice; but if you haven’t bought PixInsight, GraXpert is probably the free software with the best light-gradient removal in the linear stage.
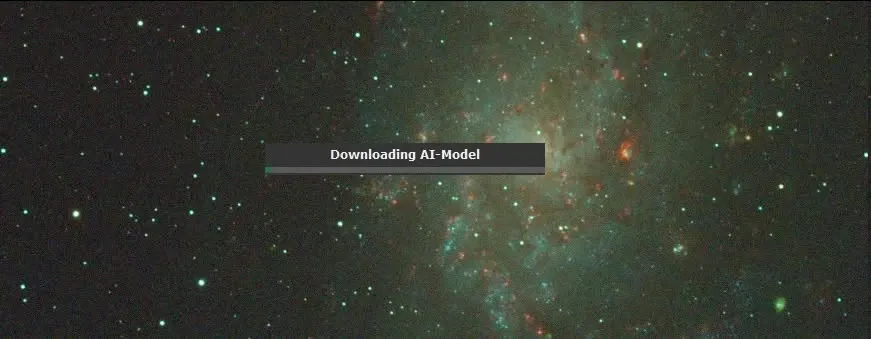
Later on, a fellow enthusiast even developed a PixInsight process (a Process, not a script) that calls GraXpert’s functionality directly inside PI, sparing you the step of exporting the image to GraXpert and importing it back. The prerequisite is that you must first install GraXpert and have the AI database enabled and downloaded — only then will this process work.
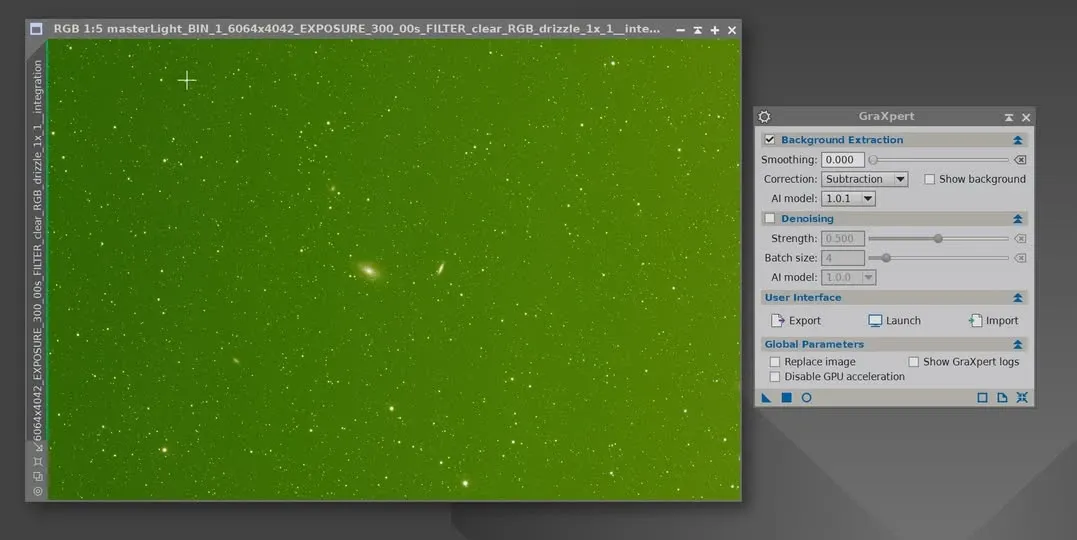
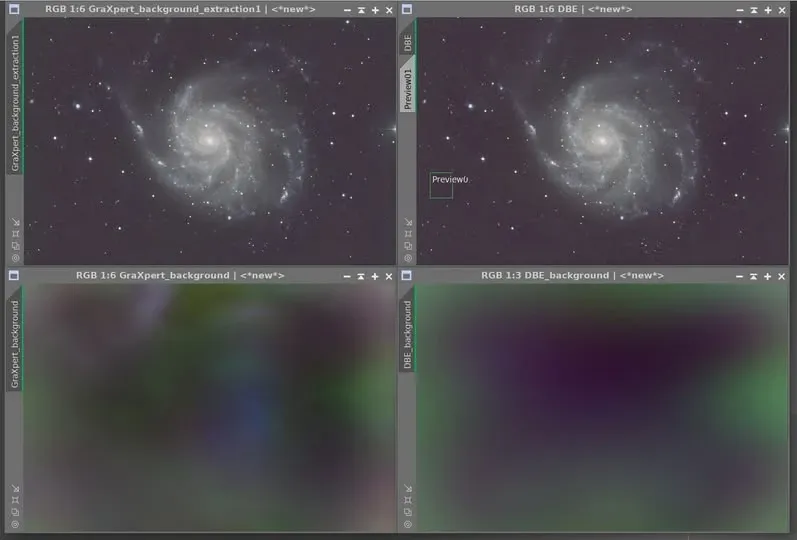
That said, in a head-to-head comparison I noticed that GraXpert AI still picks up non-background regions. Take the M101 below (green after RGB combination, likely a flat, light-leak, or calibration-frame issue): the GraXpert AI model on the left mistakenly selects part of the subject, while the DBE model on the right is clearly cleaner. Overall, the DBE model is still better.
GradientCorrection (GC): The New Generation of Automation
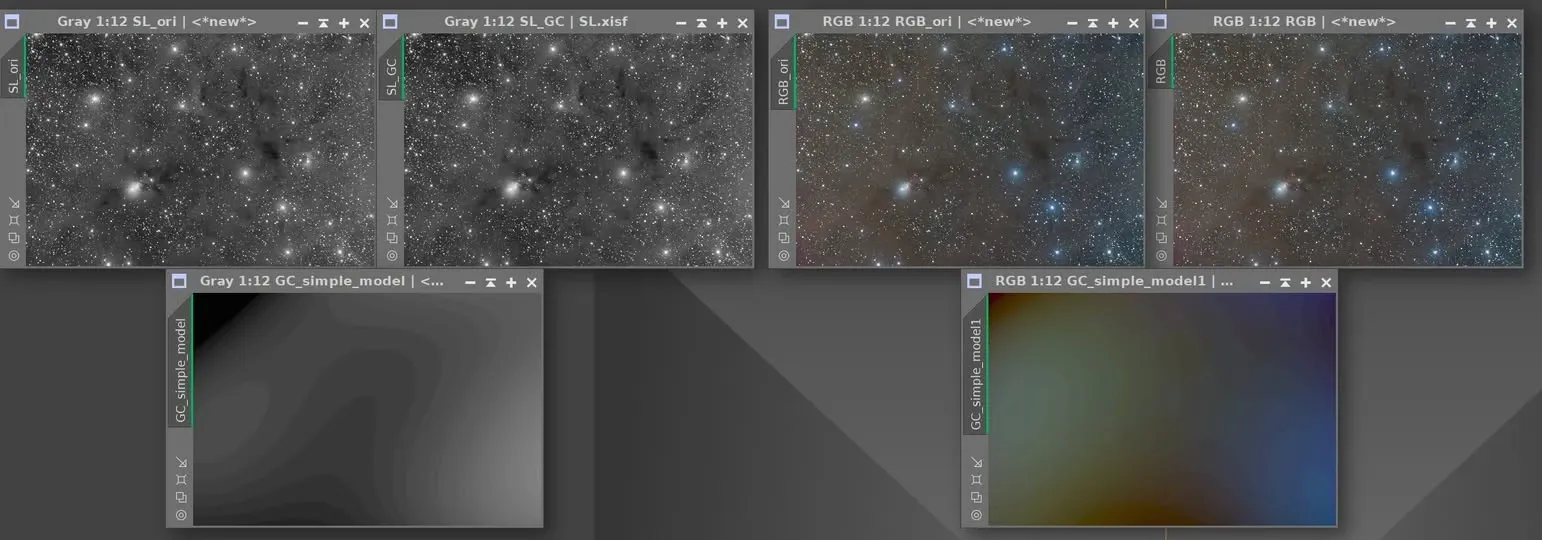
As long as you pick the right parameters, GC really works quite well. Its biggest advantage is that you don’t have to manually click on the background — even with an image where stars and nebulosity fill the entire frame and there’s simply no background to be found, you don’t have to worry about failing to place sample points.
In my testing, the dark nebulosity in the luminance channel became noticeably more three-dimensional afterward; in the color channel, a gradient that originally shifted from green on one side to blue on the other was evened out considerably.
MultiscaleGradientCorrection (MGC): Tackling Severe Light Pollution
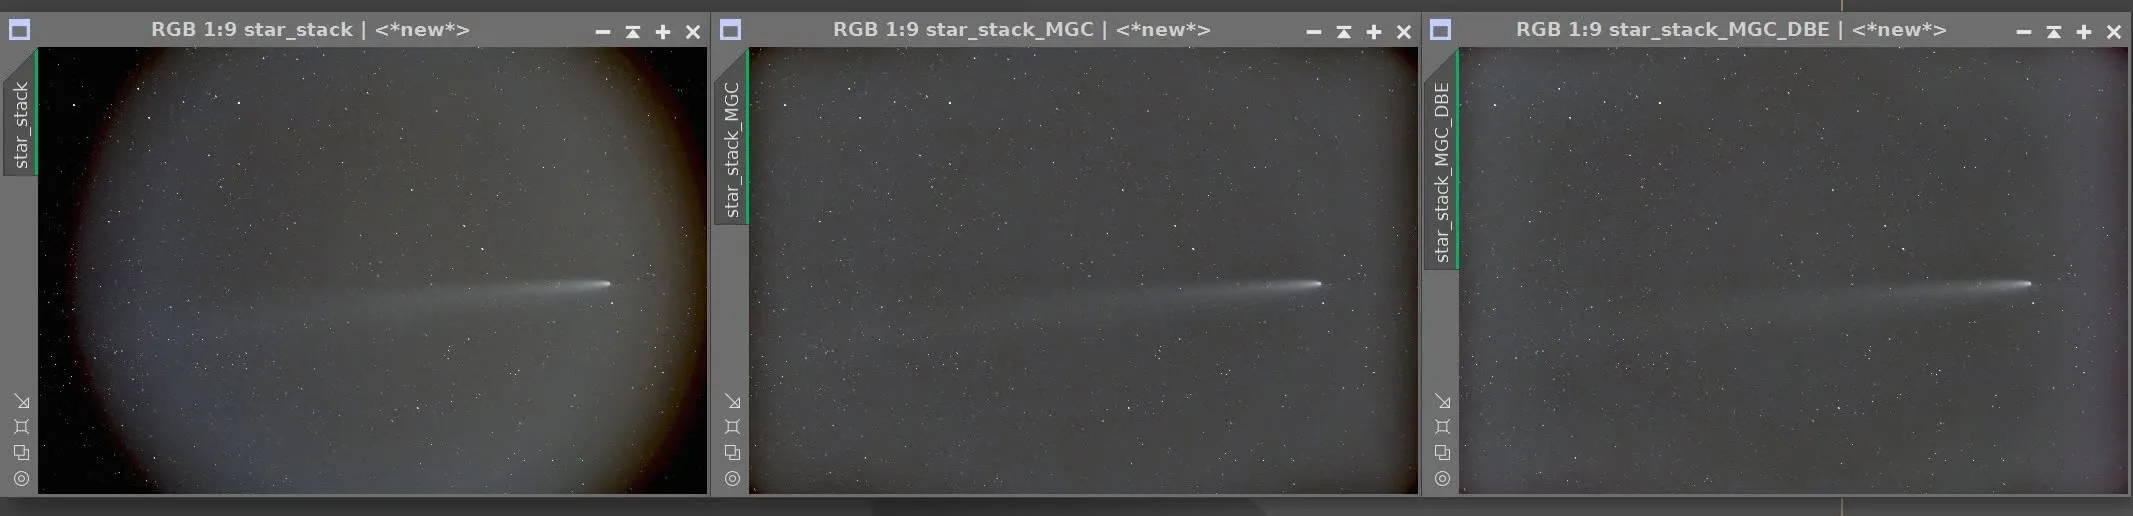
MGC is especially suited to situations with no flats and severe vignetting. I tested one workflow: original image → after MGC → then processed with DBE. Viewing all three with the same STF, you can clearly see the darkened edges and the light gradient being eliminated step by step.
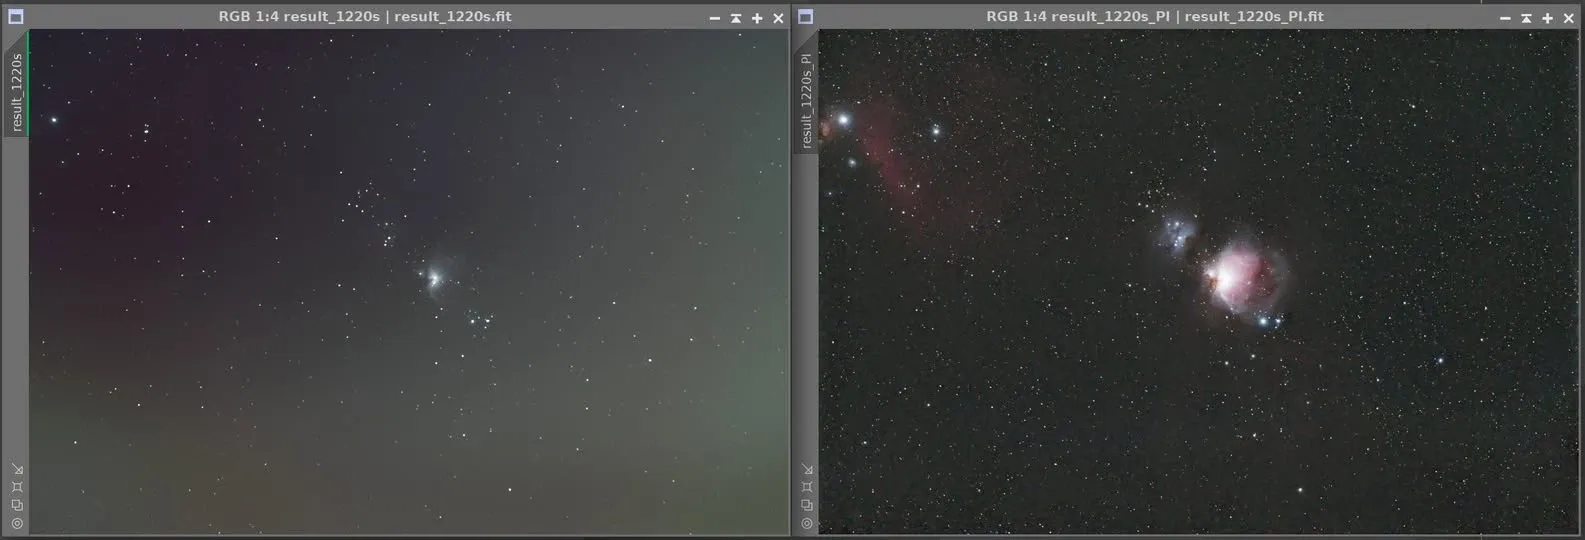
MGC’s power was on full display in a real-world case. A fellow enthusiast shot from a light-polluted area without an equatorial mount, unsure whether there were flat or other issues. I downloaded his stacked file and, using MGC, BXT, SPCC, and NXT, plus a nonlinear stretch and the curves tool, finished the result in about 15 minutes — the Horsehead Nebula, invisible in the original, emerged, and throughout the process I saw no obvious integration or flat problems. MGC handled the light-pollution gradient in a single pass, which was genuinely astonishing.
Wrapping Up
Background-gradient-correction tools keep coming out, but the logic for choosing among them is actually quite clear:
- If you have PixInsight: make DBE your main tool; when you need full automation or can’t find the background, hand it to GC or MGC; for severe light pollution, lay the groundwork with MGC and finish with DBE.
- If you don’t have PixInsight: GraXpert is the best free alternative.
Tools will keep getting smarter, but the core idea — first obtain a correct background model, then subtract it gently — won’t change. Understand that, and you’ll be able to judge which tool and which set of parameters suit the image in front of you.