Luminance and LRGB: Extraction, Combination, and RGB Working Space
LRGB is one of the core ideas in astrophotography post-processing: you process the luminance channel (L), which carries the detail, separately from the color channels (RGB), which carry the color, and combine them at the end. This article covers the extraction and combination principles for the luminance channel, along with an often-overlooked setting behind it all — the RGB Working Space.
Why process L and RGB separately
Let me start with a conceptual analogy. I was once chatting with a few fellow enthusiasts about monochrome versus color photography, and somehow the topic wandered onto the eye. We ended up summing it up in a single line:
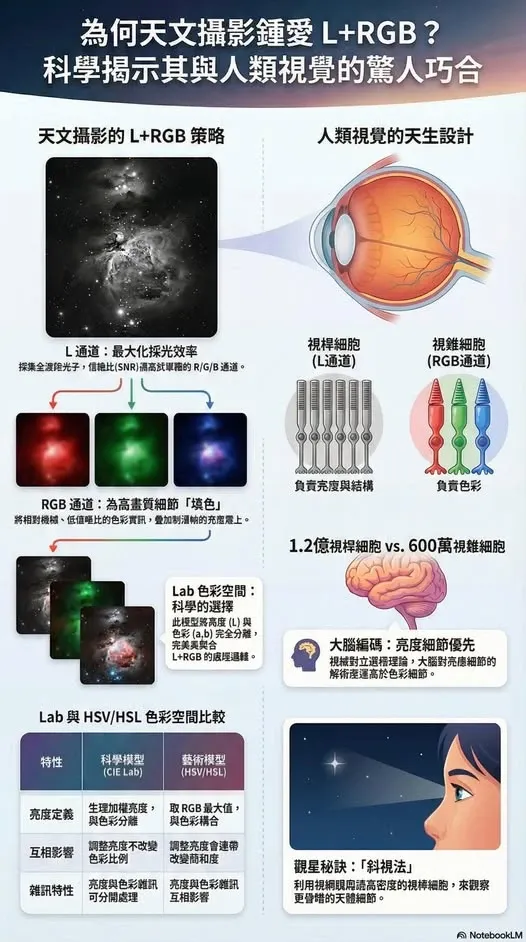
RGB mode is the choice for when you’ve reached photon financial freedom — top quality in both color and luminance at once. L+RGB mode is the survival rule of the photon-poor: first make sure you can see the structure, then worry about getting color.
A sensor that can accumulate photons over a long time makes up, to some degree, for the eye’s regret in the dark — where photons are too scarce to drive the cone cells that distinguish color. Pulling luminance out on its own to build up signal-to-noise and lock in the structure is exactly the spirit of LRGB.
Two principles for combining the luminance and color channels
To make L and RGB look good after combining, there are two directions to keep in mind:
- The luminance channel must not be too bright (or too dark), otherwise it will wash out the color.
- The color channels can have their contrast boosted, which raises the color saturation of the combined result.
The PI processes commonly involved include: ScreenTransferFunction, HistogramTransformation, ArcsinhStretch, and LRGBCombination.
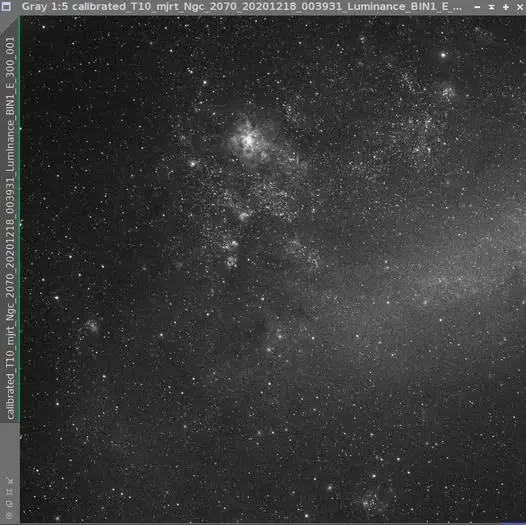
Here’s an important idea: whether the luminance channel looks good on its own doesn’t really matter that much. What matters is whether, once combined with the RGB, it makes the whole image look good and brings out the detail. Take NGC 2070, the Tarantula Nebula, as an example: a single frame auto-stretched on screen with STF shows obvious contrast, but the background is too black and the white of the Tarantula Nebula is too bright — it’s actually not a luminance image well suited for blending with RGB.
At what stage do L and RGB get combined
The LRGBCombination process is, in most cases, used in the nonlinear state. If you want to combine at the linear stage, you should use ChannelCombination instead — but you’ll notice that ChannelCombination has no option for a luminance channel at all, which is precisely what tells you why L and RGB aren’t suited to combining at the linear stage. As for what happens if you force LRGBCombination onto a linear image? Once you see the combined image fall apart, you’ll understand.
So when should you actually merge them? Roughly when both the luminance and the RGB have each been processed to a “good enough” state — that’s when I merge them and carry on. A common pitfall here is wanting to make the luminance, or each of the R, G, and B channels, look beautiful on its own. But the real point isn’t whether the intermediate L or RGB looks good (unless all you want is a grayscale image, or a color-only blurry mess) — it’s whether the color comes out cleanly and the luminance detail is presented well after the final merge.
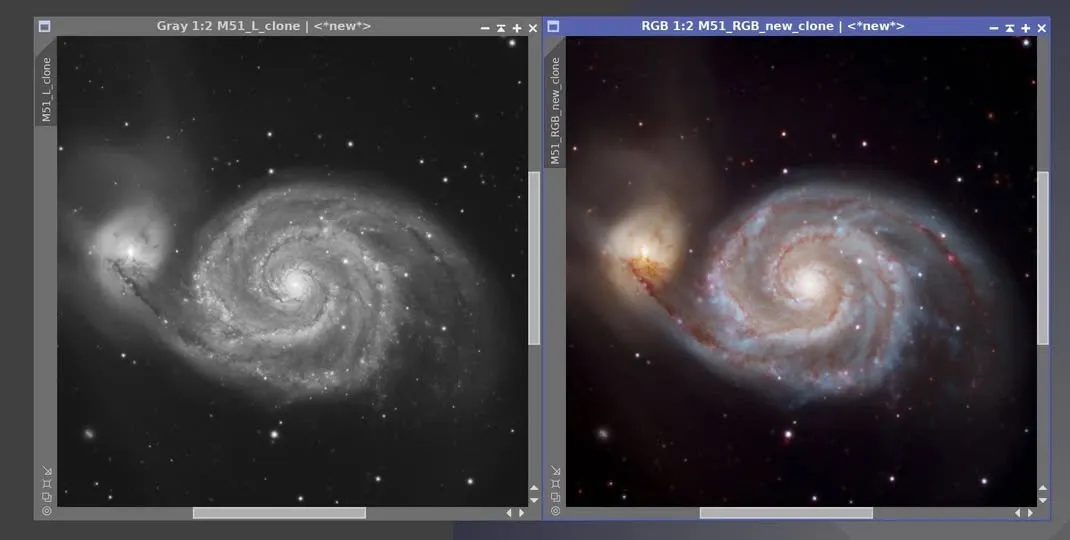
And even after merging you can’t just export the image directly — there’s still a whole chain of enhancement and color adjustment to come, and even noise reduction and blemish fixing at the very end before a piece is finished.
Color cameras need luminance extraction too
The workflows I’ve shared before have mostly centered on monochrome cameras, but when processing color images from a DSLR or a cooled OSC camera, the main workflow is actually much the same — you still process the luminance channel and the color channels separately. Extracting the luminance channel in PI is very easy; it’s just that quite a few beginners don’t know at which step to do it. Comparing against the monochrome workflow, the timing for extraction can be:
- Right after preprocessing, or
- After color balancing and DBE.
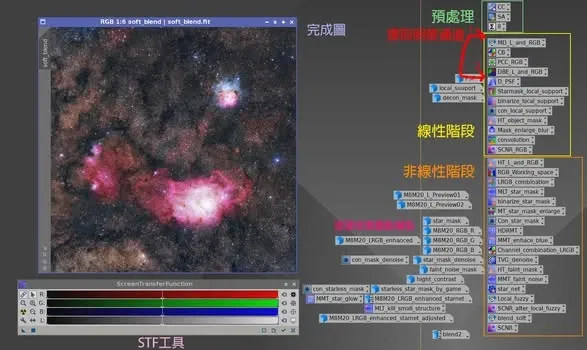
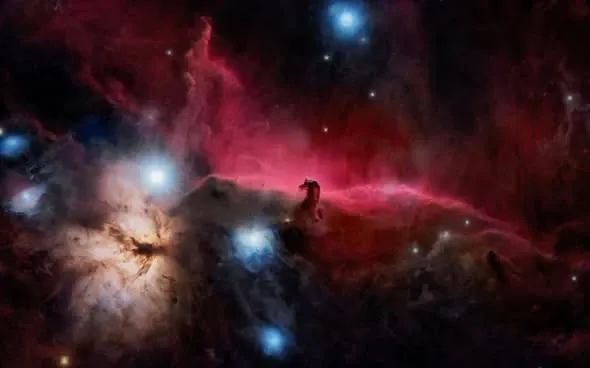
I also recorded a video demonstrating how to extract the luminance channel from a color image after integration: https://youtu.be/TDhaKp2BK4w
A common misconception: pulling out saturation ≠ the luminance channel
There’s a widely circulated claim: pull the saturation down, and what’s left is the luminance. So some people will temporarily drop the saturation in Photoshop’s Camera Raw Filter or in Lightroom, then adjust their parameters, thinking that this way they won’t be affected by color and are only tuning the luminance.
But this claim and this practice aren’t quite right. I’ve compared them directly in Photoshop: an image with only the saturation removed seems to lose some detail compared to the true luminance channel. I later ran the same experiment in PI and got a consistent result — an image with its color saturation removed does indeed lose some detail.
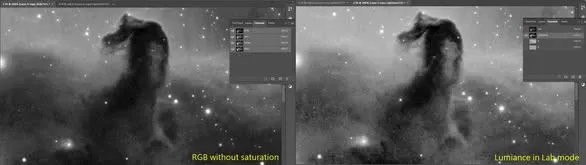
In other words, to get the true luminance in PS you may need to switch to Lab mode first for it to be accurate; whereas in PI, one keystroke extracts the luminance channel — far more convenient.
RGB Working Space (RGBWS): the hidden variable in luminance extraction
The phenomenon above — that pulling out saturation isn’t the same as luminance — actually involves an often-overlooked setting: the RGB Working Space, i.e. the proportion of how much each of the three colors contributes to luminance.
Phenomenon one: the setting affects the extracted luminance. Take two images dominated by red and by blue, and extract the luminance under an RGBWS set to the “human vision” standard. You’ll find the extracted luminance channel is noticeably darker with less detail. (If it’s hard to see, watch this video for a direct comparison: https://youtu.be/s8tRTXSrkh0)
Phenomenon two: the setting also affects the LRGB combination result. Do an LRGB combination of the L and RGB of the images above, and you’ll find that under the human-vision standard the combined image is noticeably darker overall — some of the blue hues even get slightly shifted toward purple. (Again, watch the video for a direct comparison: https://youtu.be/rcsXP9HVQs0)
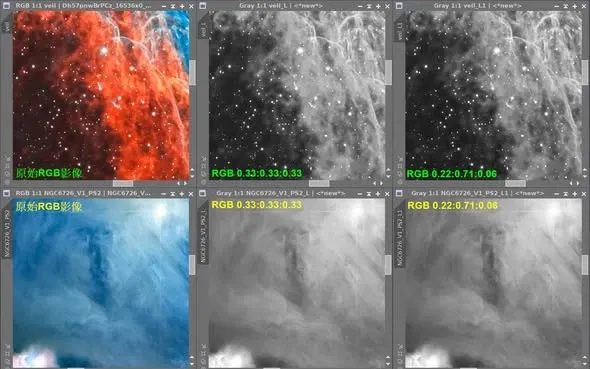
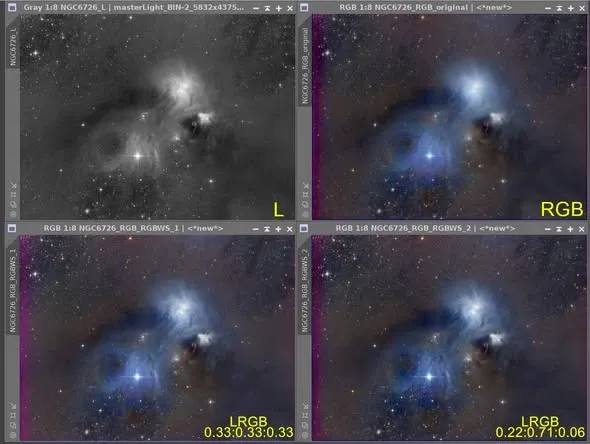
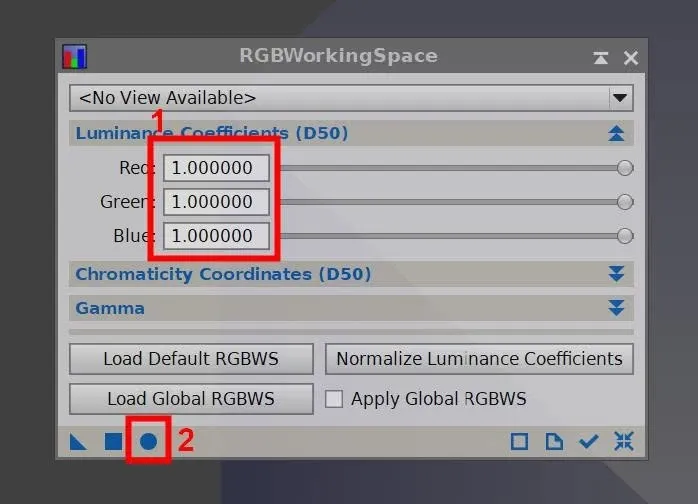
So how should you set it? If you want RGB to contribute equally to luminance, do this:
- Open the RGBWorkingSpace process.
- Set the Red, Green, and Blue coefficients all to 1 (setting them all to 1 is just easier to type; once you apply the configuration it automatically converts to 0.33 : 0.33 : 0.33).
- Press the circle in the lower-left corner to apply the global configuration.
Once set up this way, from then on every color image — whether loaded or generated — will by default have equal RGB contribution to luminance (0.33 : 0.33 : 0.33).
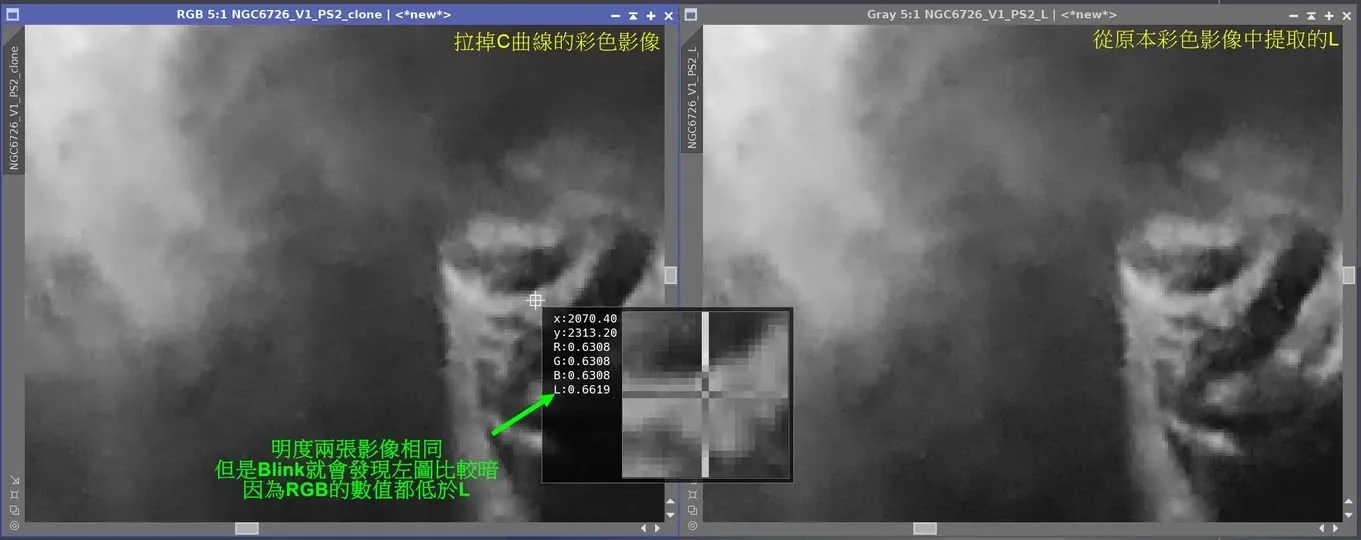
And it’s precisely for this reason that we can revisit the point that “an RGB image with its color saturation removed isn’t equal to its own luminance image”: given equal RGB-to-luminance proportions, the luminance image will be noticeably brighter than the desaturated image (pulling out the C, which represents saturation, in LCH space so the RGB values become equal).
Advanced: the Super Luminance channel (Super L)
Finally, one advanced technique. The Super Luminance channel (Super L) is a synthetic channel; one way to make it is to integrate the already-integrated L, R, G, and B channels together once more.
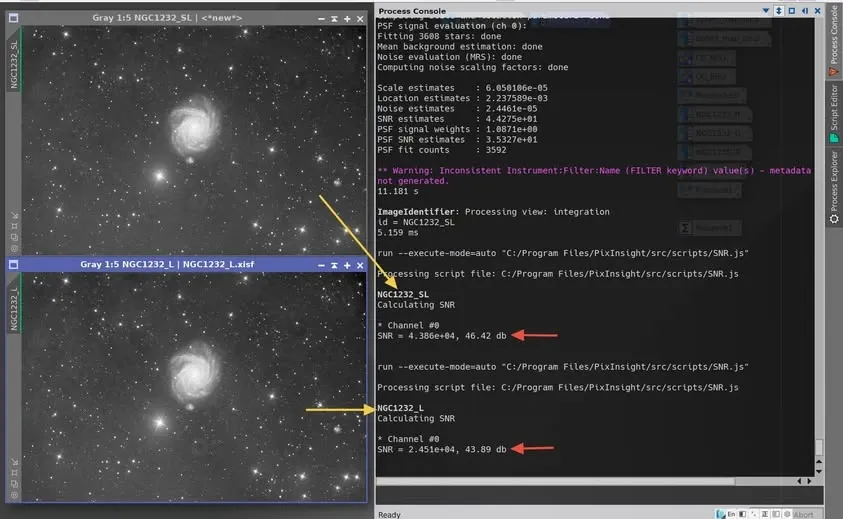
As a replacement for the L channel, compared to the original L image, Super L gives a slight bump in signal-to-noise ratio (SNR) — and even if you can barely see it with the naked eye, that little bit of improvement still helps in subsequent processing.