Star Reduction and Star Handling: The Evolution of Methods and a PixelMath Workflow
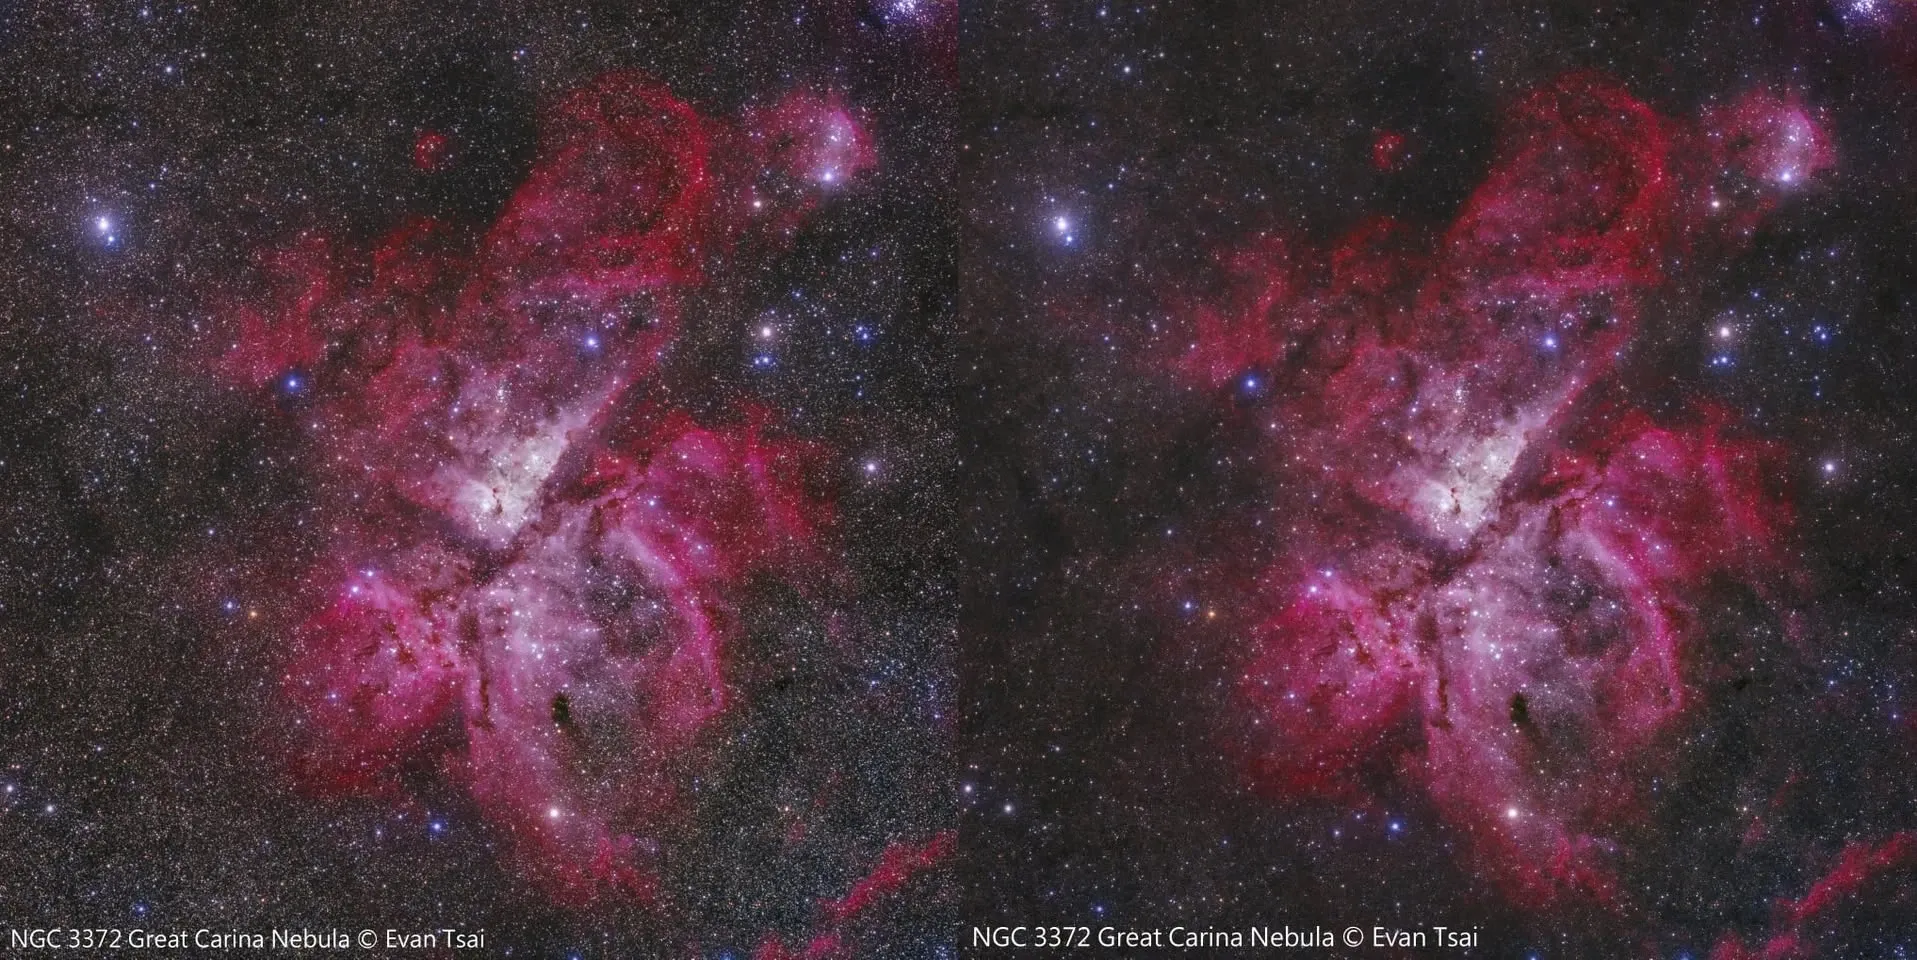
Reducing stars appropriately can make the subject of your shot stand out more, especially in star-dense regions like the Milky Way, where a sky full of stars will seriously clutter up the nebulosity if left untreated. This article walks through star reduction methods, from the erosion filters of the old days all the way to today’s mainstream starless-image approach and its PixelMath implementation.
The Old Way: Erosion-Based Star Reduction
The earliest form of star reduction relied on Erosion: using the “Minimum” filter in Photoshop, or Erosion in PixInsight, to erode the stars within a selected region and make them smaller. To be more refined about it, people would pair this with an edge mask to avoid eroding into the star cores.
Honestly, I didn’t use to reduce stars much, because traditional Erosion often damages the stars (for example, turning round stars into rhombus shapes, or mangling them into diamond-shaped stars). But some targets, such as the Carina Nebula sitting in the Milky Way, will still end up with a mass of stars cluttering the nebulosity no matter how good your star mask is, and in those cases you have no choice but to reduce the stars. This is also why the biggest Achilles’ heel of erosion-based reduction is its extreme sensitivity to mask quality: if the mask isn’t done well, artifacts easily appear at the star cores and their surroundings.
The Turning Point: Reducing Stars with a Starless Image
The march of progress gradually turned star reduction into something you could accomplish just by dragging a slider, with the size class of stars to reduce fully customizable. The key was this: people started using star-removal tools (like StarNet++) to reduce stars, not just to remove them. By 2021, once things had been turned into scripts, it became even more convenient, and Photoshop’s Minimum filter or PixInsight’s Erosion had fallen out of fashion.
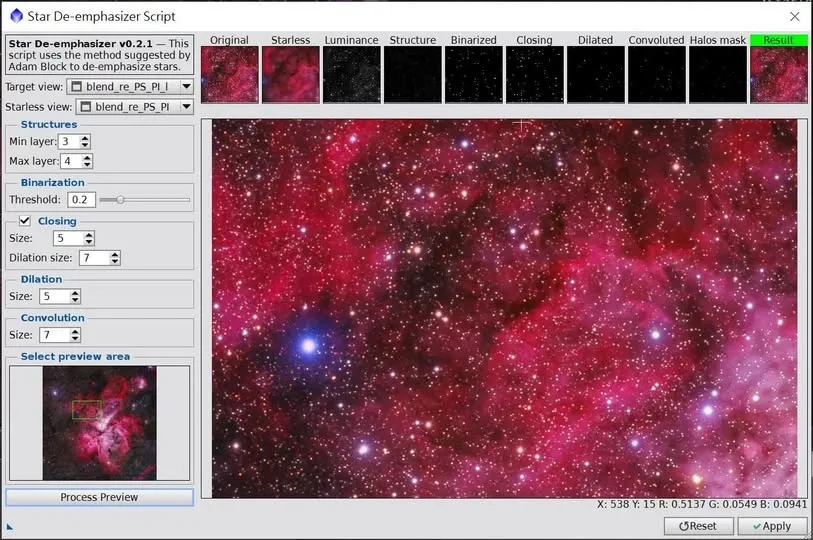
PixInsight got a ready-to-use star reduction script. It doesn’t use the Minimum filter or Erosion; instead it takes the approach of pairing StarNet++ with a Contour Mask.
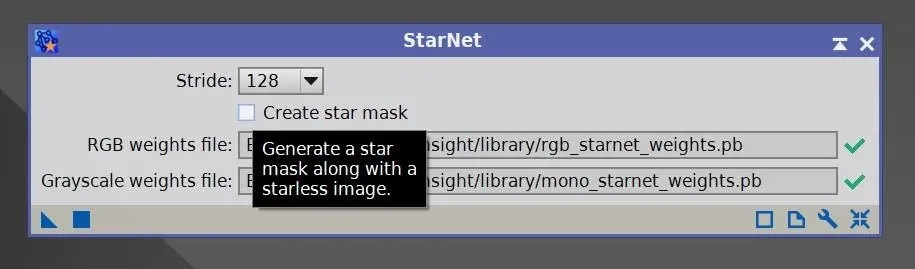
Here I’ll clear up a point that’s easy to get wrong: the “Create star mask” option in StarNet++ actually produces not a mask, but the removed stars themselves. If you use PixInsight’s PixelMath or Photoshop’s layers to add this star_mask back onto the starless image, you get something virtually identical to the original, un-removed image.
Do All the Stars End Up the Same Size After Reduction?
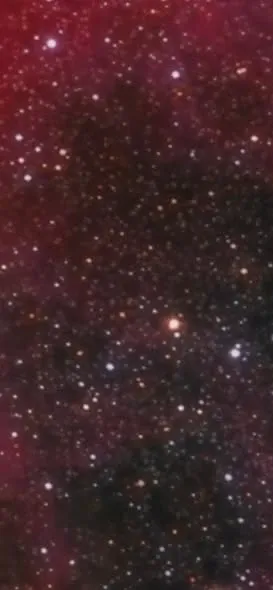
A fellow imager once claimed that after star reduction, all the stars end up the same size. Is that really true? Not at all. The size of a reduced star depends mainly on its original size and on the star reduction mask.
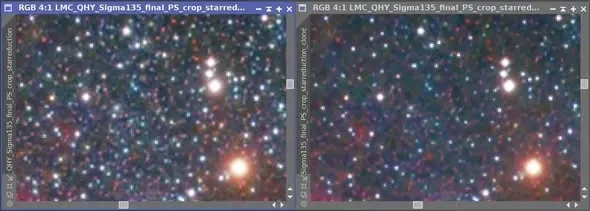
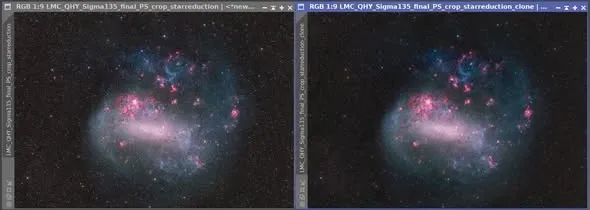
In practice, each time you reduce stars you pick the type of stars to shrink (mostly small-to-medium ones) and build an appropriate mask matched to the star sizes. After reduction the stars still differ in size; it’s just that you can tell from the stars’ surroundings that reduction was applied. Take the enlarged image of SL 17 as an example: that’s the result of reducing stars twice (I’ve never done more than two passes).
A PixelMath Star Reduction Workflow (Nonlinear State)
Reducing stars from a starless image can be done precisely in PixInsight with PixelMath. Here are the broken-down steps:
- Prepare image file A, along with its starless image, file B.
- Using STF together with HistogramTransformation, lower the brightness of both A and B at the same time (move the midtone to the right).
- Invert both the brightness-lowered A and B (keyboard Ctrl+I).
- Divide inverted A by inverted B to get the inverted star image C (PixelMath).
- Multiply C by the inverted B to get the inverted reduced-star image D (PixelMath).
- Invert D back to the normal reduced-star image (Ctrl+I).
Steps 5 and 6 are, in fact, just the formula for the screen blending mode. If you want a stronger reduction, you can lower the brightness of A and B even further in step 2. A schematic formula:
afterimage = ~((~mtf_low(beforeimage) / ~mtf_low(starless)) * ~starless)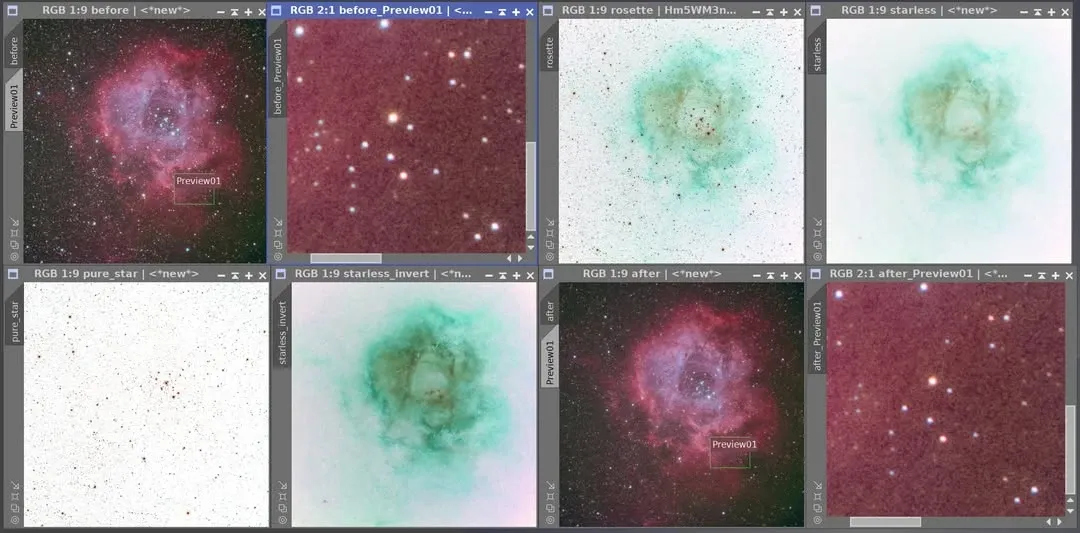
The same method can be reproduced in Photoshop or Affinity Photo, the difference being that you use layers to do it, and the blending modes between layers differ slightly.
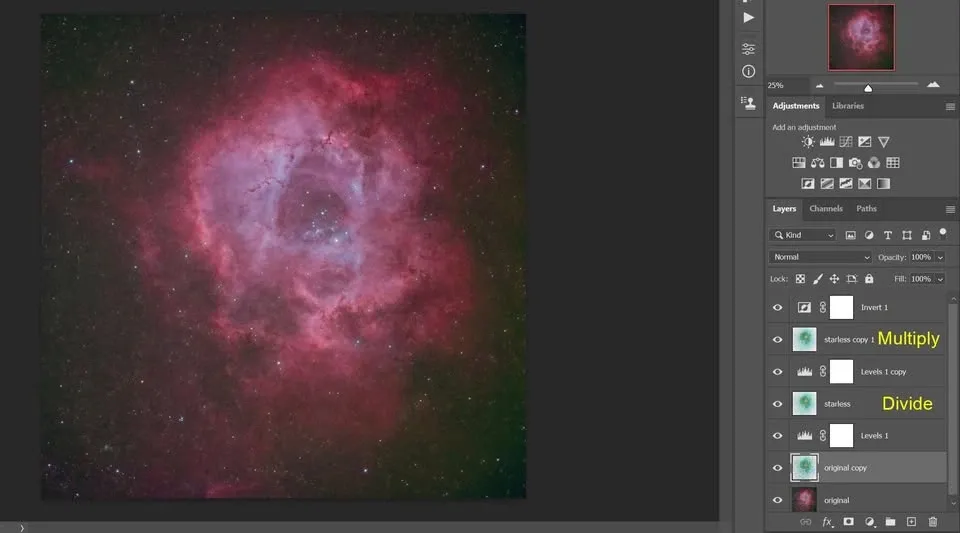
The Key: Extract the Stars Correctly with “Inverted Division”
Many people process an image with the starless approach but fail when they add the stars back at the end, and the crux of the problem is how the stars were extracted.
If you simply subtract the starless image from the original to get the stars, then add those stars back, the result is often dim, mis-colored stars that look as if you’d lowered the layer opacity. The reason is that part of the stars’ content was left behind in the starless image, so subtraction failed to extract the stars completely.
A better way is to use inverted division to obtain the complete stars; then, once you’re done processing the starless image, use multiplication or inverted multiplication (screen blending mode) to put the stars back.
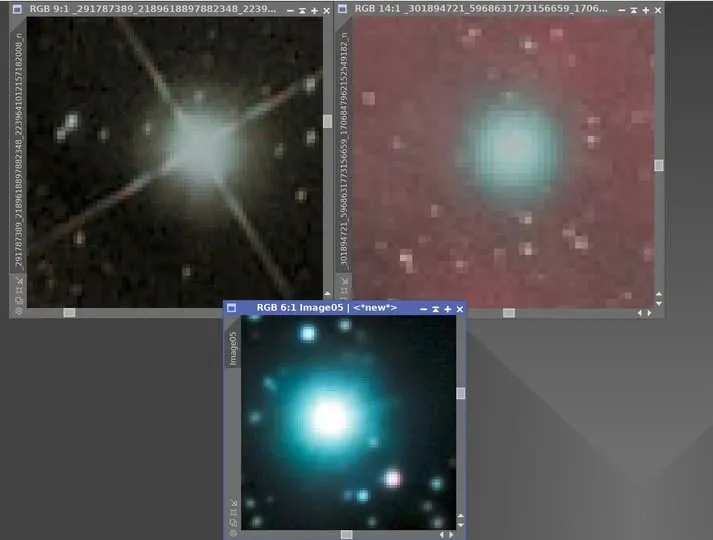
Linear vs. Nonlinear: The Formulas for Extraction and Reinsertion Differ
After RC Astro released StarXTerminator (SXT), the applicable range of star removal extended from the nonlinear state to the linear state. However, the steps and formulas for extracting and reinserting stars still differ slightly between the linear and nonlinear states, a point that often gets overlooked.
Nonlinear state (the image has already been heavily stretched, so pixels no longer hold their original linear relationship):
- Extracting stars: check “Unscreen Stars” in SXT, or after star removal use the inverted-division formula
~(~Original_Nebula / ~Starless_Nebula)to obtain the stars. - Reinserting stars: use the inverted-multiplication formula
~(~Nebula * ~stars)in PixelMath, which is the mathematical formula for Screen Blending.
Linear state (after integration, before heavy stretching, when pixels still hold their original linear relationship):
- Extracting stars: do not check “Unscreen Stars” in SXT.
- Reinserting stars: use the addition formula
Nebula + starsin PixelMath.
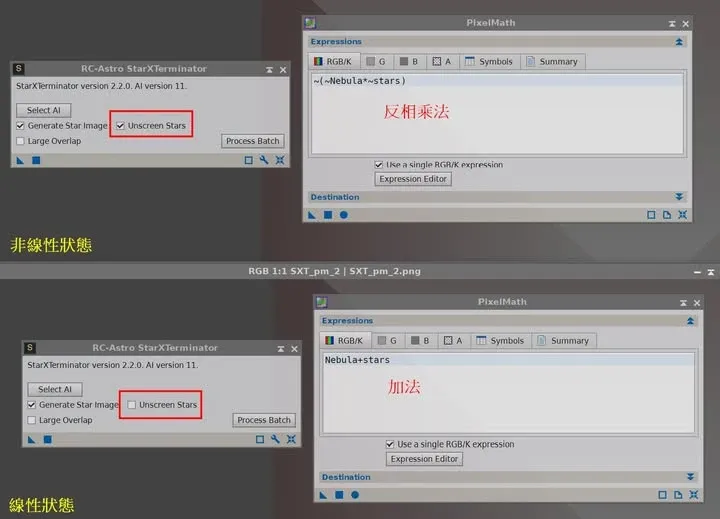
Once you’re clear about which state your image is in and use the corresponding formulas to extract and reinsert the stars, you can avoid the problem of stars turning dim, shifting color, or failing outright after being put back.