Understanding the Linear and Nonlinear States of an Image
In astro post-processing you often hear “this process has to be done in the linear state” and “that one waits until after it goes nonlinear,” but what exactly is linear, and what is nonlinear? This used to be a concept I found very hard to explain to others. Later I found a better way to explain it — by looking at the MTF curve. This article uses the MTF together with the Histogram Transformation (HT) tool to draw the line between the two clearly.
Defining linear and nonlinear with the MTF curve
The key comes down to a single action: the moment you change the position of the midtone, the image’s output is no longer linear.
The reason is that adjusting the midtone changes “the spacing ratios between pixels of different brightness.” Originally the relative brightness relationships between pixels are all in equal proportion (linear); once the midtone is moved, that proportion gets distorted, and the output naturally becomes nonlinear (you can compare this against the curve in the output section of the HT tool).
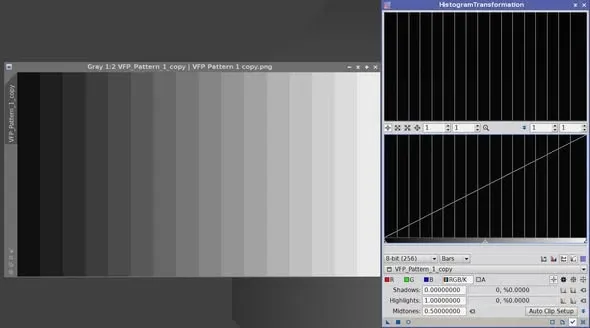
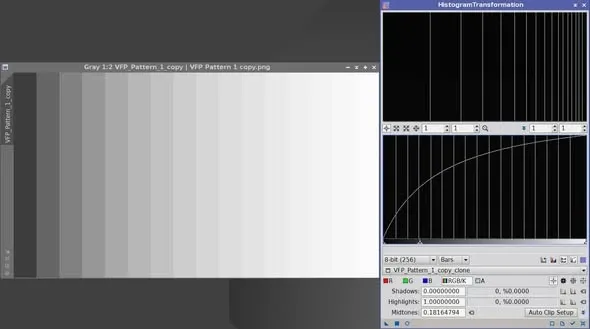
Here’s a more intuitive way to think about it: traditionally a freshly stacked astrophoto is a pitch-black expanse where you can see nothing (the linear state), and what we need to do is pull it up until the target is clearly visible — and that action is necessarily a large nonlinear stretch. For example, after stacking in APP, besides producing a linear file in which you can see nothing, if you click the save option beneath the stretch on the right, it will save a second, stretched, nonlinear photo.
(There’s also a school of thought that a very small adjustment can still be considered linear; this article takes the stricter definition — the moment you touch the midtone, we treat the image as having entered the nonlinear state.)
Adjusting only the shadow or highlight won’t break linearity
Not every adjustment turns the image nonlinear. If you only move the shadow (the dark endpoint) or the highlight (the bright endpoint), you don’t change the linear relationship between pixels — you’re only scaling or clipping the endpoints:
- Move the shadow to the right: expand the shadows (pulling the dark tones apart).
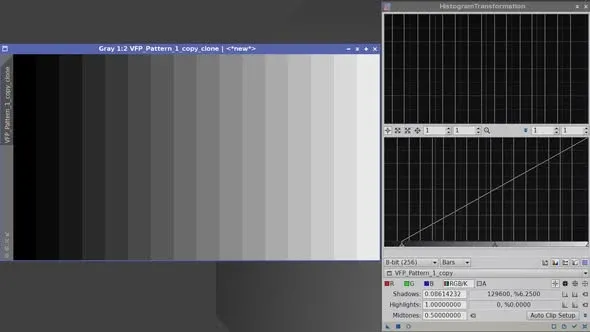
- Move the shadow upward: gradually output the shadows as gray.
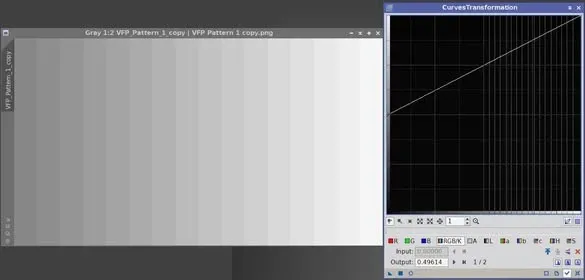
- Move the highlight to the left: expand the highlights.
- Move the highlight downward: gradually output the highlights as gray.
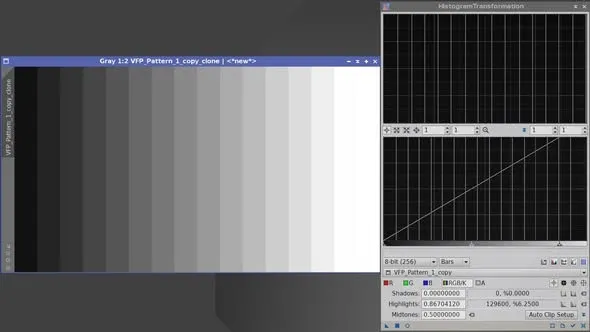
One small tooling detail to add: since PixInsight’s HT tool has removed the Low and High Ranges options, for the “move up / move down” (output as gray) demonstrations above I’ve switched to using the Curves tool instead.
Why this dividing line matters
Getting clear on what linear/nonlinear means is very practical — many image-processing procedures (such as color calibration and deconvolution) only run correctly in the linear state; once you’ve stretched and moved the midtone, the image is nonlinear and the results of certain procedures go astray. So when building a workflow, thinking clearly upfront about “should this step be done before or after the stretch” is often more important than remembering every button.