Processing Bright Stars: Deneb as an Example
When shooting the North America Nebula area, that star next to it, Deneb, is nearly impossible to avoid. It’s very bright, and in many images online, stretching blows this star out along the way, so in the end they can only crop it off or leave a broken star sitting in the frame. This article shares how, the first time I processed this region, I “tamed” Deneb step by step.
The Problem Encountered
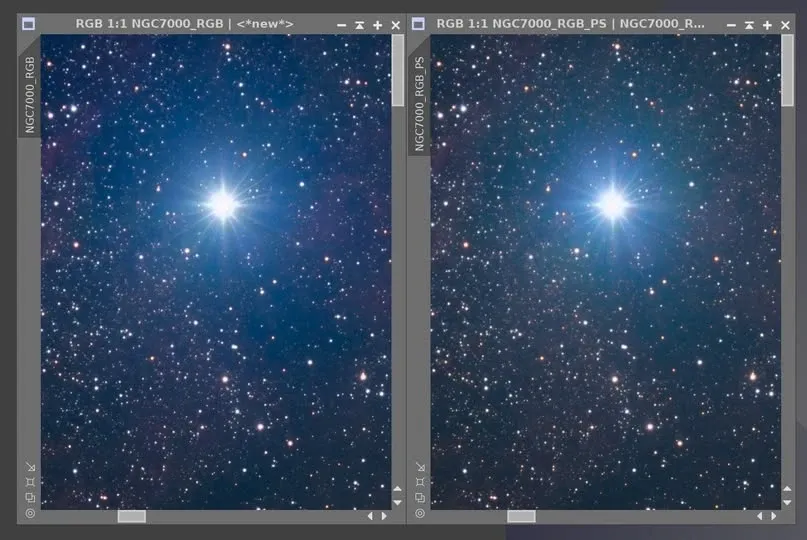
The first time I processed this area, I discovered that Deneb really is very bright, and the entire background around it had a strong blue cast. After an initial star reduction, Deneb’s situation still wasn’t solved—it was still too eye-catching, and the surroundings were still all blue. So I switched to a more targeted approach.
Processing Steps
- Adjust the black point, clipping part of the shadows: first bring down the overly bright, blue-cast shadow endpoint a little and clip away part of it.
- Remove the stars and obtain the inverse-division star image (unscreen stars): separate the stars from the nebula to obtain a star image that can be processed on its own.
- Make a color mask: here I chose blue, and applied it to the star-removed image (the nebula layer).
- Reduce the blue saturation of the nebula layer: on the star-removed image with the mask applied, lower the blue saturation to reduce that blue tint.
- Enhance the stars separately: on the star image obtained from star removal, raise the blue saturation and moderately enhance the central brightness, so that Deneb’s color and diffraction spikes keep the look they should have.
- Put the stars back: using inverse multiplication (the reverse operation of unscreen), put the adjusted star layer back into the star-removed image to composite the final result.
The core idea of this whole set is to split “stars” and “nebula background” into two layers and process them separately—the nebula layer handles bringing down the annoying blue cast, the star layer handles preserving the color and brightness a bright star should have, and finally they’re merged back together.
The Result
Comparing the right image after the steps above, you can see two clear improvements: the background around Deneb is not as blue, and the Ha in its surroundings is more pronounced, no longer close to a purplish color.
Summary
The point of bright-star processing isn’t to forcibly shrink the star or crop it out, but to “process it in layers”—use a color mask to bring down the background’s blue cast, tend to the star separately, then composite it back. Deneb is just one example; the same thinking can be applied to any target with an eye-catching bright star.