Handy Little Tools and Scripts in PixInsight
Beyond its main workhorse processes, PixInsight also hides quite a few handy little tools and scripts that can save a lot of effort in specific situations. This article rounds up a few I think are worth knowing: live stacking, image annotation, image comparison, and FITS Header inspection and batch editing.
EZ Live Stack: Stack While You Shoot and See Results in Real Time
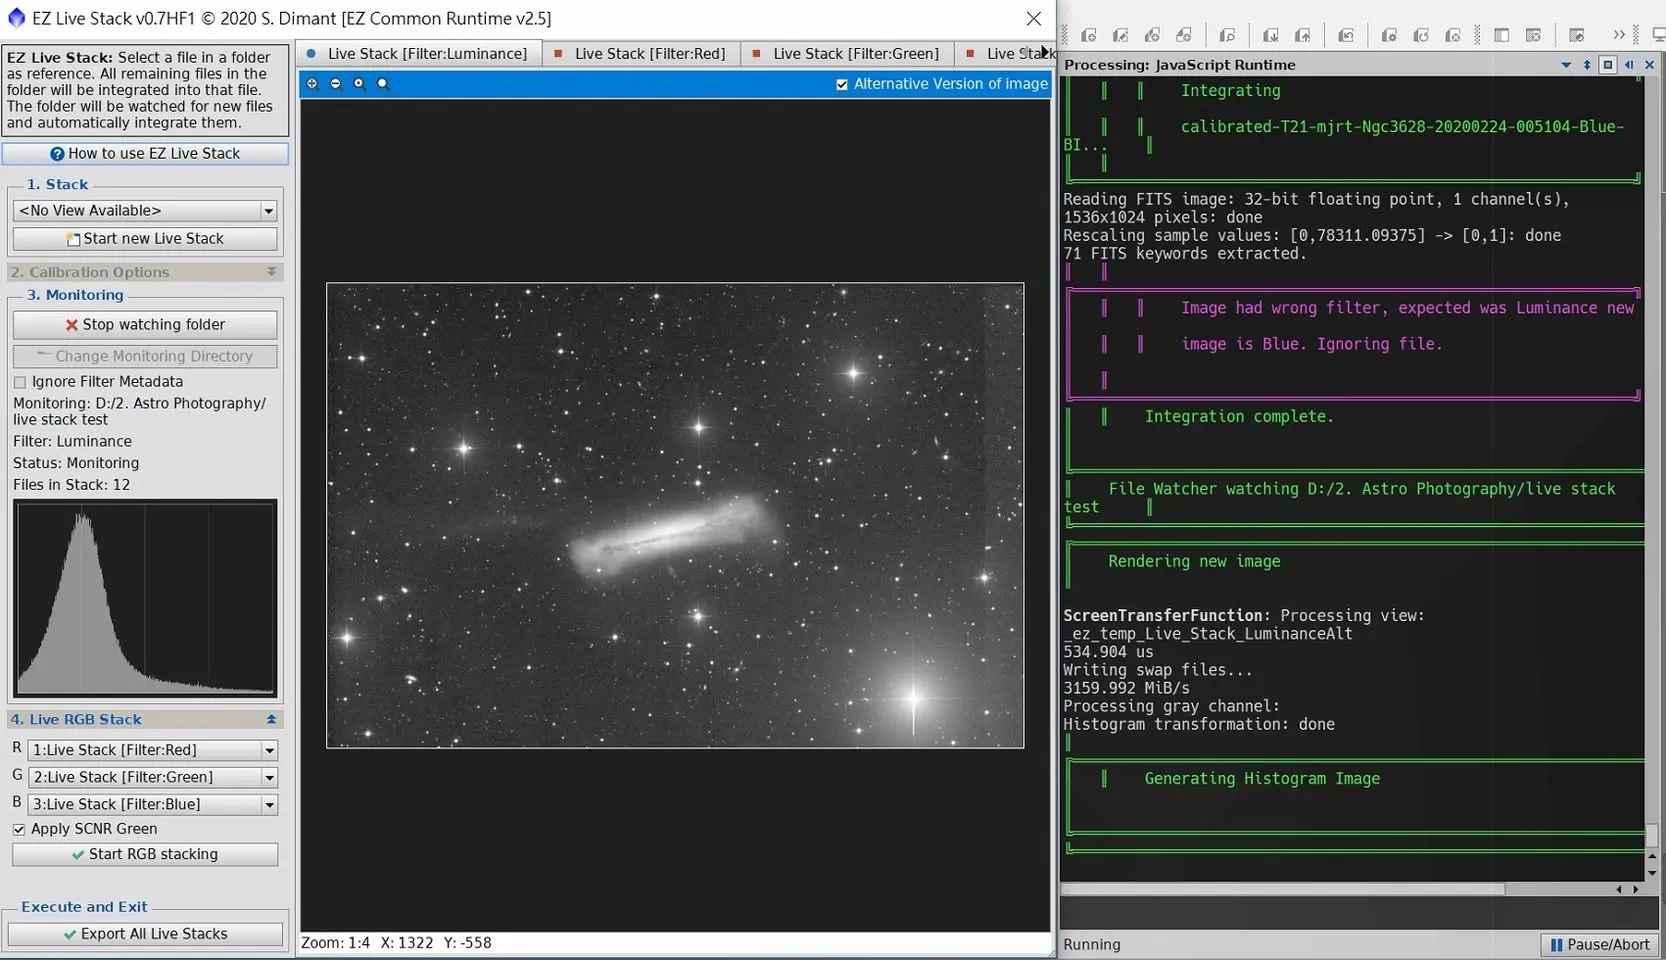
The EZ Live Stack script lets you set up a monitored folder (you need to place a reference image in the folder first as the alignment target). As photos are taken and saved into it one after another, it automatically registers, integrates, and stretches them, and it can even monitor photos from multiple filters at once and additionally produce an integrated RGB image.
Its value isn’t just in being “live.” Once, I used it to process the luminance channel of the NGC 3628 Hamburger Galaxy (12 frames, 300 seconds each)—previously, because my post-processing skills weren’t up to it, I’d never managed to bring out the tidal tail, but after automatic integration and stretching, the tidal tail actually emerged, which convinced me to go back and re-process it. As a tool for quickly previewing the night’s results, it’s genuinely useful.
Annotation: Built-In Simple Image Annotation
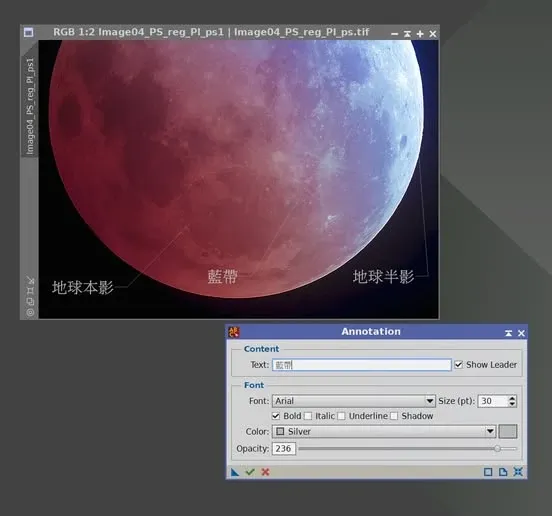
Some people don’t know that PI has a built-in Process for simple manual annotation, called Annotation. It can add notes to an image as a single line of text—whether a signature or a caption, you can do it right inside PI without resorting to other software.
Blink: Not Just for Inspection, but for Comparing Differences
PI’s Blink is not only handy for inspecting image quality; it’s also very convenient for “comparing the differences between already-registered images.” For example, the Ha and OIII distributions of the Veil Nebula differ somewhat, and by quickly toggling between them with Blink, you can tell the two channels apart at a glance, as a reference for the subsequent color blending.
Reading Image Information from the FITS Header
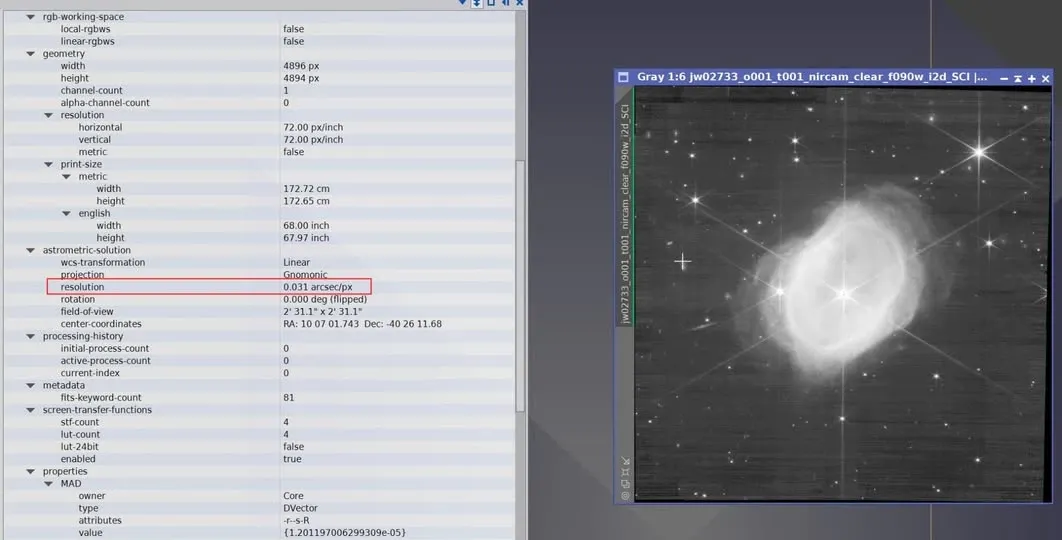
If you download raw files from something like JWST (the James Webb Space Telescope), you can open them directly in PixInsight. In the View Explorer it displays the image’s FITS Header, which contains quite a bit of information—for example, at the time I could read from it that JWST’s Pixel FOV was 0.031 arcsec/px. The FITS Header is first-hand material for understanding an image’s origins and shooting parameters, and getting into the habit of checking it is very helpful.
A small reminder from the time: when working with JWST-style compressed raw files, remember to use 7-Zip to extract them, as WinRAR, WinZip, or other software may run into problems; and if a set of files has multiple parts, remember to download them all, or the extraction will fail.
BatchFITSKeywordEdit: Batch-Editing the FITS Header
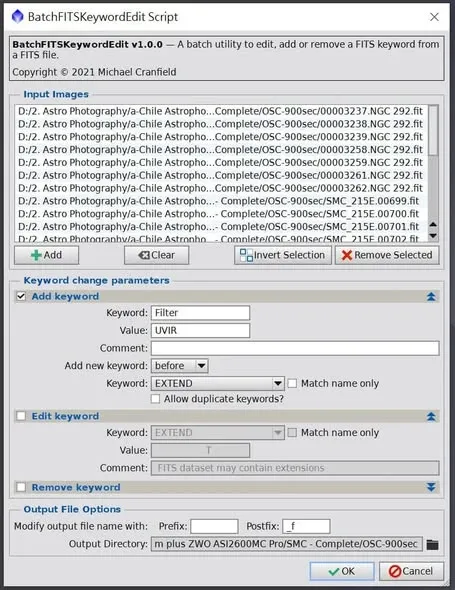
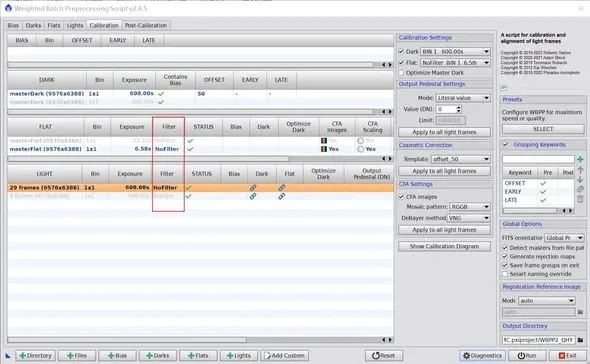
PI itself doesn’t have a built-in tool for “batch-editing the FITS Header in bulk.” But if you’re not using automated capture, or if something goes wrong during automation, it’s possible for some parameters across an entire batch of files to be wrong—for example, missing filter information. This kind of error affects WBPP’s fully automated workflow, preventing you from completing preprocessing in a single WBPP run and forcing you to select files manually one by one.
In that case, you can install the BatchFITSKeywordEdit script in PI and use it to add or modify the relevant keyword parameters in bulk, fixing the Header of an entire batch of files at once so that WBPP can run through smoothly.
Wrap-Up
Each of these tools has its own job: EZ Live Stack lets you see results the same night, Annotation adds quick notes, Blink compares channel differences, the FITS Header tells you an image’s vital information, and BatchFITSKeywordEdit rescues an entire batch of botched Headers. They’re unremarkable most of the time, but in the right situation they can save a great deal of time—well worth keeping in your toolbox.