When You Need a Mask: Keeping Bright Stars from Blowing Out During a Stretch
You often see a certain kind of image online: a big bright star in the frame saturates into a huge swollen blob that eats up everything around it. This usually isn’t a capture problem — it’s a case of “should have used a mask but didn’t” during post-processing. This article explains when you need a mask, along with a practical source for star masks.
Without a mask, bright stars blow out
Imagine an image already at its final stage, where you’re doing fine contrast and brightness adjustments. No matter how well the stars were processed earlier, if at this step you adjust the brightness of the whole image directly with no mask protecting it at all — the result will look like the far left of the figure below: the big bright star saturates first, then blows open into one gigantic star. This is exactly why so many “images with big bright stars” online look off.
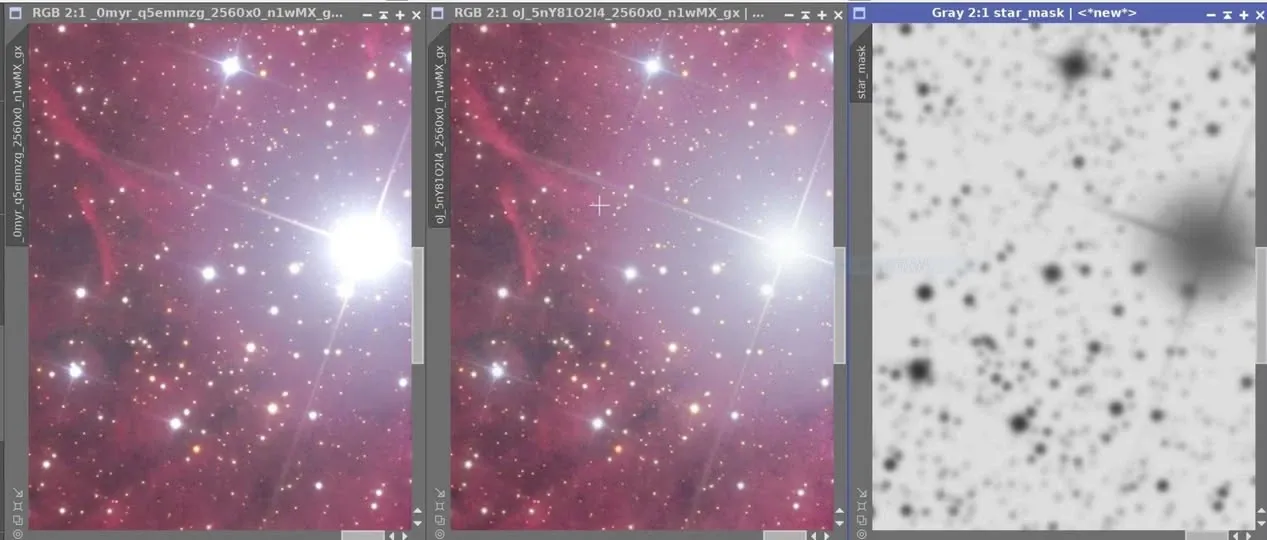
Conversely, if you apply a star mask like the one on the far right of the figure, then adjust the image’s contrast, brightness, and saturation, the stars won’t be affected:
- The big bright stars won’t grow or deform as a result;
- The small stars won’t develop color rings or color blotches around or at their centers from having their saturation raised, which would otherwise ruin the overall look.
The final result will be close to the middle image in the figure — clean stars, with bright stars kept in check.
How to make this kind of mask
The use of this kind of star mask isn’t limited to PixInsight; you can also save it as a TIF or another suitable format and use it as a layer mask in Photoshop.
As for how to generate the mask itself? Traditionally, PI’s structure-detection mask-making tool doesn’t work well on big bright stars — put plainly, big bright stars often don’t get counted as “stars” and get missed. My own approach is to use the star mask that StarNet 2 conveniently produces during star removal, take that star image, tweak it a little, and use it. This way even the big bright stars are reliably covered — much more reliable than traditional structure detection.
Summary
One of the uses of a mask is to “box off and protect” the already-processed stars when you make overall brightness / contrast / saturation adjustments. Judging whether to use one is simple: as long as there are obvious bright stars in your frame and you’re about to do a stretch or a saturation boost, you should prepare a star mask first — so the bright stars you worked so hard to capture don’t blow out at the very last step.