Manual Preprocessing: What to Do Without WBPP
PixInsight’s WBPP script is extremely convenient, and the current version can complete almost all preprocessing work automatically. If that is so, why bother learning the manual workflow? Because when the software runs into trouble, or the image itself is not suited to being handed over to WBPP from start to finish, doing it manually step by step is often the only way to confirm the state of the image without wasting time. This article gathers the manual preprocessing workflow for monochrome-camera images, and when you should switch to manual.
The Manual Preprocessing Workflow for a Monochrome Camera
Take a set of LRGBHa images shot with a monochrome CCD camera as an example (where LRGB is Bin 1 and Ha is Bin 2). The whole preprocessing workflow goes roughly as follows:
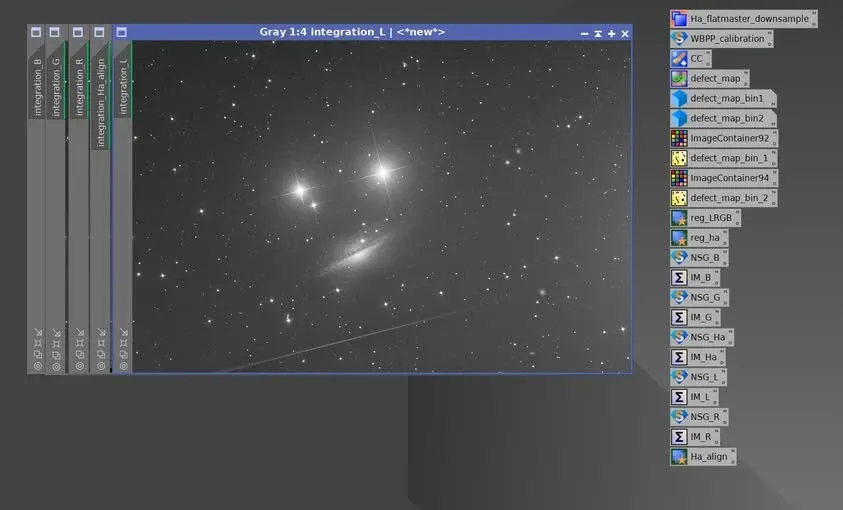
- Use WBPP to calibrate the images.
- Make a Defect Map.
- Use Cosmetic Correction to clear hot pixels.
- Use the Defect Map to clear bad columns.
- Register the LRGB images (Bin 1).
- Register the Ha images (Bin 2).
- Run NSG on each channel separately.
- Set an appropriate rejection method and integrate each channel separately.
A few differences to keep in mind:
- CMOS cameras: the only difference is that you skip the step of clearing defect columns (step 4); the rest is essentially the same.
- OSC (color) cameras: the difference is that you must Debayer before registration; you can also do CFA Drizzle, but the workflow is more complex.
- Of course, if the images have no problems at all, processing CMOS images with the latest WBPP can shrink the above steps down to a single step—provided WBPP is set up correctly.
When Should You Go Manual?
So, in what situations is it worth giving up “one-click WBPP” and going manual instead?
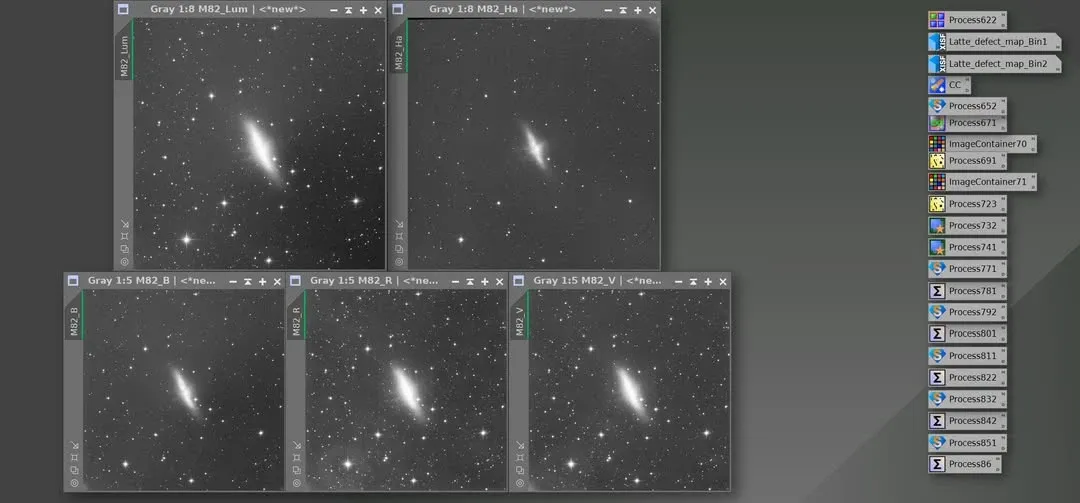
The typical scenario is: multi-night CCD shooting, with images that have many defects needing correction, and where each night has its own flats. In cases like this, manually making the required calibration frames, calibrating images, removing defects, registering stars, LN (NSG), and integrating images step by step is usually the better choice.
The image above is M82 shot with a Latte and a CCD, with each of the five LRGBHa channels finished through preprocessing and about to enter the linear stage—made exactly this way, step by step. You could of course throw all the files into WBPP and run them, but what comes out is often not what you want, and once you need a small fix you have to rerun the whole thing, which is quite a waste of time. Manual processing is slow, but it is the only way to confirm the state of the image at every stage without doing wasted work. Once you have practiced the fundamentals of preprocessing, you will know exactly which stage broke when something goes wrong.