Understanding STF Screen Stretch: Concepts and Techniques
A freshly stacked astrophoto always looks like a black expanse, and many people don’t know where to begin. PixInsight’s Screen Transfer Function (STF) exists precisely to solve this headache. This article gathers the core concepts of STF and a few practical techniques into one place.
What STF actually does: it stretches the screen, not the image
The most important idea about STF is this: it only stretches the display on screen and never permanently changes the image’s values. This lets you inspect the image content and carry out linear processing while in the linear state, without having to permanently stretch the image first.
To make it concrete, watch the background K value: in the linear state the sky background sits at roughly 0.003; once you permanently stretch, the sky background comes up to roughly 0.12. The two look similar on screen, but the underlying values are completely different.
So stop saying “the image is black, I can’t see anything, I can’t work on it.” In PI, with STF, you can comfortably do linear processing and immediately confirm the effect. Besides PI, MaxIm DL, CCDStack and similar software have comparable functions.
Basic operation: Ctrl+A and that nuke button
Select an image you’ve already integrated, press Ctrl+A on the keyboard (auto screen transfer function), or click the button on the STF affectionately known as the “nuke” button, and you’ll immediately see what the integrated image looks like in its linear state.
If you like the result after STF, you can drag the STF’s settings onto HistogramTransformation to permanently stretch the image, then export it to whatever software you want to continue in (Photoshop, Affinity Photo, Lightroom, and so on).
All red or all green after stretching? Hit that lock first
Many people, after buying PI, only ever use STF — pressing the nuke button to auto-stretch the image. But they often run into one problem: after the stretch the whole image comes out a wash of red or green, and they don’t know what to do.
The fix: press that padlock on the STF (which unlinks the RGB channels), then hit the nuke button again, and the image will look normal. Take M101 as an example: when the cursor reads the background, you’ll find the red value is far higher than green and blue; once you unlink the RGB channels, STF automatically finds the best stretch position for each channel.
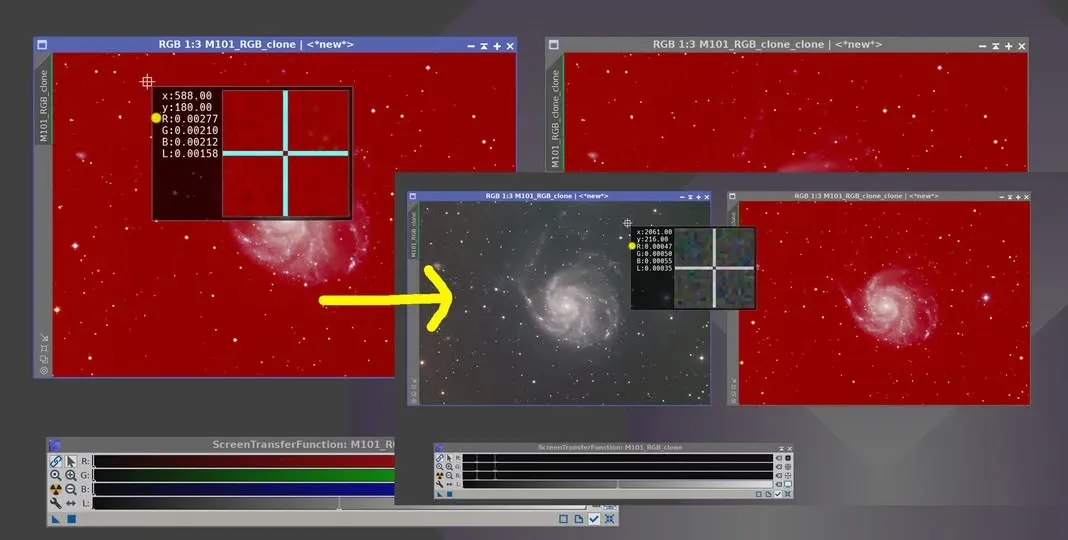
Note, though, that STF only temporarily makes the display look normal. To truly fix the color cast, you can use Background Neutralization to neutralize the background so the background values of the RGB channels become closer to one another, then do color calibration; of course, you can also just let PCC do all of this automatically.
Copying STF settings: comparing different images correctly
Plenty of people know STF is handy, but because it is an automatic stretch, pressing Ctrl+A stretches each image by a different ratio based on its own values. That means that even if image A and image B look similar on screen, their underlying STF settings are actually different — a consequence of the automation, not a sign that the signals are genuinely the same.
If you want to use STF to genuinely compare the signal difference between images A and B, newer PI (from 1.8.9 on) can directly copy one image’s STF settings onto another, without permanently stretching the image with fixed values.
How to do it: use Alt + left mouse button to drag the image tab onto another image’s tab.
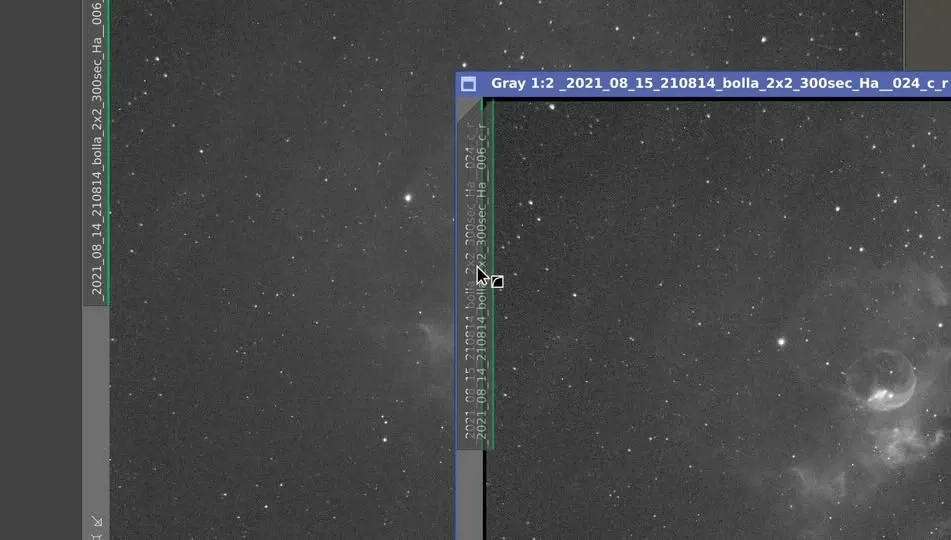
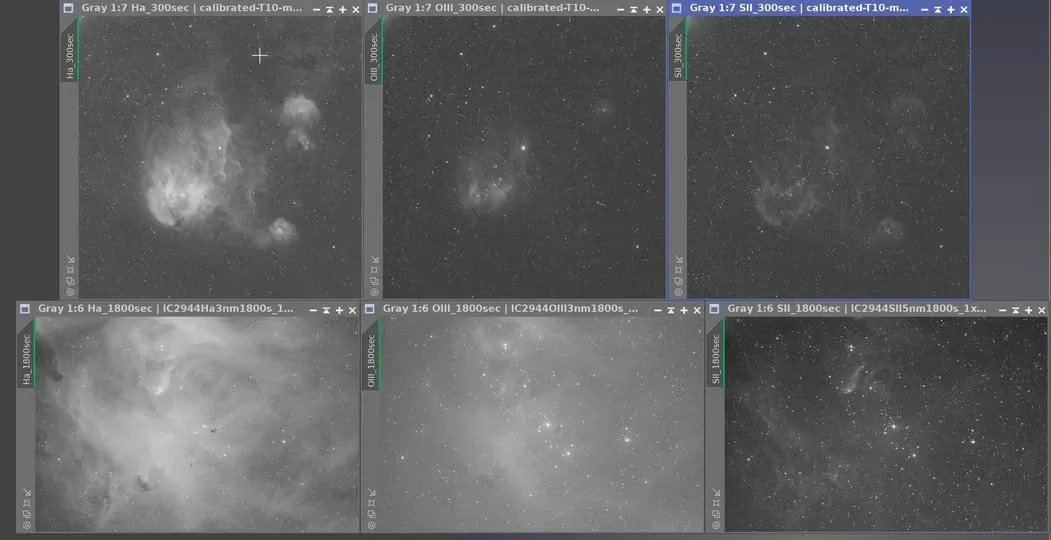
By the same logic, if you want to compare signal strength across several images in the linear state, remember to use Alt to copy the same STF settings onto all the images you’re comparing. If you press Ctrl+A on each image separately, the degree of screen stretch will usually differ, and you won’t be able to compare the signal differences correctly. Take IC 2944 as an example: you can clearly see that the SII signal in some regions is very faint compared with Ha and OIII.
Hidden feature: the boosted STF
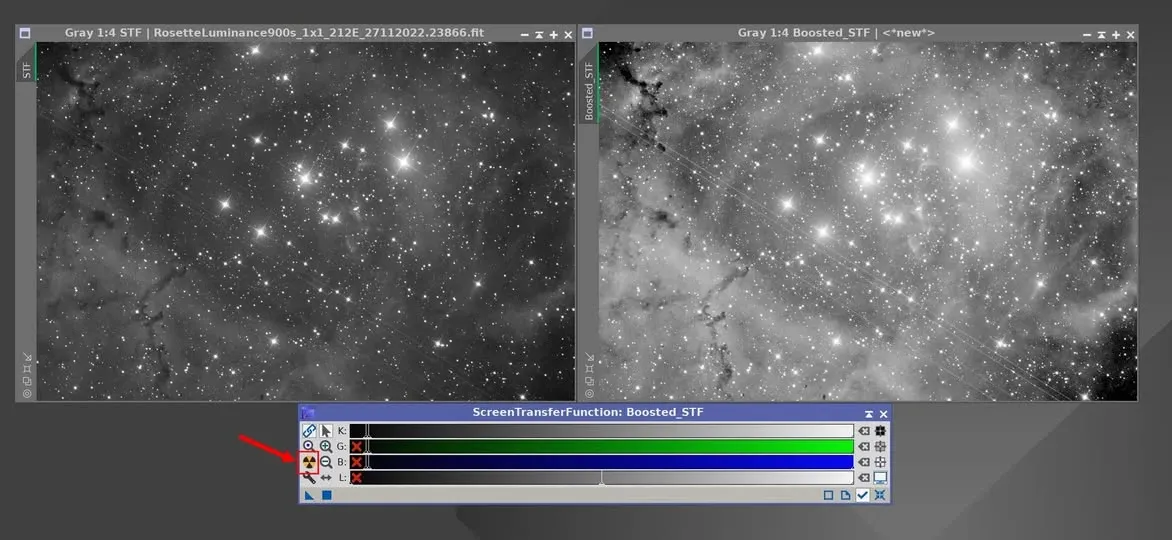
Finally, a little trick many people don’t know about. Besides simply pressing the nuke button, STF has a hidden usage: hold Shift while clicking the nuke button, and the image will show a boosted version of the STF screen stretch.
As shown, the left is the ordinary STF, and the right is the boosted result.