Running Multiple PixInsight Instances on Windows
When would you ever need to run more than one PixInsight at the same time? Two situations come to mind. The first is when PixInsight is tied up by some script or process and you temporarily can’t do anything with it. The second is when you’re running one (or several) CPUs with a huge core count—say, 64 cores or more—because a single PixInsight process simply can’t make full use of that many cores at once, so running multiple instances becomes very handy. This article covers two ways to run multiple PixInsight instances on Windows.
Method 1: Edit the shortcut’s parameters
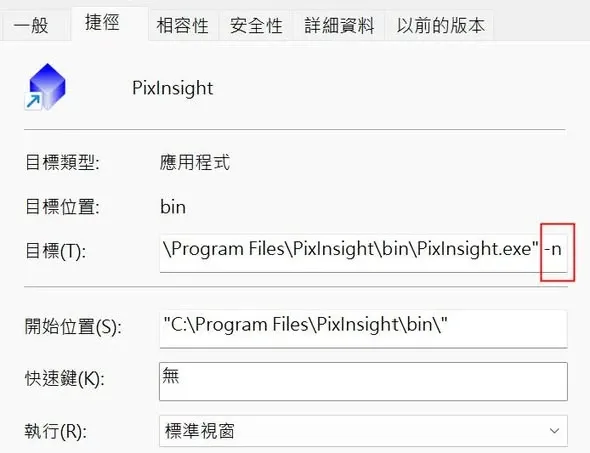
Right-click the PixInsight shortcut, open Properties, and in the “Target” field add a space followed by -n after the "...", then click OK. Now click that shortcut: the first click opens the PixInsight you normally use, and clicking it again opens a second PixInsight.
Method 2: Issue a command from the Process Console
If the first PixInsight window isn’t tied up, you can also bring up the Process Console inside PixInsight and type !!Pixinsight -n, which likewise opens a second PixInsight.
How to tell the two instances apart
So how do you tell the two processes apart? The second PixInsight you open shows PixInsight (2) in its window title, so you can distinguish them at a glance.