Making and Applying Masks in PixInsight
In astro image post-processing, what takes the most time is often not applying some process, but making the mask that the process requires. How well the mask is made directly determines the result. This article gathers the concepts, common tools, and a few useful scripts for making and applying masks in PixInsight.
Why Masks Matter So Much
The truth is that in astro image processing, apart from the workflow steps and parameters, the most crucial thing is the masks used in those steps. That is why the most time-consuming part of processing is frequently making the masks themselves.
It is worth noting that making masks does not require a very fast computer; it tests the human brain. I personally spend far more time making masks than the computer spends processing the files, but it is an investment well worth it—once the mask is right, the processing usually finishes in a snap; it is tuning the mask itself that eats up most of the effort.
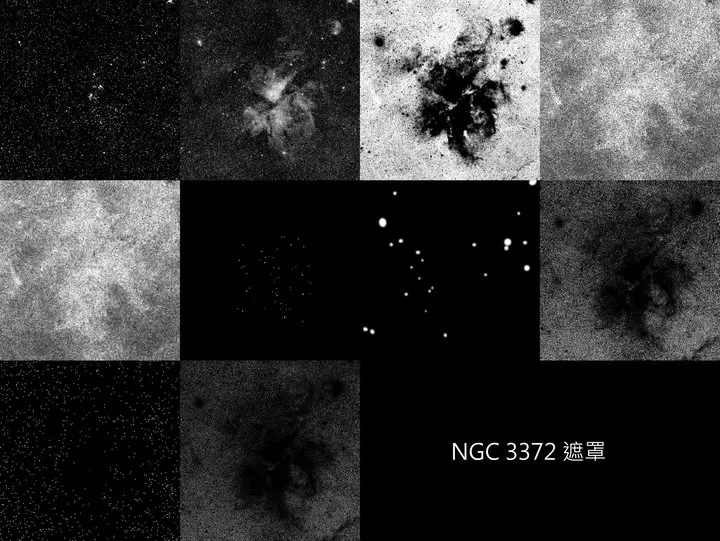
So, where do you need masks? Deconvolution, linear/nonlinear stretch, noise reduction, defect removal, patching out artifacts, star reduction—these are just a few of the common ones; in fact many more processes need masks. If you want to advance in astro image post-processing, learn to make masks well, so that you can target a specific part of the image for a specific purpose without affecting the parts you would rather leave alone.
Star Masks: A List of Common Tools
The star mask is the most common kind, and also the one that demands the most effort. The principle for making star masks is roughly the same across the board, but truly mastering the essentials still takes time to accumulate. The commonly used tools fall into two categories:
- Primary tools: StarMask, MLT (MultiscaleLinearTransform), MaskGen, StarNet++.
- Supporting tools: Morphological Transformation, Binarize, Convolution, PixelMath, Histogram Transformation.
Nebula Masks: Procedural, No Manual Painting Required
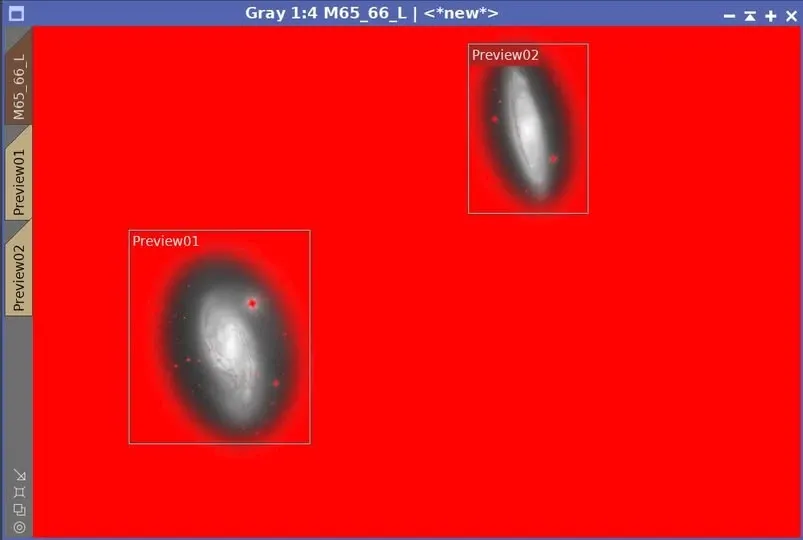
A typical need is to enhance the gas of a galaxy or nebula without affecting the stars. The way to do it is to make a suitable mask. Through PixInsight’s dedicated processes—such as GAME, MLT, Dilation, and Convolution paired with PixelMath—this is easily done, and requires no manual painting whatsoever.
Luminance Masks: Selecting Only the Structures You Want
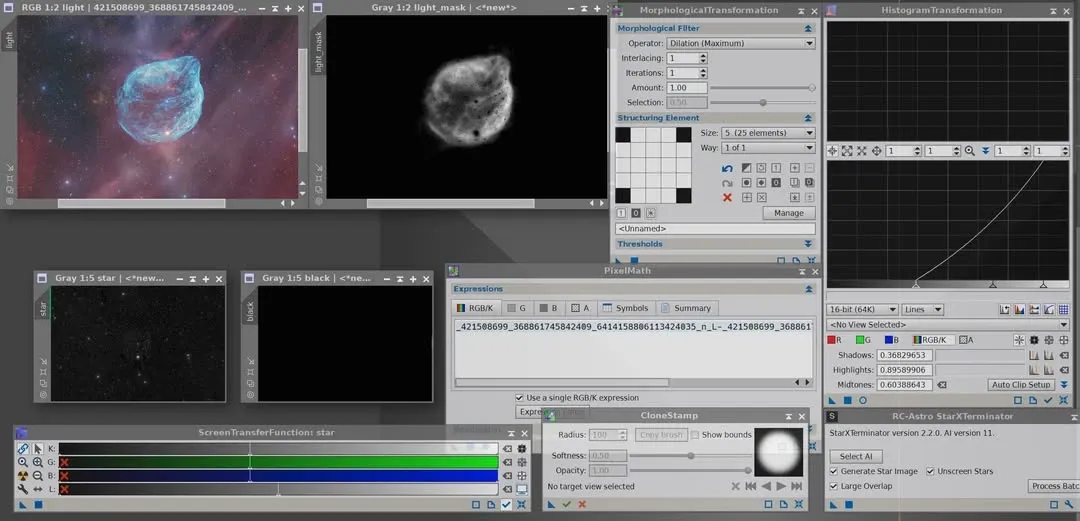
Going a step further, you can make a more refined luminance mask that selects only specific structures in the image. Take SH2-308 as an example: using PixInsight alone, I once spent about 5 to 7 minutes making a mask that selects only the dolphin’s head proper, with its stars subtracted out.
The helper images used along the way mainly include an all-black image obtained via PixelMath, and a plain star luminance channel (obtained by extracting the stars and then pulling out the luminance channel). Once this mask is applied to the original image, only the dolphin’s head (excluding its stars) is affected during adjustment.
When You Need to Edit a Mask by Hand: Brush-Type Tools
Most masks can be completed procedurally, but occasionally you still need to fine-tune by hand. On this front PI’s brush-type tools have gone through a stretch of development:
- Dynamic Paint Brush: developed by RBA (author of Mastering PixInsight), it is similar to Photoshop’s brush and lets you quickly edit a mask by hand. However, it seems to only paint white; if it could paint black, its applications would be broader—to paint black, you can pair it with the Clone Stamp.
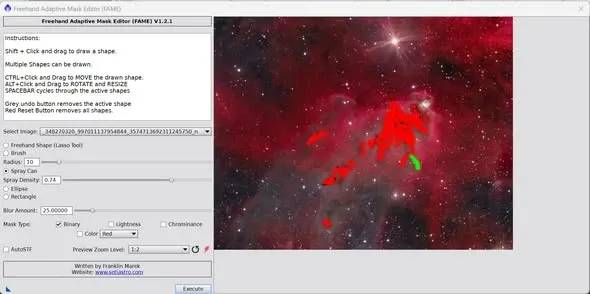
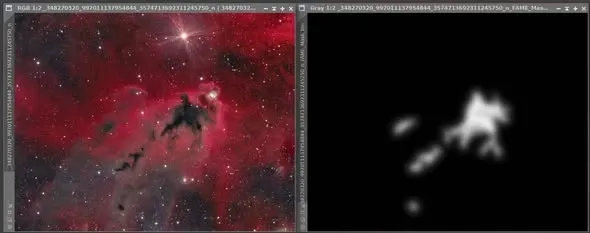
- FAME script: from version 1.2 onward, in addition to the original elliptical, rectangular, and lasso selections, it added a brush function. So now, instead of relying on the Clone Stamp, you can paint the mask you want directly in PI with a brush, which is quite handy. You can add FAME in PI’s Repository via
https://raw.githubusercontent.com/setiastro/pixinsight-updates/main/; after the automatic update it will appear under the SetiAstro tab in the scripts.
The three short clips below demonstrate the Dynamic Paint Brush in actual use: