PixInsight × Photoshop Hybrid Workflow
I originally learned PixInsight solely to process astrophotos. But all along the way, I kept feeling that something was missing without Photoshop in the mix, and my image processing never felt quite complete. This article gathers my takeaways from going from “PixInsight only” to “practicing both PixInsight and Photoshop,” and how the two pieces of software make up for each other’s shortcomings.
The Principles Are Shared, the Operations Differ
Photoshop and PixInsight don’t work the same way, but the underlying principles are actually shared. Because of that, the same post-processing technique can, in some cases, be carried out by different means, using either Photoshop or PixInsight. That’s exactly why I later decided to learn Photoshop: to fill in the part I’d never picked up in PixInsight.
Layer Blending: Two Roads to the Same Destination
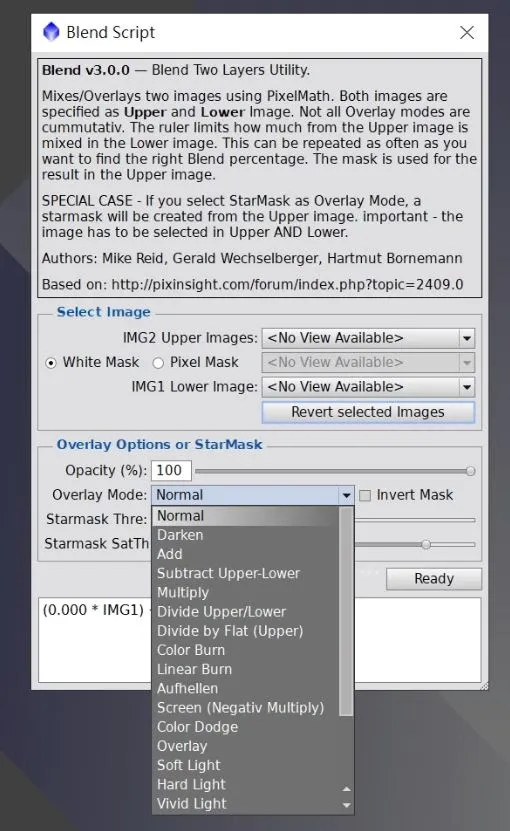
PixInsight has no layer feature, but in reality every individual image in it can serve as a layer. So how do you achieve Photoshop’s most powerful capability, layer blending, inside PixInsight?
- The Blend script: the blending modes in its menu are almost identical to Photoshop’s, plus it adds a few modes designed specifically for astro images, and it can auto screen-stretch as well.
- PixelMath: it can do layer blending too, you just have to write the formula yourself.
The Crucial Difference in Mask Logic
The behavioral logic of the two programs when it comes to “masks” is where beginners get confused most easily, and it’s worth spelling out clearly:
- Photoshop: where the upper layer is hidden by a mask, the lower layer fills in.
- PixInsight: the area hidden by a mask is left unchanged.
In other words, Photoshop merges two layers with a mask to produce an effect. Both layers contain something you want, and by masking off the unwanted region of the upper layer, you merge it with the wanted region of the lower layer into a single image. PixInsight, by contrast, applies the effect directly onto a single image, and protects the areas you don’t want to affect with a mask.
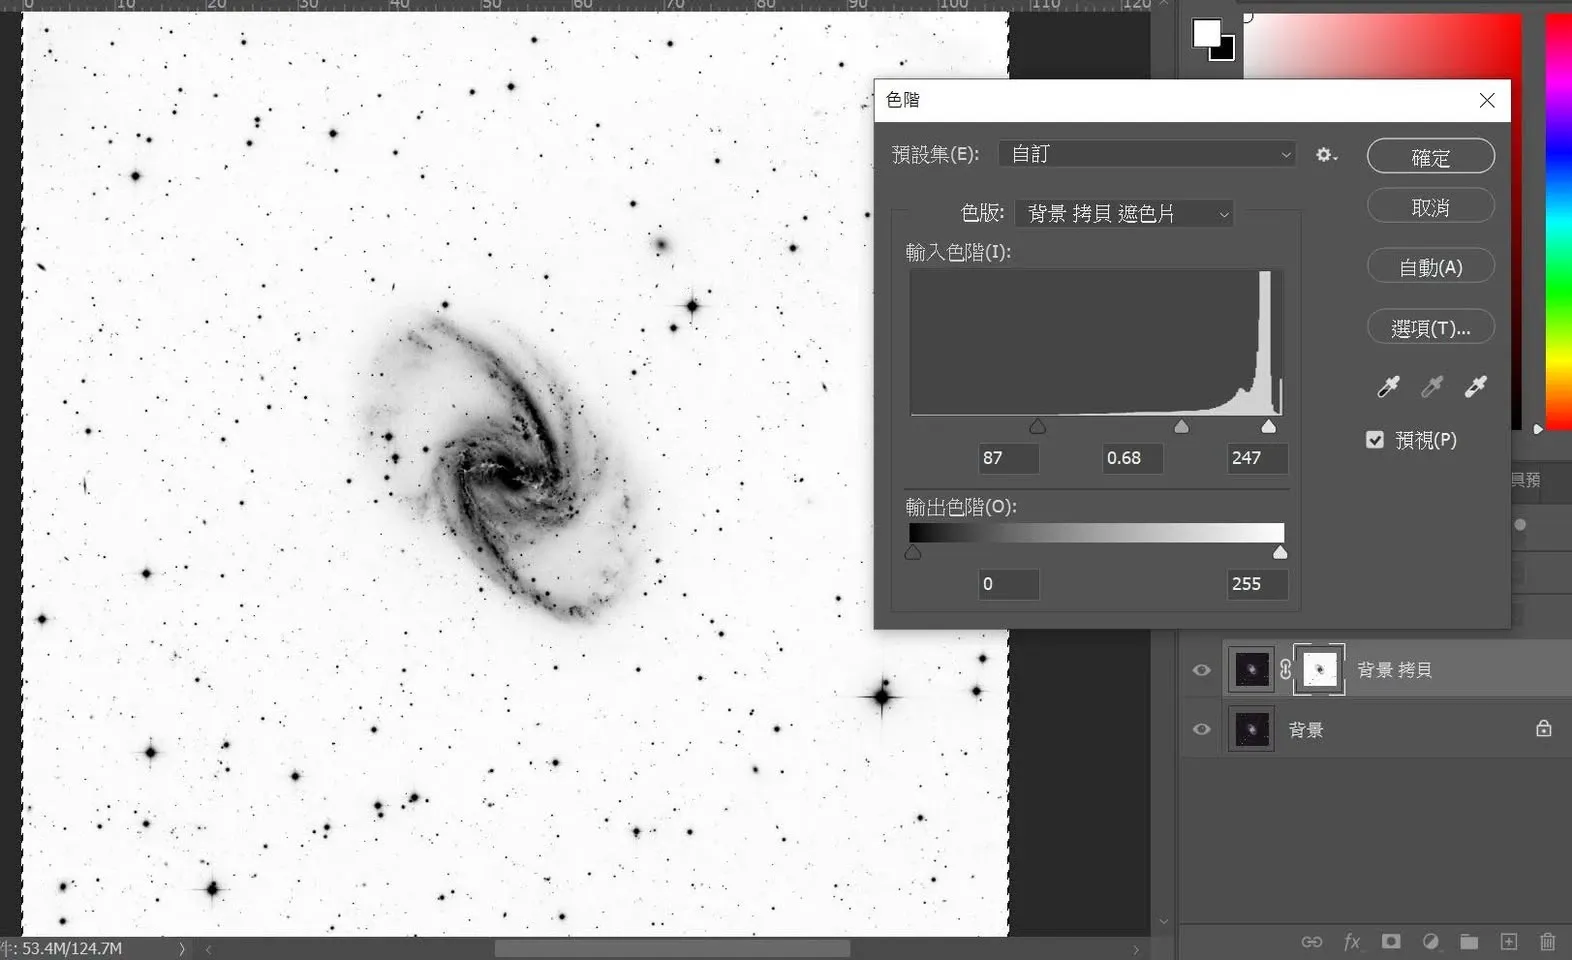
Because of this principle, I personally find Photoshop less intuitive when it comes to masks, since you also have to keep the relationship between the layers in mind, though of course that’s a different story for people who are already used to Photoshop.
Fixing Small Flaws: The Two Tools Working Together in Practice
The two programs are especially efficient at handling small flaws when used together. Take the common trace of an internal-reflection halo as an example. Here’s how I handle it in Photoshop (in the nonlinear state):
- Remove the stars and produce a star image.
- On the starless image, make a selection with a selection tool and fill the background with Content-Aware Fill.
- On the star image, use the Healing Brush to remove the residue.
- Merge the two images back together with the Screen blending mode.
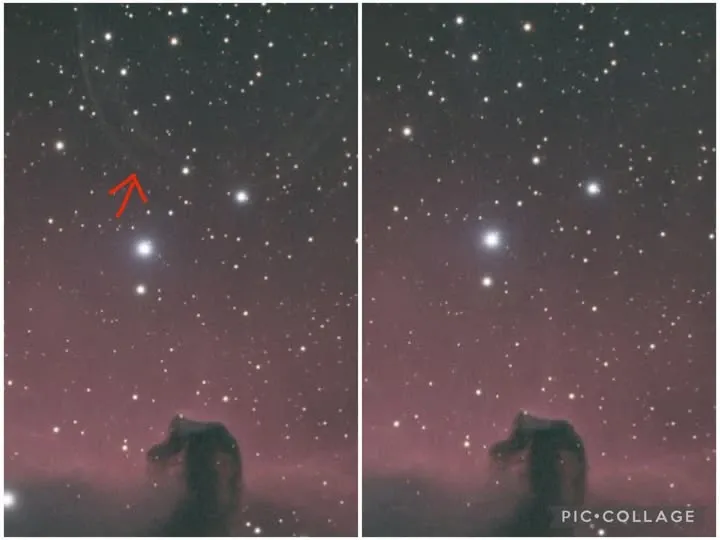
The whole process takes less than eight minutes from start to finish. This kind of small flaw needs no cropping of the image; you can wipe it out easily with Photoshop’s Content-Aware Fill paired with layer blending.
Why It’s “PI in the First Half, PS in the Second”
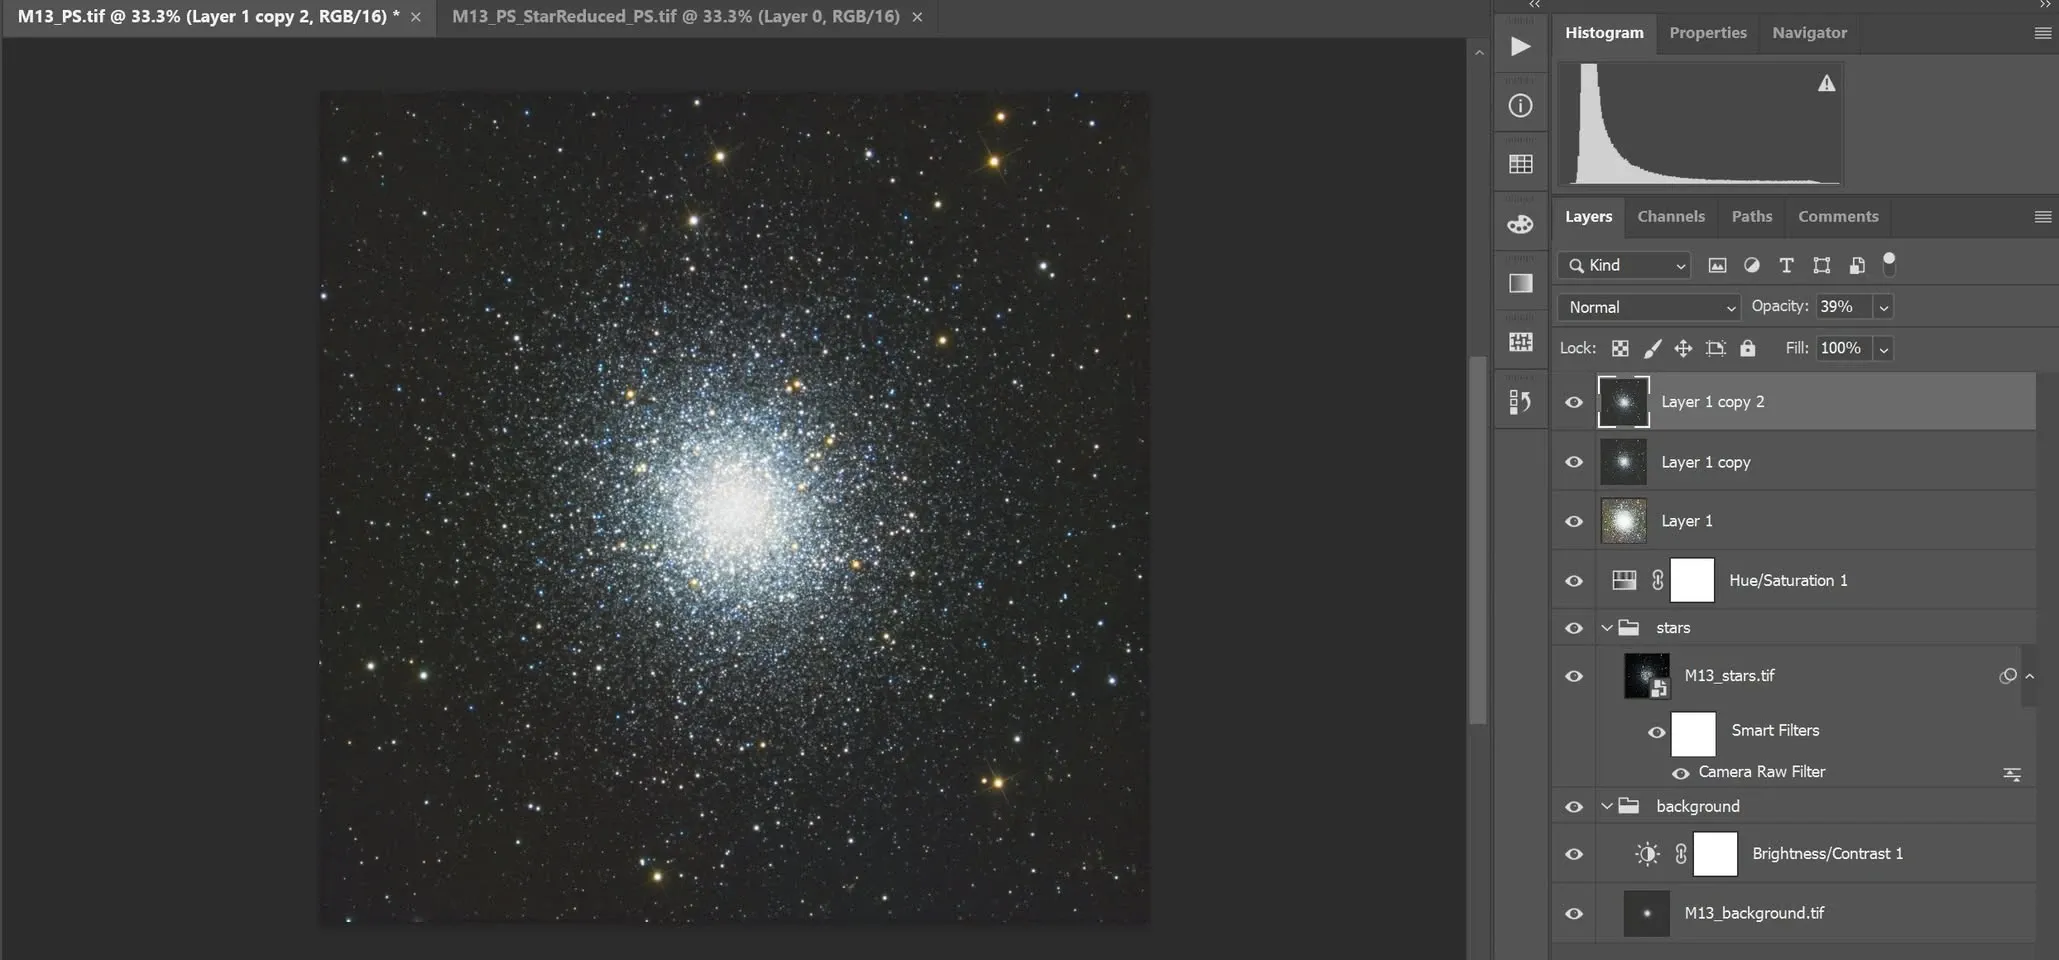
In January 2024, I finally brought Photoshop formally into my workflow, as the software for final adjustments and output. The first image I did seriously in Photoshop was NGC 2170, the Angel Nebula, with PixInsight and Photoshop each taking up about half the processing time. In that image, BXT (BlurXTerminator) mainly just served to reduce the stars; the detail in this kind of image usually can’t be enhanced further by it. What really ate up the time was the detail enhancement and color work in Photoshop, which is what finally brought both the background molecular clouds and the Angel Nebula together into the frame.
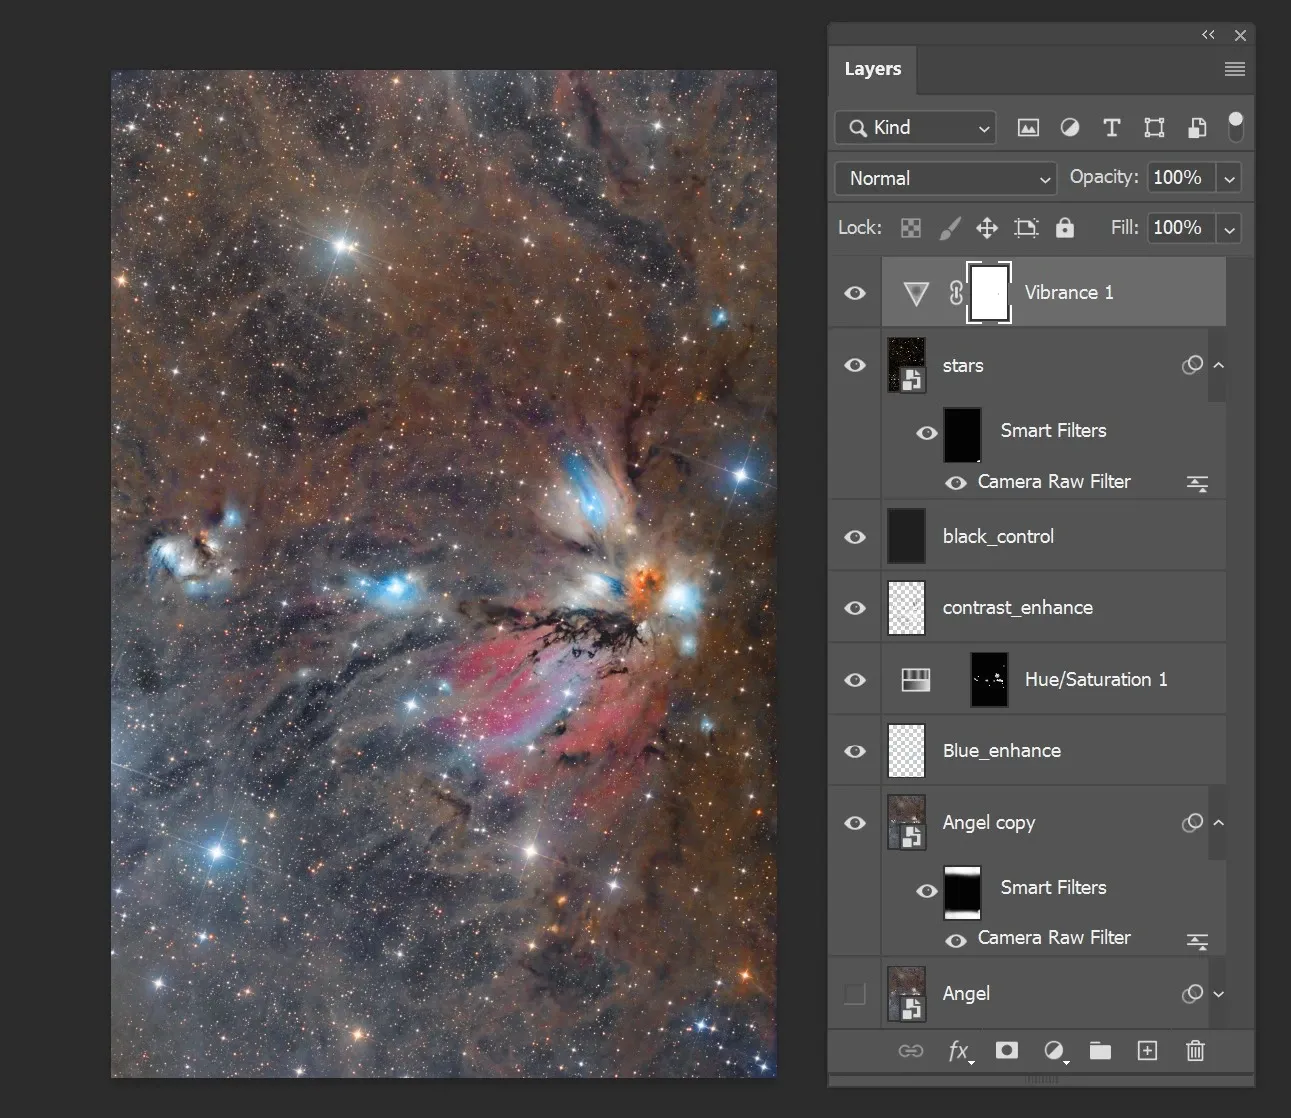
My current workflow can be summed up simply as “PixInsight in the first half, Photoshop in the second”:
- PixInsight (first half): handles the early-stage processing. The more complex masks are all built in PixInsight and then exported for Photoshop to use; AI tasks like star removal are all handled in PixInsight before being loaded into Photoshop.
- Photoshop (second half): holds a strong advantage in live preview of layer blending, non-destructive editing, and color adjustment.
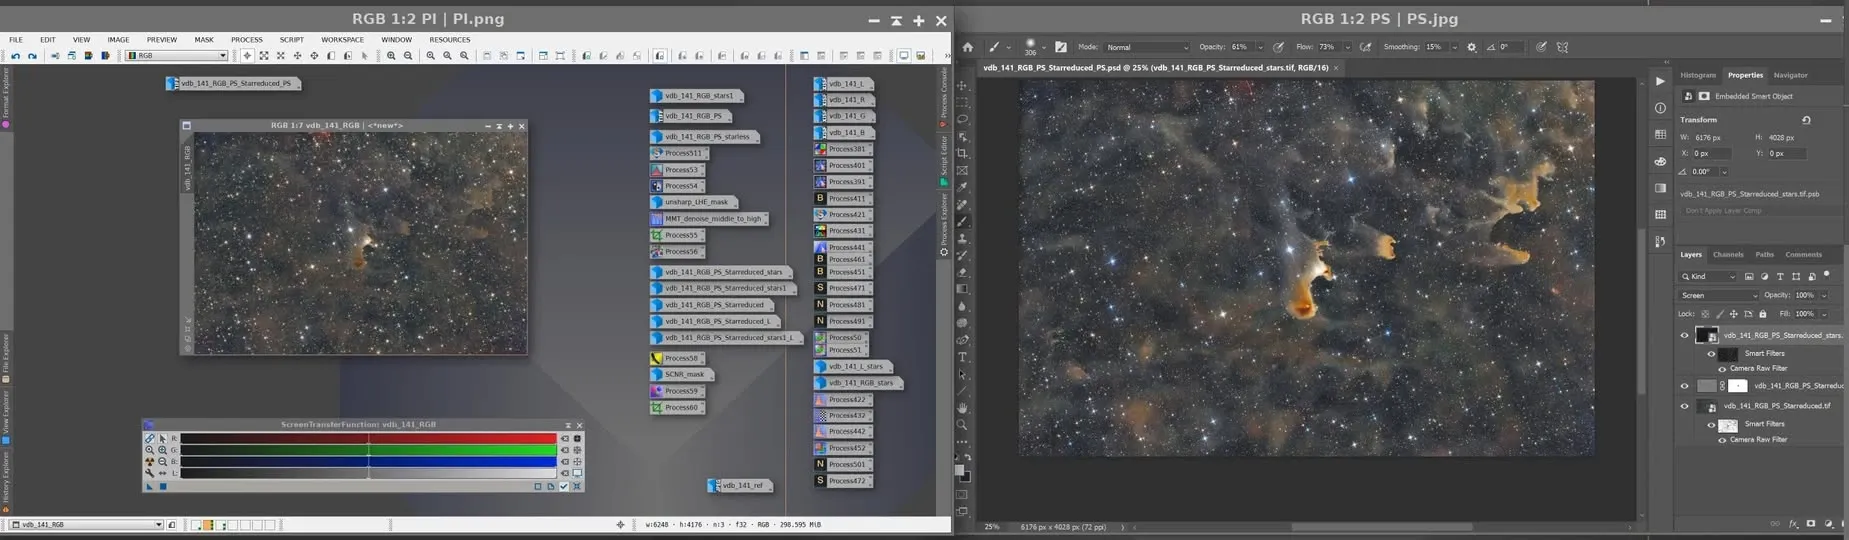
The biggest benefit of practicing both is that they make up for each other’s shortcomings. The one thing to watch out for is this: when PixInsight exports a file for Photoshop, be sure to save it as a 16-bit TIF, because Photoshop runs into trouble opening 32-bit files.
Do You Still Need PixInsight, Then?
Adjusting colors and fixing flaws in Photoshop really is much faster than in PixInsight; “what you adjust is what you get” is quick and convenient with layer blending. But does that mean PixInsight is no longer needed? My answer is no. The reason Photoshop can be so smooth in the later stage is actually thanks to PixInsight’s early-stage work; it’s precisely the solid groundwork that lets the later Photoshop stage shine more easily. The two are complementary, not substitutes.